Jupiter is a spectacular planet to image because it’s big, bright and full of dynamic detail, and in this guide we'll reveal how to photograph Jupiter and take advantage of its majesty.
Earth’s turbulent atmosphere does get in the way though, and this can present problems.
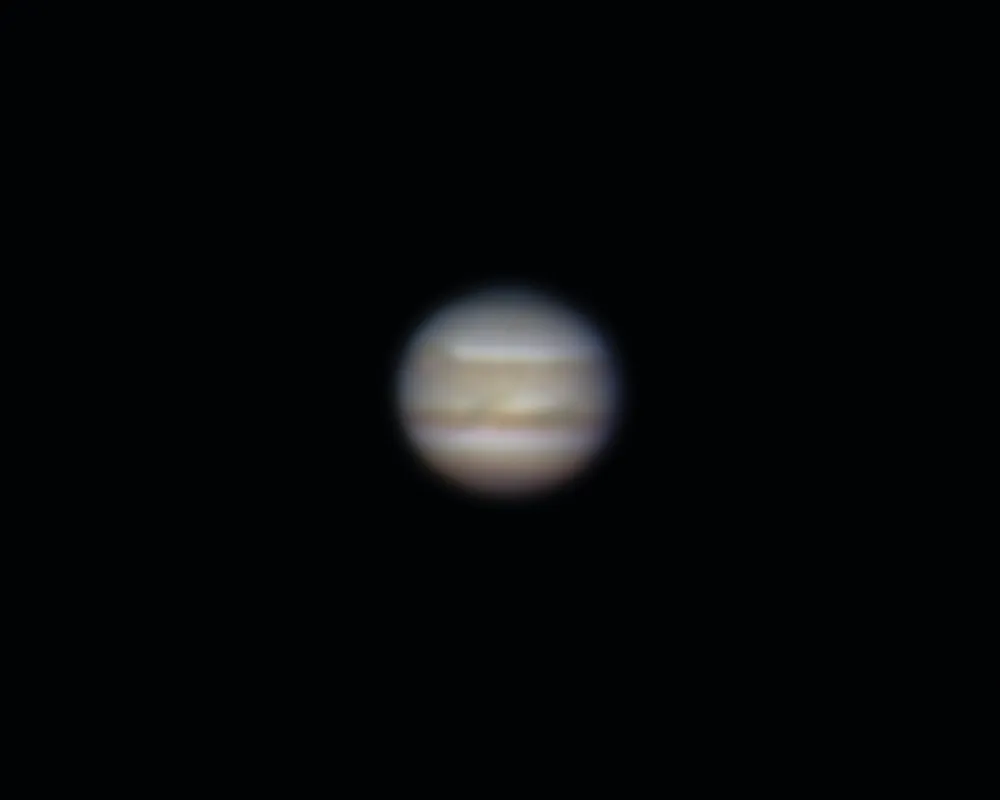
When you observe Jupiter through a telescope, you'll see the shimmers and distortions caused by the atmopshere.
This makes fine detail difficult to discern.
For visual observing, read our guide on how to observe Jupiter through a telescope
These ‘seeing’ effects can vary dramatically from one night to the next, but it's worth remembering that the best views of any of the main planets and the Moon are to be had when they are at their highest point in the sky when due south.
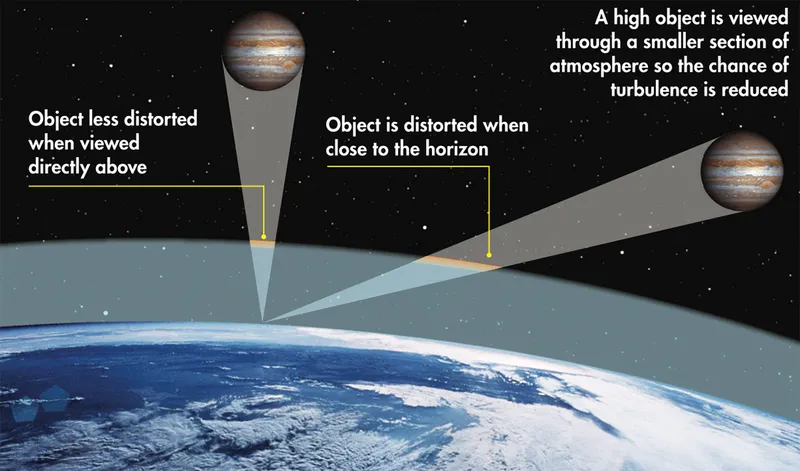
Think of Earth’s atmosphere as a shell surrounding our planet. Directly above you, you’re looking through the shell at its normal thickness.
Look close to the horizon and the apparent thickness is increased – at this point, an astronomical object’s light is reduced and it appears redder, because the blue wavelengths of its light are scattered.
Seeing-related turbulence also increases.
Photograph Jupiter through a small telescope
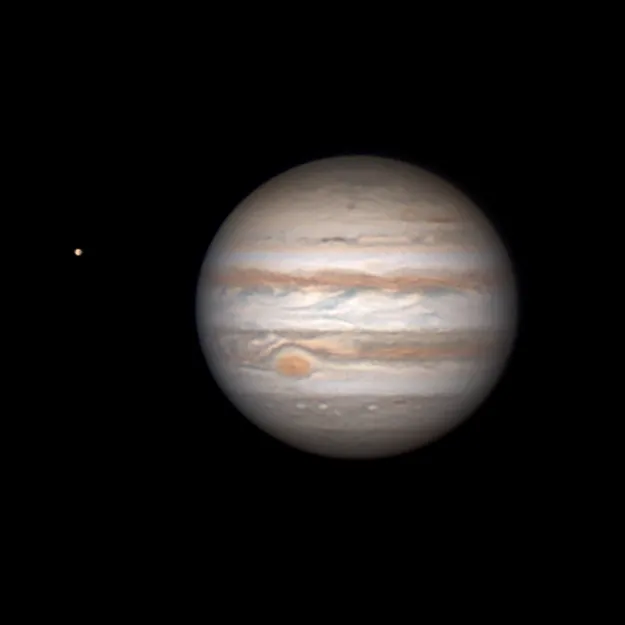
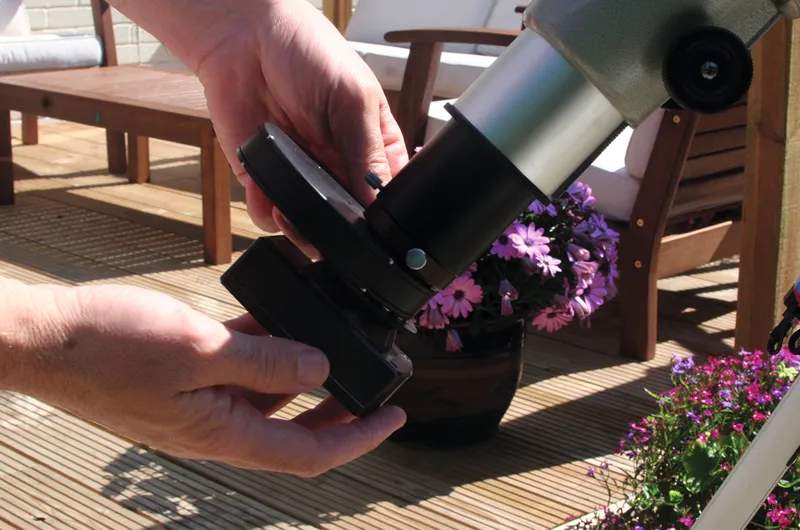
A small telescope can reveal good detail on Jupiter’s large disc, and one of the easiest ways to capture this on camera is to centre the planet in a telescope, accurately focus and point the camera down the eyepiece.
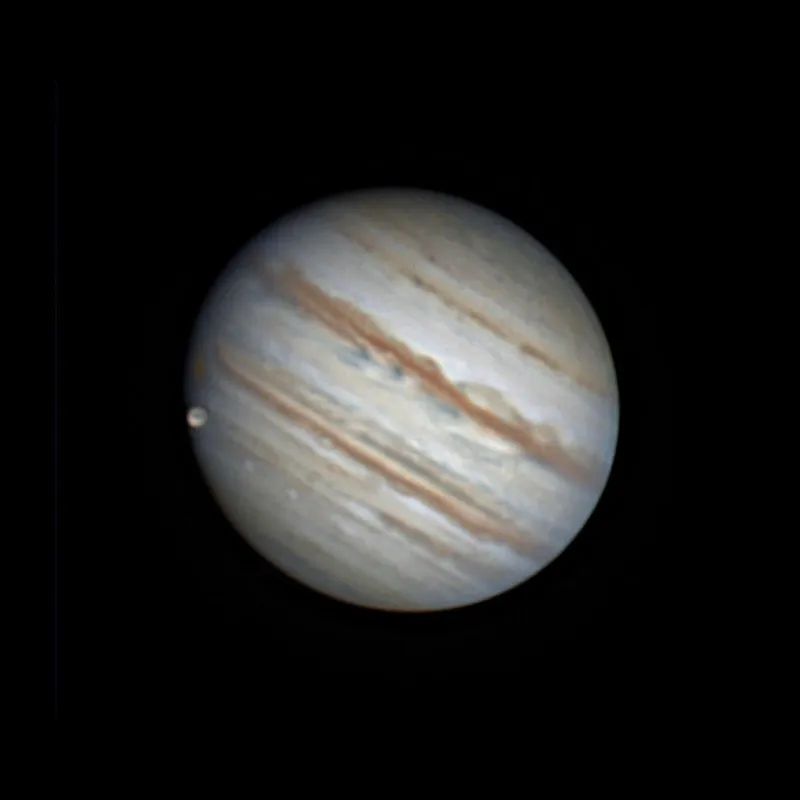
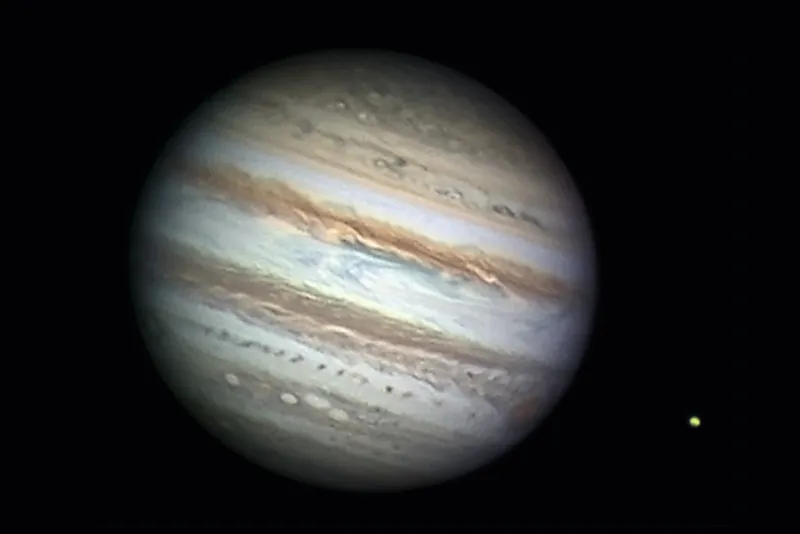
This technique, known as afocal imaging, can capture Jupiter’s disc, its four bright Galilean moons and even detail in Jupiter’s atmosphere.
This detail typically includes the two main belts, and the Great Red Spot if it happens to be on the Earth-facing side of the planet.
An afocal shot is great for taking a snapshot of Jupiter, but the technique does have limitations.
A smartphone, point-and-shoot or DSLR camera can only capture Jupiter as the atmosphere delivers it.
You could get lucky and snap the planet in a rare moment of good seeing, but typically the result is an image that appears blurred and indistinct.
What’s more, pressing the shutter button at the exact moment to capture good seeing is something that, even if you do manage it once, is hard to repeat.
For more on this technique, jump straight to our guide on how to photograph Jupiter with afocal imaging.
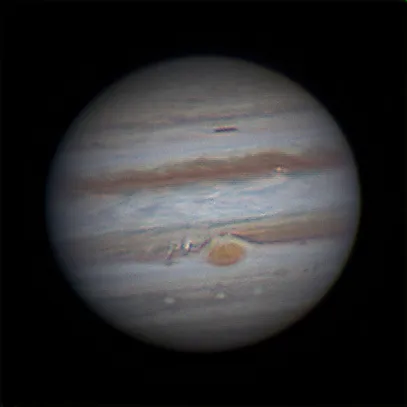
Photograph Jupiter via the stacking method
An alternative method of photographing Jupiter is to take lots of still shots in rapid succession – the faster the better.
This increases the probability that you’ll catch some of the good seeing on offer.
The faster the frame rate, the more good quality stills of Jupiter you’ll catch.
High frame rate planetary cameras have the sensitive, low-noise chip to take the short enough exposures for frame rates of 30, 60 or 120-plus frames per second.
Even so, noise is still likely to be an issue for single frames.
The solution to this is to pull out the good frames and combine them.
These can then be aligned (‘registered’) to one another and averaged (‘stacked’) together using free software such as RegiStax.
For more on this, jump to our guide on how to process your photograph of Jupiter using RegiStax.
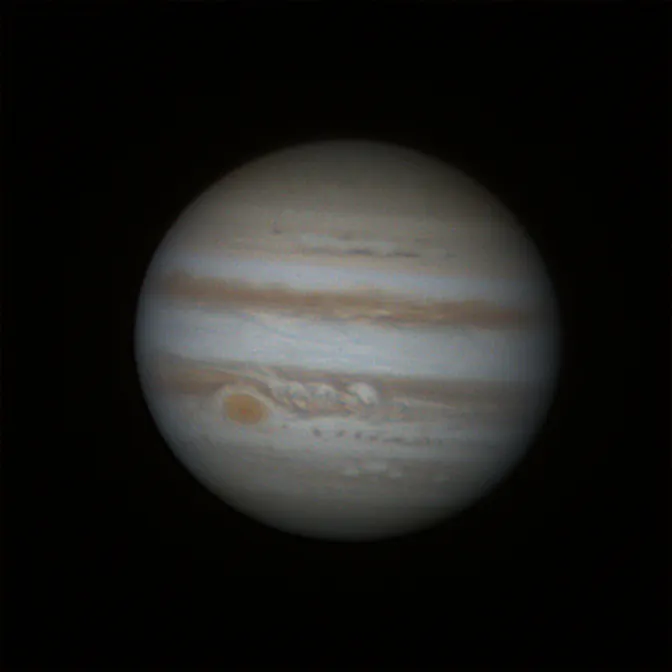
The stacking stage reduces the effects of random noise and improves the quality of the final picture of Jupiter.
Any telescope with a suitable 1.25-inch fitting can use a high frame rate planetary camera.
A driven equatorial mount makes life much easier, although computerised altaz mounts can also be used.
Increase your magnification

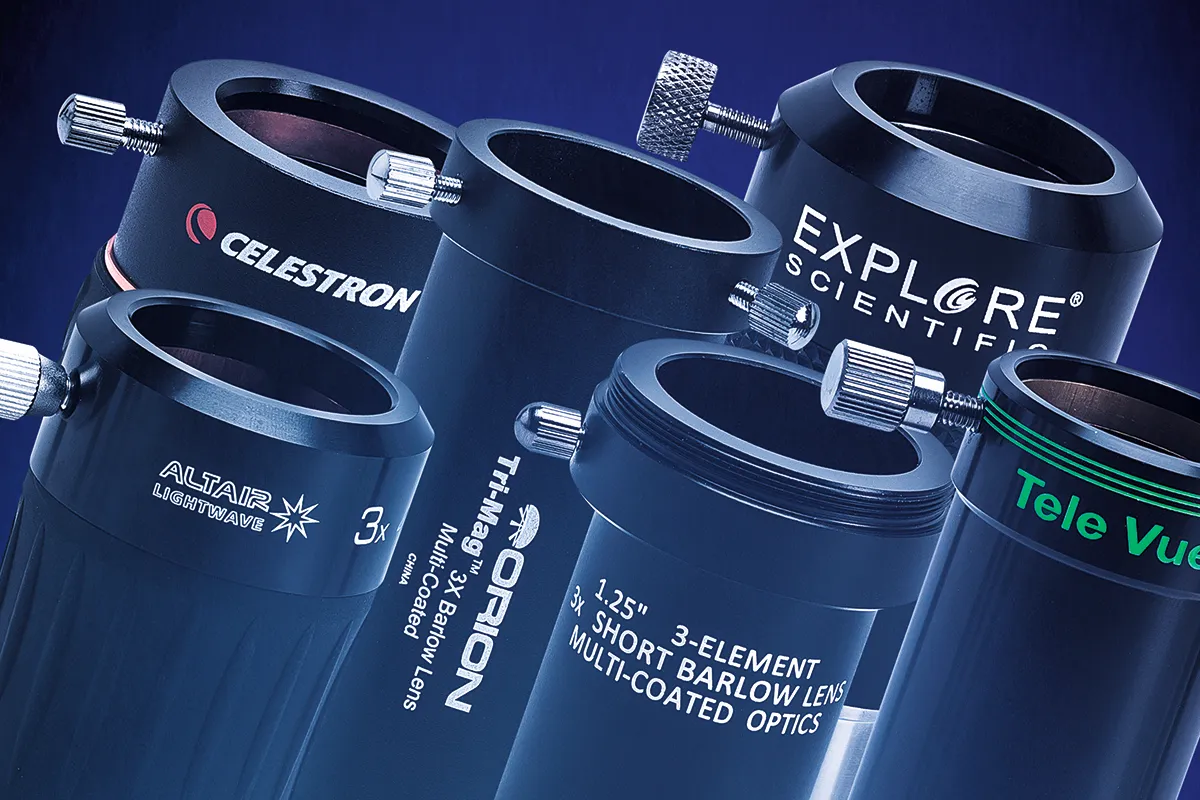
Larger image scales, when Jupiter takes up more of the picture, can be achieved by using optical amplifiers such as Barlow lenses or Powermate lenses.
Inserted between the camera and the telescope, these effectively increase the telescope’s focal length as seen by the camera.
The longer the effective focal length, the larger Jupiter will appear on the camera’s chip.
But don’t overdo it: as a rule of thumb keep your telescope’s focal ratio – that’s its focal length divided by aperture size using the same units – to between f/15 and f/40.
Only approach the higher values if the seeing is excellent.
For example, a 4-inch telescope with a 1,000mm focal length has a focal ratio of f/10 (1,000 divided 100).
A 2.5x Powermate lens multiplies this f/number directly and delivers a focal ratio of f/25.
Increasing the effective focal length causes the image of Jupiter that’s delivered to appear dimmer.
Large telescopes with naturally long focal lengths are able to maintain image brightness with decent image scales.
Larger apertures also benefit from higher resolving power, meaning they can reveal smaller detail than a small aperture instrument.
How to photograph Jupiter with a one-shot-colour camera
One-shot-colour cameras can record full-colour still sequences of Jupiter in one go, but there are a number of limitations.
For Jupiter, capture times should be kept below 120 seconds to avoid motion blur due to the planet’s rapid rotation.
Then there’s an atmospheric effect called dispersion, which spreads the light of a distant object out into a spectrum in a similar way to a prism.
Find out more about this in our guide on how to use an atmospheric dispersion filter.
The effect gets worse the lower in the sky you go.
Also, some telescope designs cannot bring all colours to the same focus at the same time, resulting in colour fringing.
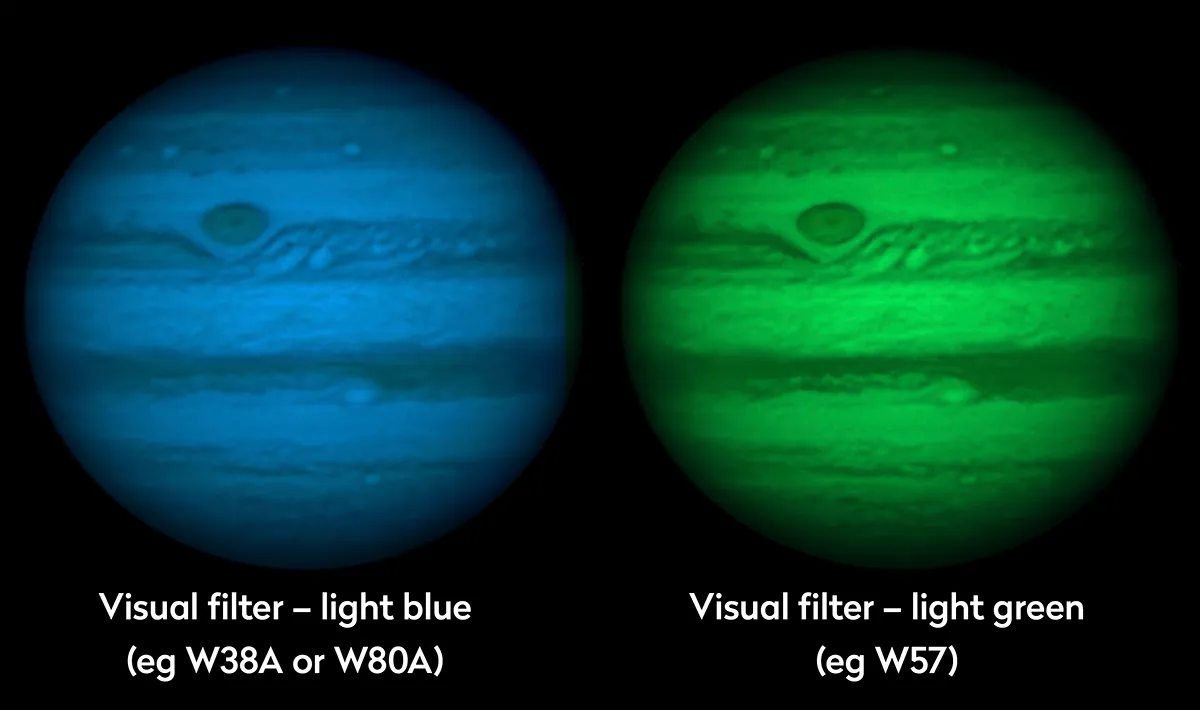
Using filters to photograph Jupiter
Using a monochrome camera and a set of imaging filters avoids the issues caused by Earth's atmosphere when photographing Jupiter/
The advantage here is a set of crisp individual red, green and blue images.
These are then combined to create a sharp, full-colour result.
The disadvantage is that filtered captures take longer to complete, so planet rotation becomes more of a problem.
One technique is available to undo the rotation of a fast rotating planet such as Jupiter.
The freeware program WinJUPOS can do this, and using this method it’s now possible to increase your imaging time to many minutes or even tens of minutes.
Quick guide to key techniques
Photograph Jupiter with afocal imaging
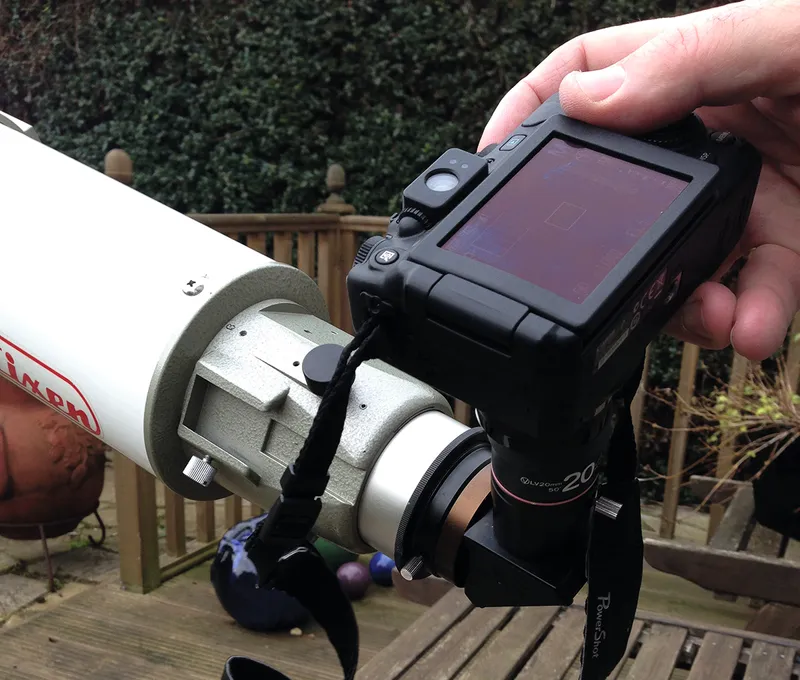
Afocal imaging is quick and simple to do.
All you need to capture your image is a telescope set up to deliver a sharp image when viewed through the eyepiece.
If you wear glasses, keep them on when achieving focus.
A driven equatorial mount is highly recommended to make life easy, but even without one, with a bit of careful timing you can still achieve a result.
Cameras that allow you to set ISO sensitivity and exposure time give you better control.
Try setting a mid-to-high ISO to start with.
If you have the option, set the lens to use a low f/number to let in more light and finally set the exposure time to 0.5 seconds.
The actual time needed will depend on your setup, so review the image and if too bright, lower the exposure time; if too dark, increase it or up the ISO.
You’ll need to hold the camera so that its front lens is quite close to the eyepiece lens – but don’t let them touch otherwise you may scratch one of the surfaces.
Try using a low-power eyepiece at first, and then increase the magnification as necessary.
A remote shutter release is recommended, but if you don’t have one use your camera’s delay timer to take the shot.
This means the picture will be taken a few seconds after you press the shutter button, removing any motion caused by applying pressure to the button.
Photograph Jupiter with a planetary camera
There are many different types of planetary camera available, but the basic differences come down to maximum frame rate and whether they take colour or mono images.
The mono option requires you to image through RGB filters and combine them using software to get a full-colour result.
A filter wheel will make life easier but increases the cost of your setup.
Choosing a camera without an in-built infrared blocker is recommended, as this would prevent useful infrared light from swamping what is a normally infrared-sensitive chip.
Some RGB imaging sets have ultraviolet and infrared-blockers built in by default.
Not having one permanently built in allows you to use speciality infrared pass filters, which only let through infrared wavelengths.
The capture process requires you to get the planet on the chip of the camera, accurately focus and set the sensitivity of the camera so that the image does not saturate.
Most camera control software shows the peak saturation level. Keep it around 80-90% and you should be fine.
The number of frames you need to capture depends on the image scale, but for a relatively small image 500 frames should be fine.
For larger images, anywhere up to several thousand frames per capture are recommended.
Because Jupiter rotates rapidly, there’s a time limit of around two minutes for a full colour-set capture, but this can be extended using WinJUPOS’s de-rotation techniques.
Process your photograph of Jupiter using RegiStax
Step 1
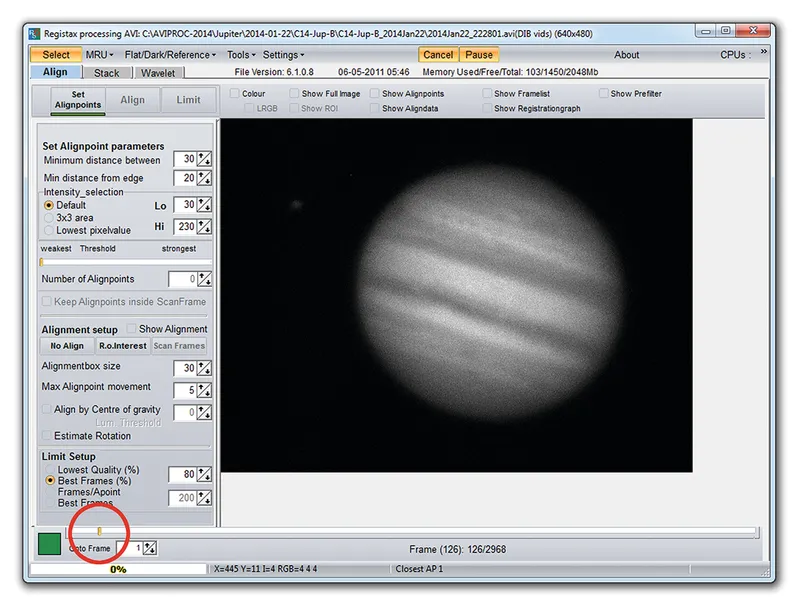
Click ‘Select’ and pick the movie file you want to process.
The movie will open and present you with the first frame.
Use the slider at the bottom of the window to step through the movie frames.
Stop at a frame that looks particularly sharp.
This will become the reference frame that RegiStax will compare all the others to, so take your time here and choose the best you can find.
Step 2
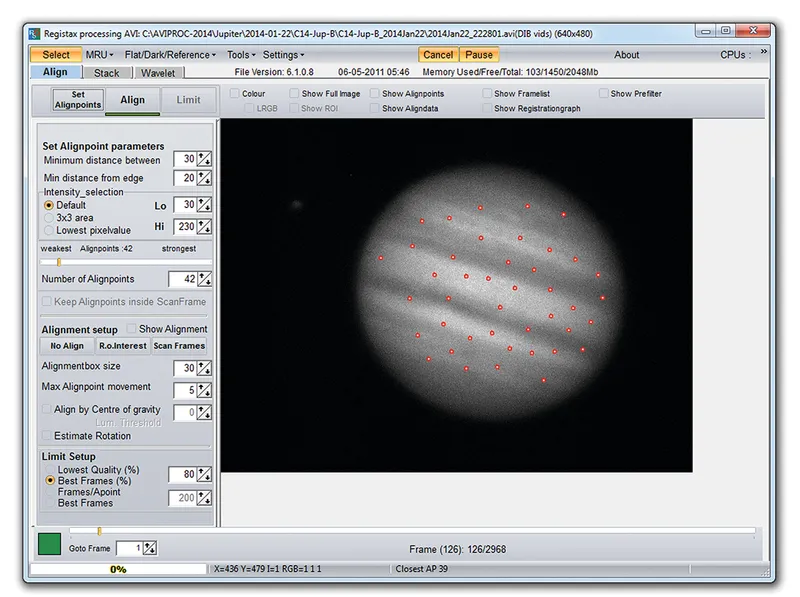
Click ‘Set Alignpoints’.
RegiStax will attempt to locate the highest-contrast features in the image and mark them as references points.
It will monitor how these features look in all the subsequent frames.
You can define your own alignment points by carrying out Step 1 and clicking on the features you think are the best reference points – in this case, don’t click on Set Alignpoints.
Step 3
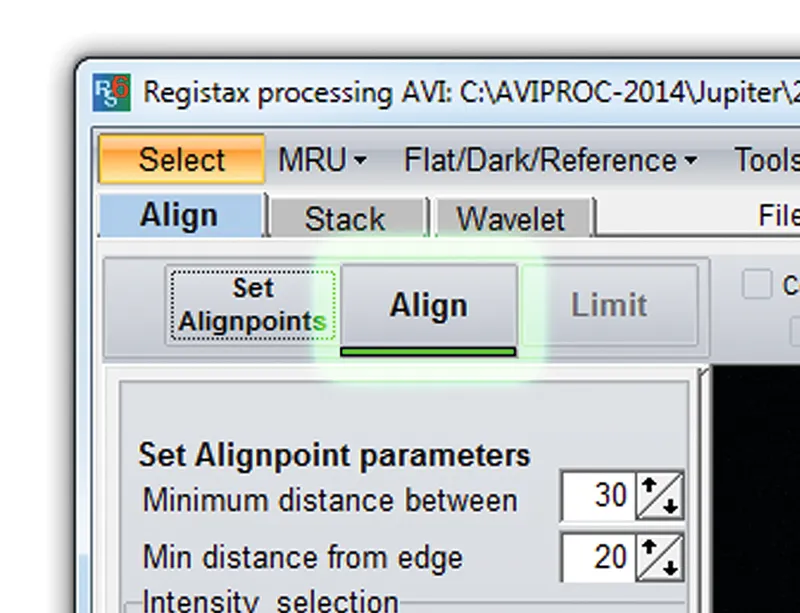
Click ‘Align’. RegiStax analyses all the frames in the movie, assessing their quality and how misaligned they are to the reference frame.
The result is the registration graph.
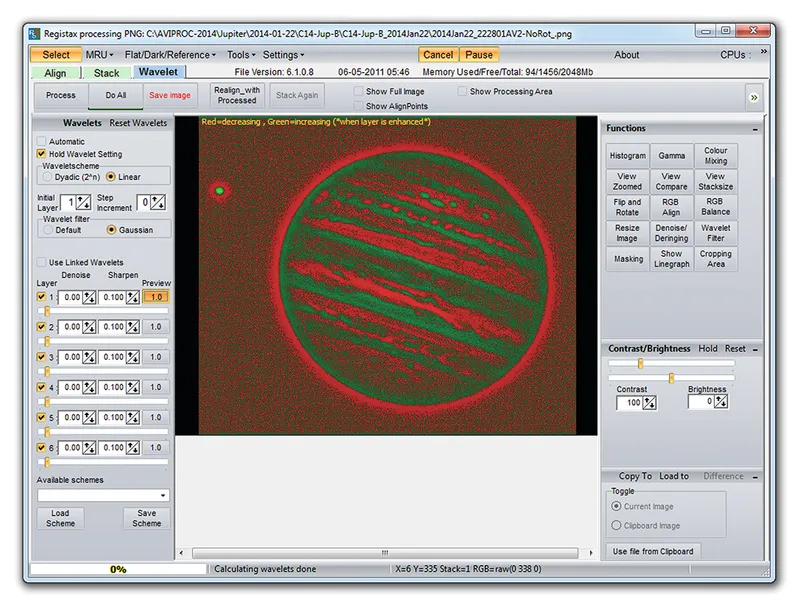
The red line in this graph indicates the RegiStax-assessed quality of the frames, while the green line shows how far off alignment they are.
The frames are internally sorted in quality order with the best on the left.
Step 4
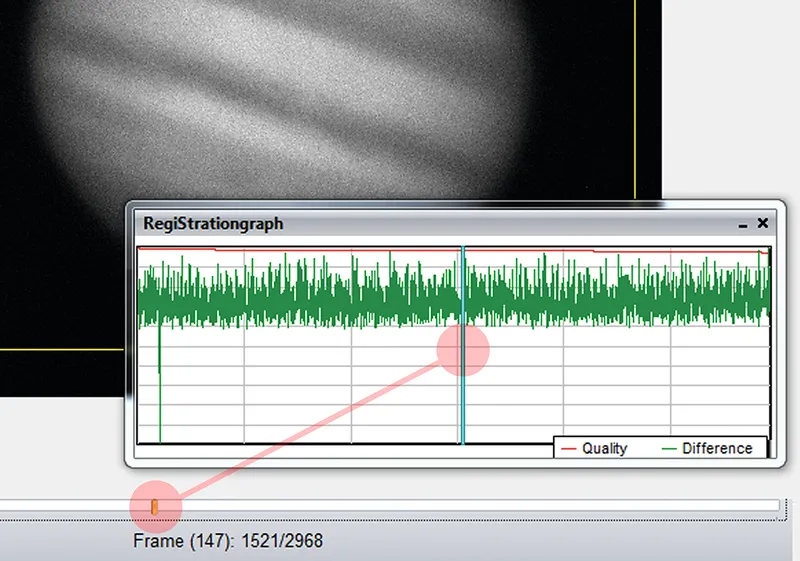
Use the frame slider at the bottom of the window to move the vertical bar in the graph.
The bar determines the quality threshold of the final process.
Basically, the bar should be moved to a point where the red quality line indicates the minimum quality threshold you’re happy to accept, typically 80-90%.
Any frames to the right of the bar will be rejected and not used in the final process.
Step 5
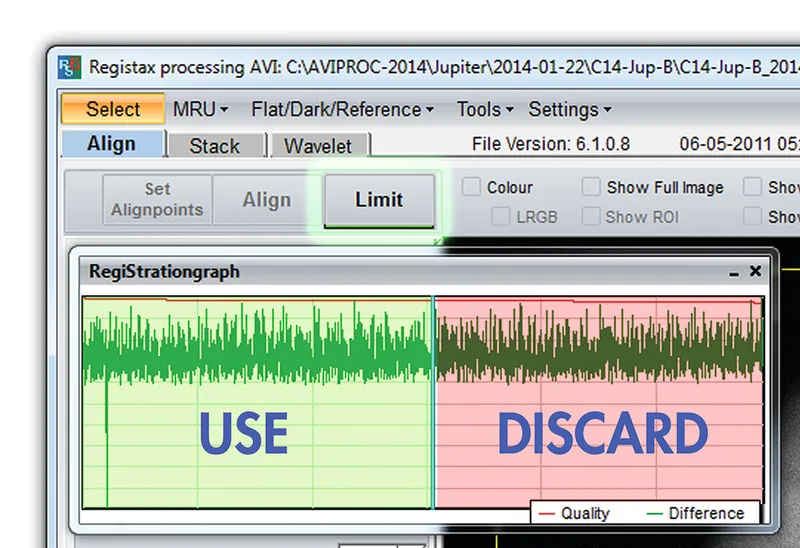
Clicking on ‘Limit’ confirms your threshold choice.
Once done, click ‘Stack’.
This instructs RegiStax to work through all the frames that made it through the quality threshold, aligning them to one another and then averaging the image content between frames.
The end result is normally a smooth, noise-free image.
Save the result using one of the lossless file formats, for example PNG or FITS.
Step 6
Repeat Steps 1-5 for all movie files.
Click ‘Select’ and open a result file from Step 5.
This will open in the wavelet sharpening screen.
Select the Gaussian option.
Moving the sliders to the right sharpens a certain level of detail in the image.
Click the preview button to see what is affected; a small tweak on the early sliders is normally enough.
Save to a new file name when done.
Have you captured a photograph of Jupiter? We'd love to see it, and it could end up being featured in the magazine or our website. Don't forget to send us your images.
This article originally appeared in the March 2014 issue of BBC Sky at Night Magazine.
