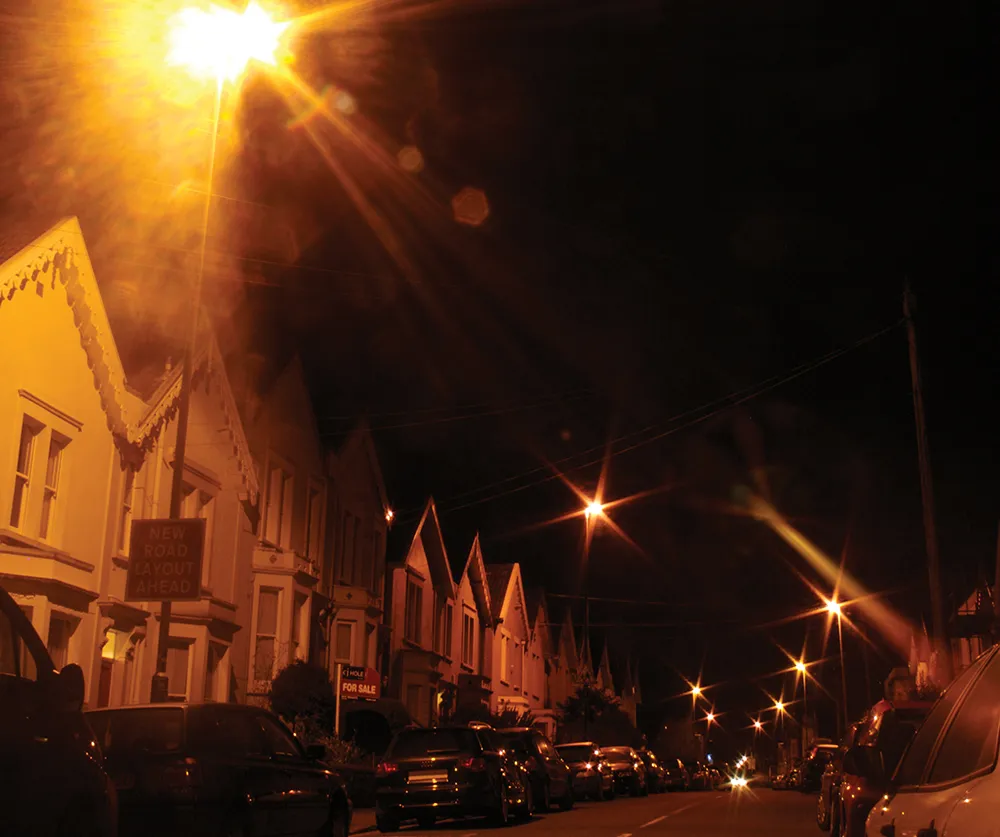
I spend much of my free time trying to image the night sky and capture a good astrophoto. There is just one problem: I live in London, one of the most light-polluted areas in the UK. This makes it hard to achieve one of the main requirements for a good astro image – a high signal to noise ratio.
While the best way to increase that ratio is to reduce the noise by imaging from a site with darker skies, there are ways to do this from the middle of a city. It is possible to capture a good image from under the urban lights.
When I started in astrophotography I used a DSLR and colour single shot CCD. The results weren’t what I expected.
The images lacked detail and were often filled with the orange glow of light pollution, despite my best attempts to reduce it.
For more advice, read our guides on how to remove the effects of twilight from your planetary astrophotos and how to remove light pollution from your astrophotos.
Even with exposures of four hours I wasn’t happy with the amount of detail that I was managing to capture and trying to remove the glow was a long process that still didn’t give me the results I wanted.
Things improved when I switched to using a monochrome CCD camera. This keeps the main advantage of a CCD, its sensitivity.
The more sensitive the camera, the shorter the exposure required to detect faint detail. CCD cameras have a greater dynamic range than DSLR cameras, meaning there is a larger range of luminosity it can detect.
For more on DSLR camera settings read our DSLR guide.
The CCD can more easily capture both faint and bright detail in a single exposure, rather than needing several images to bring out different details.
However, a mono CCD only detects the brightness of the light, not its colour. To bring out the colour of images you have to use filters.
In normal colour imaging, three filters are used to separate the primary colours of the visual spectrum.
Red, green, and blue (RGB) filters are designed to approximate the colour sensitivity of the human eye, so that the resulting image is true colour.
When using RGB filters to create a broadband image, all types of wavelengths are captured across the entire visible spectrum so this picks up a lot of light pollution from the surrounding city lights.
This is usually most visible as green and magenta gradients in the images. To reduce this I use a simple CLS CCD light pollution filter.
There are a few things to remember when using light pollution filters in general. First is that they are not 100% fool proof when it comes to light suppression.
These filters are helpful, but they have their drawbacks. All of them are designed to block out only particular wavelengths
of light and there’s one overriding factor to consider when deciding how effective they will be for you.
They’re designed to block the wavelengths emitted by low pressure sodium vapour lamps – the orange type. If the area you observe in is lit by newer LED lamps then light pollution filters will be useless.
They also cut down the total light getting to the sensor, so the exposures required will be longer.
However, they should increase the ratio of useful image information compared to background glow, so overall should result in an improvement.
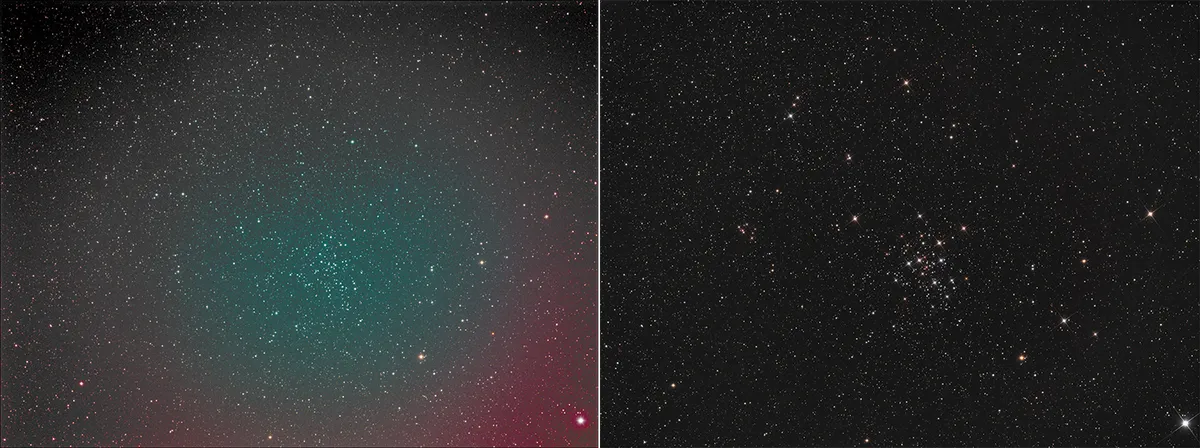
For those times when I want to bring out the finer detail of a deep-sky object, I add narrowband filters: the light pollution filter’s green tint is easy to remove in photo editing software during processing.
These enhance the contrast of emission objects by accepting only a narrow range of wavelengths around the emission lines of certain gasses within the objects, such as hydrogen-alpha (Ha), oxygen (OIII), sulphur (SII) and others.
During post-processing the data from each emission line is assigned a certain colour band – red, green or blue – and these are combined later in a graphics editor to create the most stunning images.
As these filters only pick up a tiny portion of the light, they can be used to take astrophotos even when the Moon is up as well or from locations usually plagued by light pollution.
Narrowband filters commonly come with a bandwidth of 5nm or 3nm at the emission line they let through; you can expect to pay a higher price for the lower bandwidth filters.
Much time and effort will be required to capture data from all 3 filters. So little light gets past the filter that imaging requires very long exposure times.
Typically I’ll spend at least 3 to 4 hours imaging time on each filter, with some single exposures of up to an hour.
The most rewarding results come from the Ha filter. The image is readily visible and has much detail.
The OIII and SII filters produce dim, noisy images that are frustrating to work with, but are needed for a complete image.
Keeping the telescope on track when narrowband imaging takes some practice too. I use an autoguider, and finding a stable guide star can be a challenge thanks to the fact that so little light reaches the guide camera’s sensor.
Some narrowband imagers choose to use a separate camera on a guidescope. This has several advantages, the biggest being that since the guide CCD is not looking through the narrowband filter, the stars appear considerably brighter and finding a suitable guide star is easy.
The drawback to a guidescope though is flexure, where different parts of the telescope setup move by different amounts over the course of the night.
This means that the main telescope may not be perfectly aligned with the guidescope during the course of the exposure.
I use an off-axis guider that allows you to guide your telescope through the same optics that are taking the picture. This eliminates any possibility of guiding error.
However, the main difference between narrowband and broadband images comes when you combine the colours for the first time using image editing software.
Generally I use the standard Hubble palette combination where SII is red, Ha is green and OIII is blue.

Since the Ha is usually a much stronger emission line, the result comes out very green. So it’s a good idea to assign the SII and OIII a stronger combine factor, or do an equivalent in Photoshop to ‘push’ the SII and OIII data before combining them.
Even when that is done, it’s likely you’ll want to do more colour adjustments, such as adding a Selective Colour adjustment layer, before the results become pleasing.
Though I try to cut down on light pollution, there’s always a little that gets through. To cope with this, I use powerful program called Gradient Xterminatorwhen processing data.
This Photoshop plug-in destroys light wash and amplifier glow from surrounding lights that may have been introduced while imaging.
Finally, once all of this is done I arrive at my final image. It might take a bit of work, but you would be amazed with what you can accomplish even under the skies of a city.
To sum up:
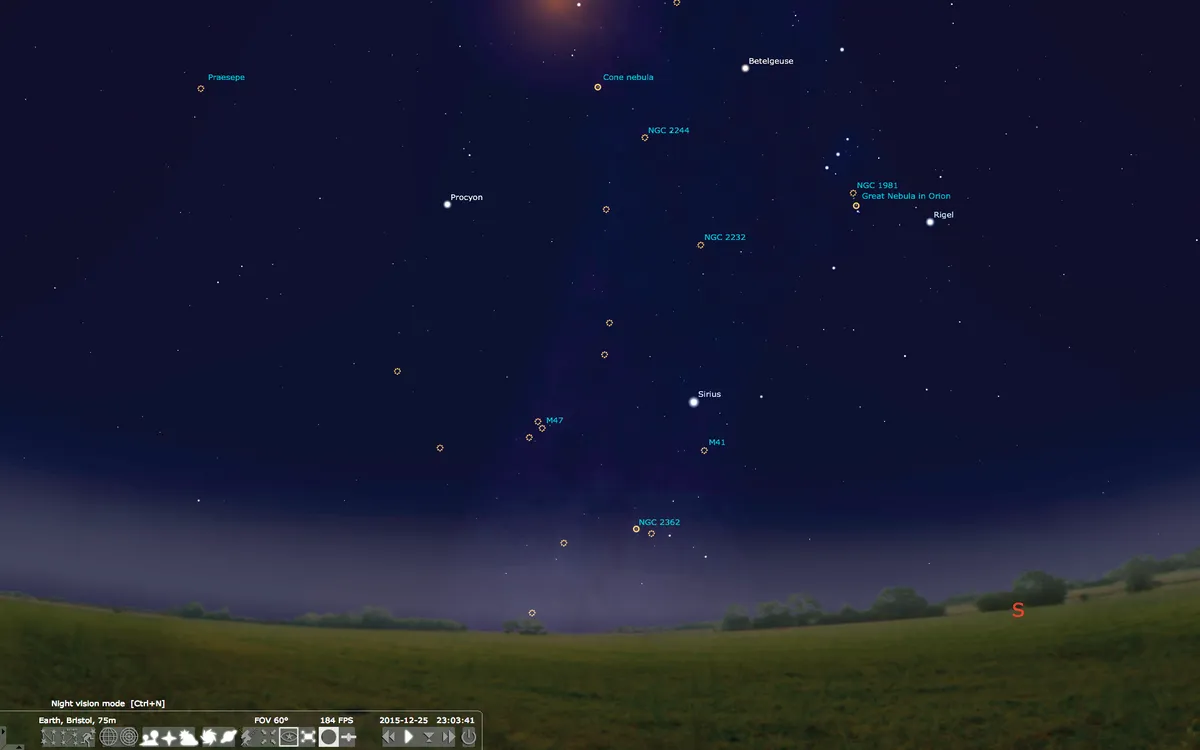
- Plan your imaging in advance using a planetarium program such as Stellarium to work out where your target is going to be in the sky and how much time you have to capture it. This will also help you work out where the best place in your garden or observing site will be to both avoid light pollution and get the best view.
- Image when your desired object is just past the meridian line in the sky. This will ensure you have the best sky conditions and will help shy away from light pollution.
- Invest in a decent mount that will allow you to track for a longer period if you are aiming to do long-exposure astrophotography.
Hiding from light pollution
Hiding away from light pollution is much more effective than editing it out afterwards.Shielding your equipment from stray light can be as simple as adding a cardboard cuff to the end of your scope, or by extending the dew shield.
A lot of stray or unwanted light these days comes from security lights. If you have them, turn them off while observing.
If your neighbour’s security lights are troublesome, politely ask if they can be turned off while you observe.
An offer to show the neighbours what you are looking at can work wonders and you never know, you might convert them to your hobby.
Stray light also reduces as the night goes on. More people head to bed, turning off their lights as they go, and some local authorities turn street lighting down or off after midnight.
If you are able to stay out late, you’ll probably find that after midnight the amount of stray light around seems to be less than earlier in the evening.
Even if you have streetlights shining into your garden, it’s usually possible to find a spot that’s not illuminated by them, giving a good view of the sky.
Getting into the shadow of a brick wall or a tree can help here, though this can block your view of a large part of the sky, so you may need to hunt around for the best spot in your garden.
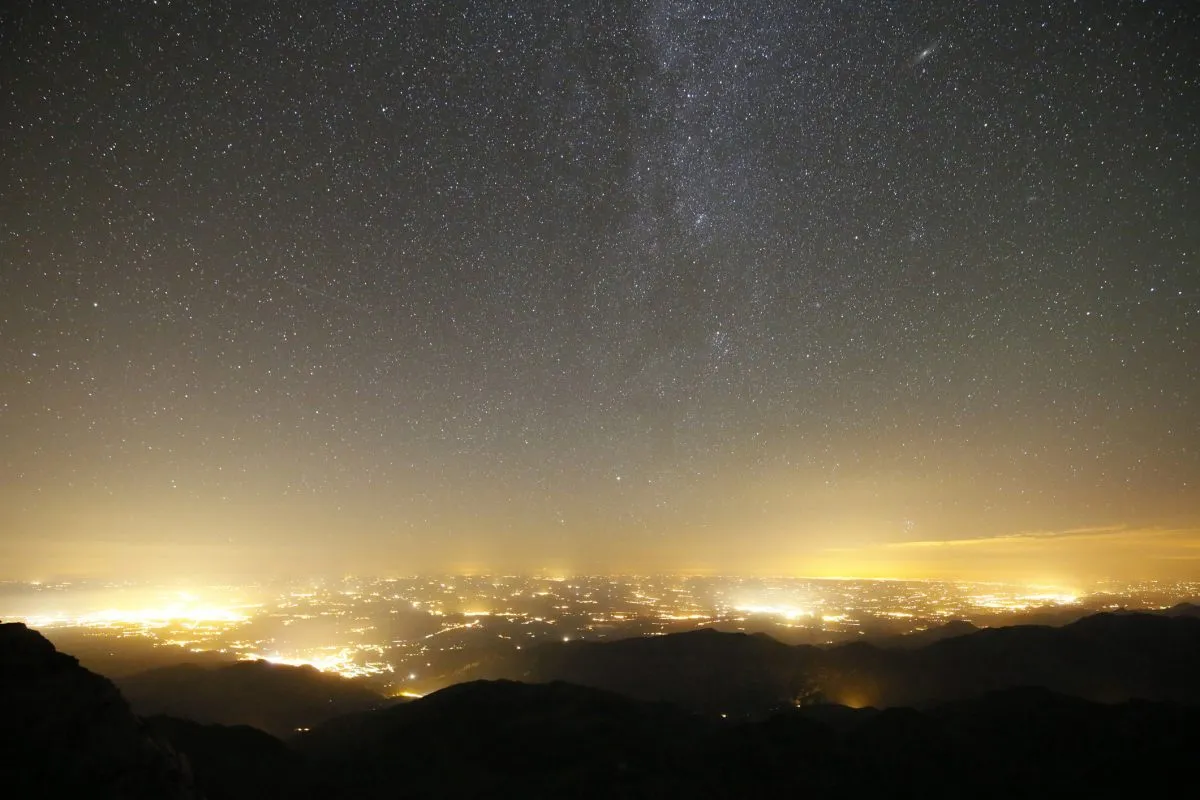
One of the most difficult forms of light pollution comes from artificial light being shone directly into the sky and reflecting back off dust and water vapour, filling the sky with a haze of light.
High humidity or prolonged dry spells when dust can be thrown up into the atmosphere will seem to make the situation worse. Check weather reports and wait for stable conditions with low wind speeds to get the darkest skies.
Jaspal Chadha captures the sky from his garden in London, where he has to overcome the heavily polluted skies. This article originally appeared in the November 2015 issue of BBC Sky at Night Magazine.