If you struggle to capture satisfying planetary images then you may be pleased to hear that there’s help at hand in the form of an accessory known as an atmospheric dispersion corrector (ADC).
These clever gadgets dramatically reduce the amount of dispersion that occurs when light passes through our atmosphere, and by doing so enable you to photograph the planets and produce imagesthat show noticeably finer detail.
Atmospheric dispersion correctors are a great tool for astrophotography, but an ADC can also help if you’re a visual planetary observer, increasing the amount of surface detail you’ll see through the eyepiece.
What is atmospheric dispersion?

Atmospheric dispersion happens when light entering our atmosphere from space, at an angle, is refracted.
This refraction bends the light to a slightly steeper angle and makes the object look higher in the sky than it really is.
The amount of refraction is greater the lower a celestial object is in the sky: so at sunset, for example, refraction can cause the Sun’s image to be raised by over 0.5°, slightly more than one solar diameter.
As well as changing dramatically with an object’s altitude, the refractive (bending) power of the atmosphere also varies across different wavelengths.
Put simply, this means that the amount of refraction is also dependent on the colour of the light.
This phenomenon of atmospheric dispersion spreads light from any point-source – like a star – into a vertical spectrum, which becomes longer the lower the object is in the sky.
The effect can be seen in the famous green flash of Venus.

How does an atmospheric dispersion corrector work?
A correctly adjusted ADC, placed between the camera or eyepiece and a Barlow lens, will go a long way towards reducing the spectral spread caused by the atmosphere, improving image resolution as a result.
It does this by applying the opposite amount of dispersion to that caused by the atmosphere, reconverging the light of the different wavelengths at the focal plane of your scope.
An ADC generally uses a double prism arrangement to correct the dispersive effects of our atmosphere.
This allows its dispersive power to be smoothly varied over a wide range.
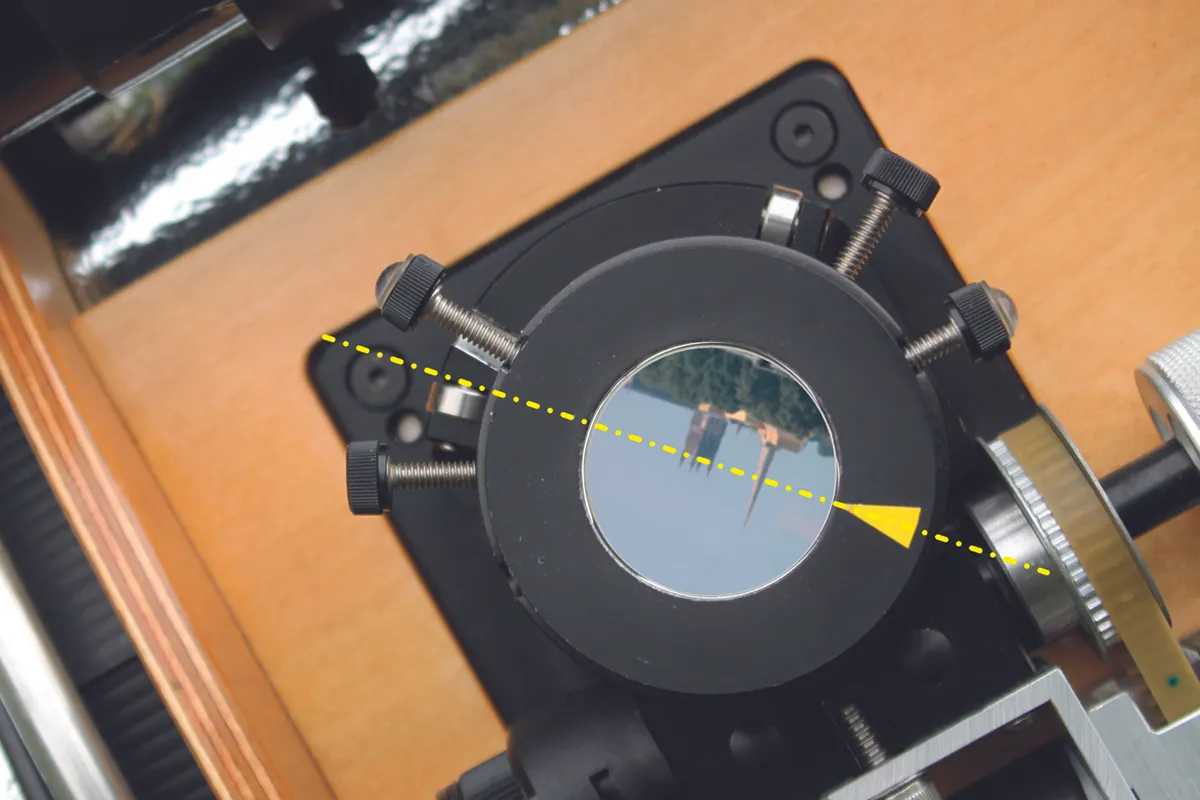
For example, the Astro Systems Holland ADC uses a matched pair of thin, circular, multicoated prisms arranged face-on to the optical axis.

The rotation of each prism is independently controlled using a lever. Using these levers to alter the angle between the two prisms, you can vary the degree of overall dispersion that the ADC gives from zero to double that of a single prism.
The best ADC prism positions for any object need to be found by trial and error.
This is because the prism settings that will properly reconverge the light depend on the exact details of your setup, such as the distance between your camera and the ADC.
Consequently, ADCs don’t have calibration marks on their bodies that can be set for a specific object’s altitude.
One of the best ways to calibrate an ADC accurately is to use a colour camera for the set-up process, as described in our step-by-step guide below.

Do you need an atmospheric dispersion corrector?
How much an ADC could help with your astro imaging depends on your setup, and what type of astrophotography you prefer to do.
Monochrome Imaging
If you use separate colour filters with a monochrome video camera, you’ll get improved planetary resolution, especially in the blue band. As is true in all cases where an ADC is used, the lower the object’s altitude, the greater the benefit.
Colour Camera
If you use a colour video camera you’ll get much improved planetary resolution at all wavelengths. The advantages an ADC brings to such a setup are greater than when using a monochrome camera.
Luminance Imaging
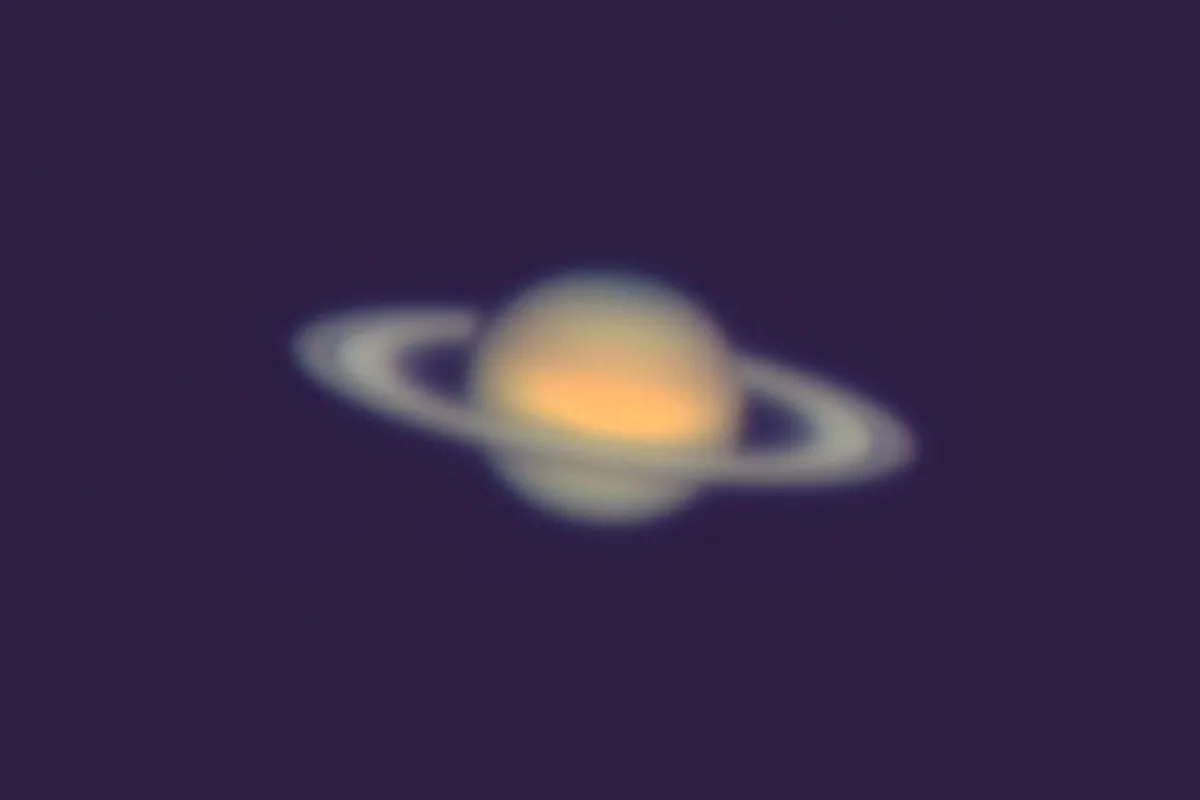
With a luminance filter, an ADC enables you to image in high resolution across the full width of the visible spectrum. This is useful for objects with low surface brightness, such as Saturn.
Visual observing
In the eyepiece you’ll get better resolution of fine planetary detail, similar to the improvement seen
in luminance imaging with an ADC.
Using an ADC with a monochrome camera
The benefits of using an ADC depend on how you want to use it.
ADCs are commonly used by those doing planetary imaging with monochrome cameras, but they can have a variety of other applications, too.
Traditionally, monochrome imagers take videos through separate red, green and blue filters and then combine the three final processed images into one full-colour image.
RGB imaging does actually deal with some of the effects of atmospheric dispersion without the need for an ADC.
This is because within each separate colour band the amount of dispersion is much less than that of the visible spectrum as a whole.
So by realigning the three separate red, green and blue images prior to creating the final colour image, the overall amount of atmospheric dispersion is reduced.

This method works reasonably well for the red and green bands, especially when the planet is quite high in the sky, but is less successful for the blue band.
These shorter wavelengths are dispersed more, and across the bandwidth of the blue filter the spreading effect is much more significant.
We’ve seen that dispersion gets worse the lower an object is in the sky, and it becomes problematic for each colour band when the amount of spreading exceeds the resolving power of the telescope.
For more advice on this, read our guide to photographing targets low in the sky.
For my 8.7-inch reflecting telescope (which has a resolving power of about 0.4 arcseconds) an ADC is useful, under good seeing conditions, when planets are below an altitude of 66° for the blue-filtered image, 42° for the green image and 33° for the red one.
So from the UK, where planets can never be more than about 60° high, using an ADC should always benefit the blue image, providing the seeing is good.
With larger aperture telescopes, the resolution is better, and so using an ADC is beneficial at even higher object altitudes.
The benefits of using an ADC for monochrome imaging can be seen in the image below, which shows Jupiter in good seeing at an altitude of 48°.
The improved clarity of the blue channel from using an ADC is noticeable, but in red and green at this altitude there is little benefit, just as we’d expect.

Using an ADC with a colour camera
If you’ve got a colour camera you’ll see an even bigger benefit from using an ADC than a monochrome imager would.
Colour video cameras have the colour filters formed on top of their imaging chips.
These filters, known as a ‘Bayer matrix’, are inferior to the separate filters used in RGB monochrome imaging, having a much broader and less well-defined wavelength window.
This leads to each colour being more affected by atmospheric dispersion. The image of Mars below shows an example of the significant improvement in image detail that can be achieved when using an ADC with a colour camera.

Cameras capturing light from an object across the full visible spectrum will show the worst effects of atmospheric dispersion, i.e. monochrome cameras with no colour filters used – producing
a ‘white light’ or luminance image.
Generally, dispersion effects make the quality of a luminance image so inferior that taking one is pointless unless the planet is almost overhead.
This is a shame: using a luminance filter (which only blocks the light’s infrared and ultraviolet components) can give higher quality images thanks to the much higher light throughput.
For example, when capturing a luminance channel you can use lower gain settings, take shorter exposures and use higher frame rates, allowing more frames to be gathered in a given time.
Creating a luminance channel image is therefore especially useful for planets with low surface brightness like Saturn, where light is really at a premium (see the image below).

Using an ADC changes all this, allowing detailed luminance images to be taken despite the broad wavelength range.
The resulting higher-resolution luminance image can then be combined with a lower-resolution colour image made from separate red, green and blue images, to give a fully coloured, high-resolution image.
The image above shows the benefits an ADC can bring to luminance imaging of Saturn.
The planet was at a low altitude of 30°, an elevation that does not normally yield particularly good planetary images.
In the top row we see how the ADC transforms the level of detail seen in the luminance image.
In the lower row we see a standard colour RGB image created in the same imaging session (also imaged with an ADC), and how that colour image is improved significantly by combining it with the more detailed luminance image.
The top row of this image is interesting from another perspective, because the luminance view is the one that most closely matches what visual observers would see, looking at Saturn through the eyepiece and sampling the full visible spectrum.
So the picture indicates the significant benefits of using an ADC for visual observers wanting the best planetary views.
These benefits of using ADCs for visually observing the planets will help you see more surface detail on Mars, Jupiter and Saturn.
And if you’re worried that the glass in an ADC might dim the image of a planet, don’t be.
With modern coatings the light loss through the device will be minimal – ADCs have their optical surfaces multicoated to further reduce light loss.
For the cost of a premium eyepiece, an ADC can take you a step further in your quest to take the best planetary images or see the best planetary views.
Using an atmospheric dispersion corrector, step-by-step
Step 1: Installation
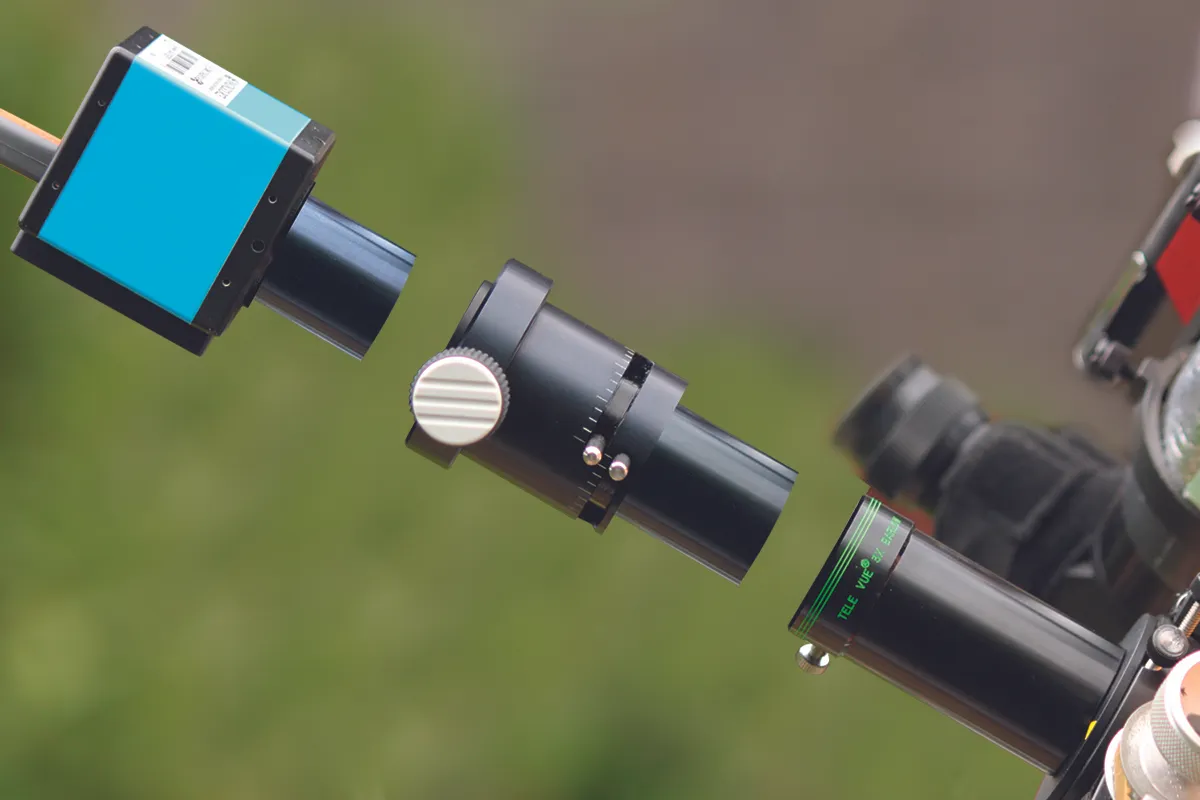
Position the ADC between a Barlow lens and the camera or eyepiece. The ADC works best at focal ratios above f/15: this configuration lessens the optical demands on the ADC and so reduces image aberrations as a result. Centre the planet in the field of view.
Step 2: Orientation
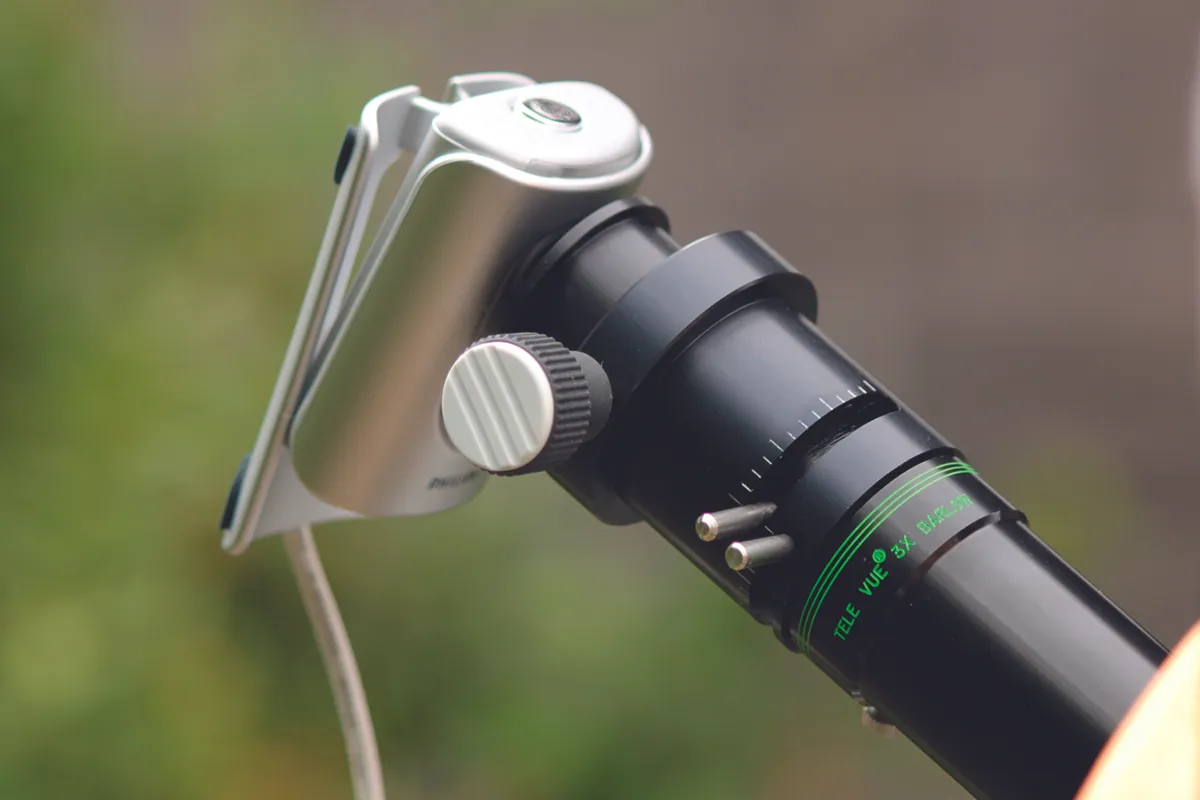
Rotate the ADC so that the mid-point between the levers lines up with the horizontal direction as seen through the eyepiece. You can find the horizontal direction simply: look at the horizon through your scope’s focuser, without an eyepiece in place.
Step 3: Colour Camera
Focus the planet in the camera or eyepiece. Once focus has been achieved, carefully remove the eyepiece or camera from the ADC and replace it with a colour camera – a cheap colour webcam will do here. Increase the colour saturation of the camera.
Step 4: Dispersion Assessment

Without adjusting the focuser, move the ADC and colour camera in and out of the Barlow until the image is in focus. Then secure them. This preserves the distance between the ADC and the focal plane. Increase gain and exposure until the planet’s disc is just slightly overexposed.
Step 5: Adjusting the ADC
The edge of the planet will be colour-tinged due to dispersion: red on one side, blue on the other. Adjust each lever, keeping them an equal distance from the mid-point, to minimise the colour differences. You may need to re-centre the planet afterwards.
Step 6: Ready to go
Replace the colour camera with your main camera or eyepiece, which should still be in focus but will now be dispersion corrected. Observe or image as normal. You may need to repeat this procedure later on if the planet’s altitude changes by more than a few degrees.
This guide originally appeared in the November 2012 issue of BBC Sky at Night Magazine.