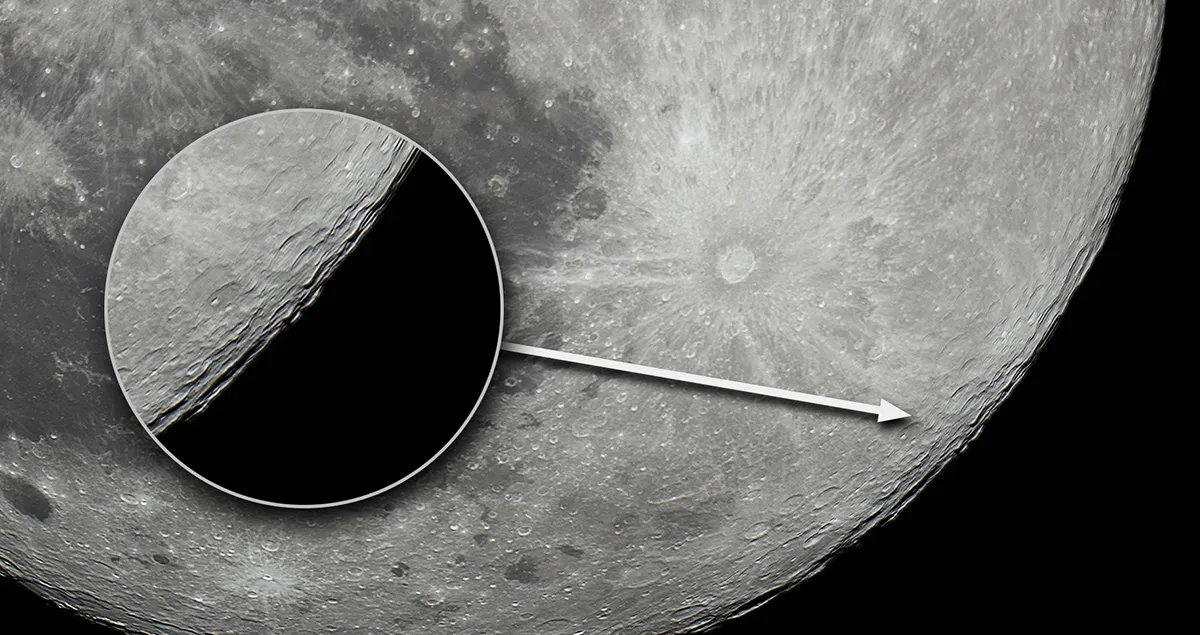
The face of the Moon records hundreds of millions of years’ worth of asteroid and comet impacts. Its disc is peppered with countless craters and large basins, where immense collisions punched deep into the lunar crust.
But scattered across the Moon’s pockmarked highlands and the smooth basalt lunar seas, emanating from some craters are also striking, bright features.
They are cosmic splashes of rock and dust that give a hint of the dynamic and tumultuous past of our nearest neighbour.
Astronomers call these surface features ‘ray ejecta’: the material thrown out from the impacts that made their parent craters.
For more on getting the best out of our lunar companion, read our guides on how to observe the Moon and how to photograph the Moon.
/CNRS/Université Joseph Fourier)")
These dazzling ray systems are generally associated with younger craters. Tycho, for example, is thought to have formed around 109 million years ago.
The bright streaks are in essence ‘fresher’ material that hasn’t experienced the same level of space weathering as its surroundings (a process that typically darkens the surfaces of Solar System bodies).
The impact events that created these ray systems must have been breathtaking.
Though we can’t see those cataclysms today, viewing some of the ejecta they left behind through a telescope or a good pair of binoculars can still give one an appreciation of the immense energy involved.

How to observe Moon ejecta systems
Ray ejecta on the Moon come to prominence at a time during the cycle of lunar phases when other targets are poorly illuminated for observation or imaging.
Craters, mountains and rilles appear most spectacular when they’re obliquely lit: something that accentuates surface textures and differing heights with deep shadows.
Ray systems, though, appear at their most impressive when the Sun is high over their location on the lunar surface.
In fact, most ray systems become almost invisible when their parent craters are lit from a shallow angle.

This means that full Moon and the late gibbous Moon phases, when features on the far eastern or far western side of the lunar disc are lit from above, are the best times to see these enigmatic ray ejecta.
Read our guide to find out when the next full Moon is visible.
Some ray ejecta systems, like the sprawling mass that surrounds the crater Copernicus, can just be made out with the naked eye on a clear night. A good pair of binoculars is also a wonderful way to explore them.
At full Moon, when the air is still, the view of Tycho’s extraordinary rays in 10x50 binoculars gives a real sense of the huge streaks of ejecta material wrapping ‘around’ the three-dimensional hemisphere of the Moon’s nearside.
Indeed, their ease of viewing is something that makes the ray systems unlike many of the smaller features on the lunar disc.
- For weekly lunar phases and rise times sent directly to your email inbox, sign up to the BBC Sky at Night Magazine e-newsletter.

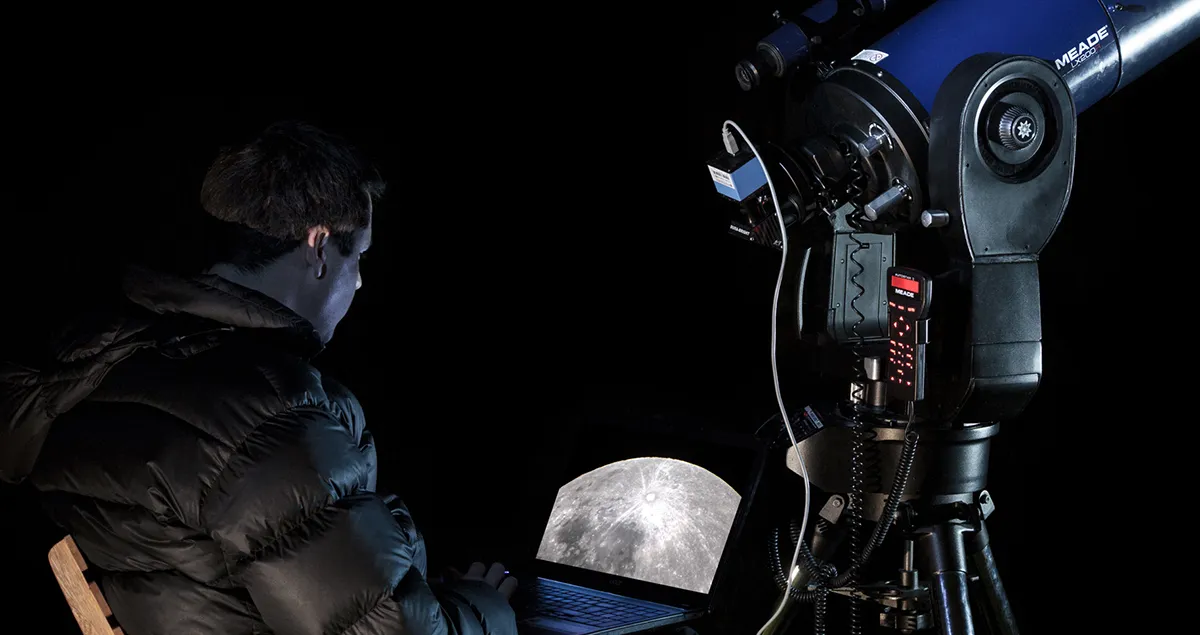
Observing Moon ejecta systems with a telescope
What’s more, to explore the largest ray ejecta features in more detail you really don’t need a large telescope.
A small refractor with an aperture of around 60mm is perfectly suited to providing wide views of the streaked landscape around Copernicus, Kepler and Tycho.
You can even use a small telescope to look for the brighter ejecta regions when they are shrouded in lunar night.
When the Moon is a thin crescent the light scattered off Earth illuminates the nightside of the lunar disc with ‘Earthshine’.

At these times, even though they are in darkness, the rays and ejecta blankets of craters like Aristarchus and Tycho still stand out clearly, lit only by our planet’s glow.
If you have access to a larger telescope, say 8–10 inches (200–250mm) in aperture, you’ll be able to resolve finer details in the ray systems on nights of good seeing.
A larger aperture instrument will also open up the smaller ray systems, such as the striking double streaks from the crater Messier and the fantastically shaped ejecta from the crater Proclus, which is likely to be the result of a shallow-angle impact.
There are also a number of craters that have more modest ray systems around them, which are not quite as bright and showy as the most famous examples but are nonetheless fun to image or view at the eyepiece.
Examples include those around the craters Aristillus, Langrenus, Anaxagoras and Petavius B.

Sketching with pencils or pastels can also be a great way to record views of lunar ray systems at the eyepiece. For more on this, read our guide on how to draw the Moon.
There are many different ways to enjoy and explore these captivating features: binoculars, large scope, camera sensor or eyeball.
Take one of our top picks and get started investigating them for yourself.
6 lunar ray systems to observe with binoculars or telescope
1
Copernicus

The crater Tycho possesses, undoubtedly, the most spectacular ray ejecta system on the Moon. Some rays from Tycho stretch most of the way across the lunar disc and dominate the rugged southern highlands, where Tycho sits. Binoculars will show the ray system and the bright ejecta blanket surrounding Tycho when sunlight is shining from a high angle onto the crater and its surroundings.
2
Kepler

A short hop from Copernicus is the similarly impressive crater Kepler. Though Kepler itself is smaller than Copernicus it nonetheless has a fine ray system that is a delight to explore with a large telescope using a medium magnification eyepiece. There’s an interesting mix of forms visible within the rays, from some that shoot out radially in a fairly straight fashion, to others that have a slightly meandering appearance.
3
Proclus

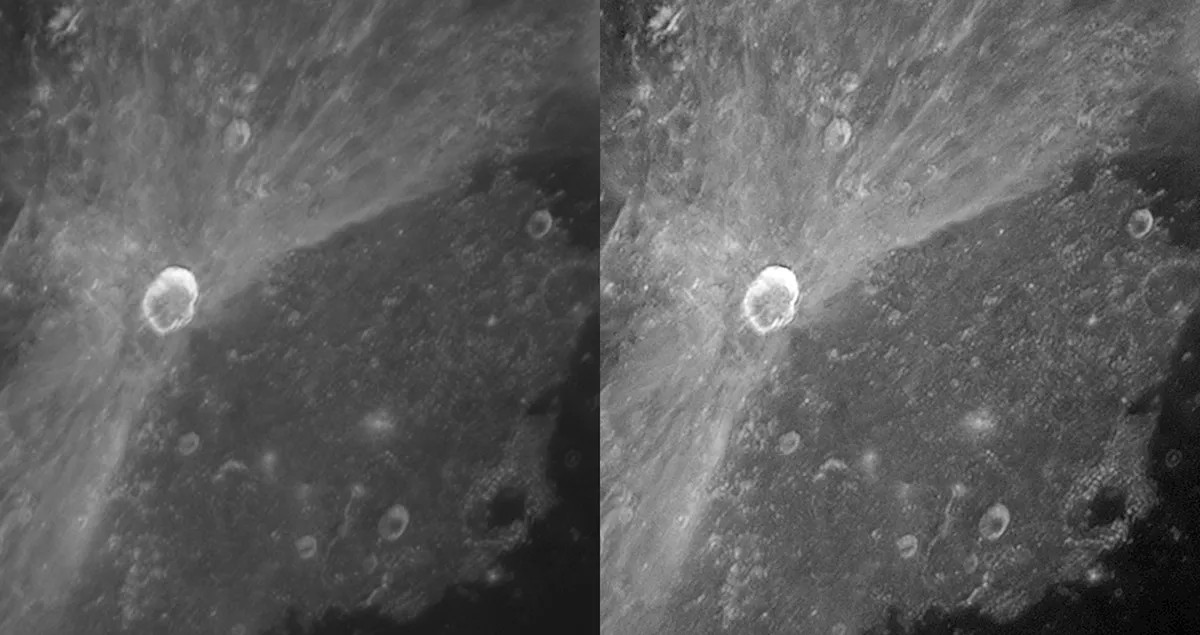
The 27km-wide crater Proclus lies in the cratered and hilly terrain that sits between the eastern shore of Mare Tranquillitatis and the curved western shore of Mare Crisium. The crater has one of the more unusual ray ejecta systems on the Moon – appearing somewhat like a handheld fan. The striking shape of the ejecta is visible in 10x50 binoculars and also makes it an interesting target for high-resolution imaging.
4
Aristarchus

Set within the vast Oceanus Procellarum, the crater Aristarchus cannot be missed around the time of full Moon as its dazzling inner walls are spectacularly bright and stand out conspicuously against the surrounding basalt plains. The crater also has an interesting ray system that spreads out in a filamented fan shape broadly towards the southeast. It makes for a fascinating target to explore with a telescope – either visually or with an imaging setup.
5
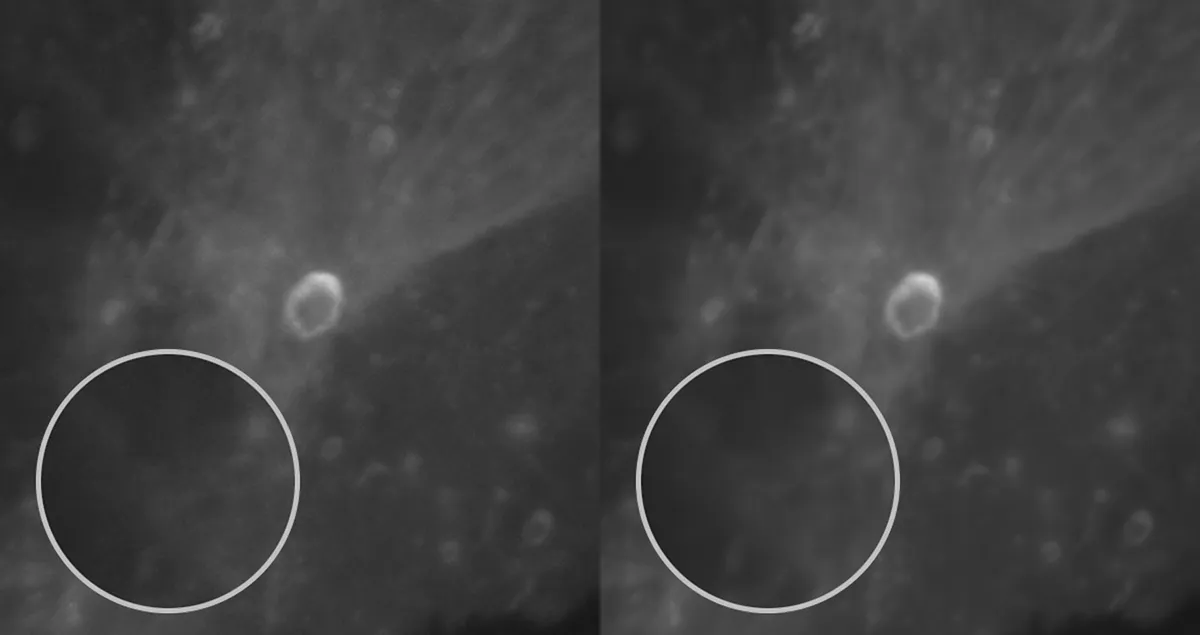
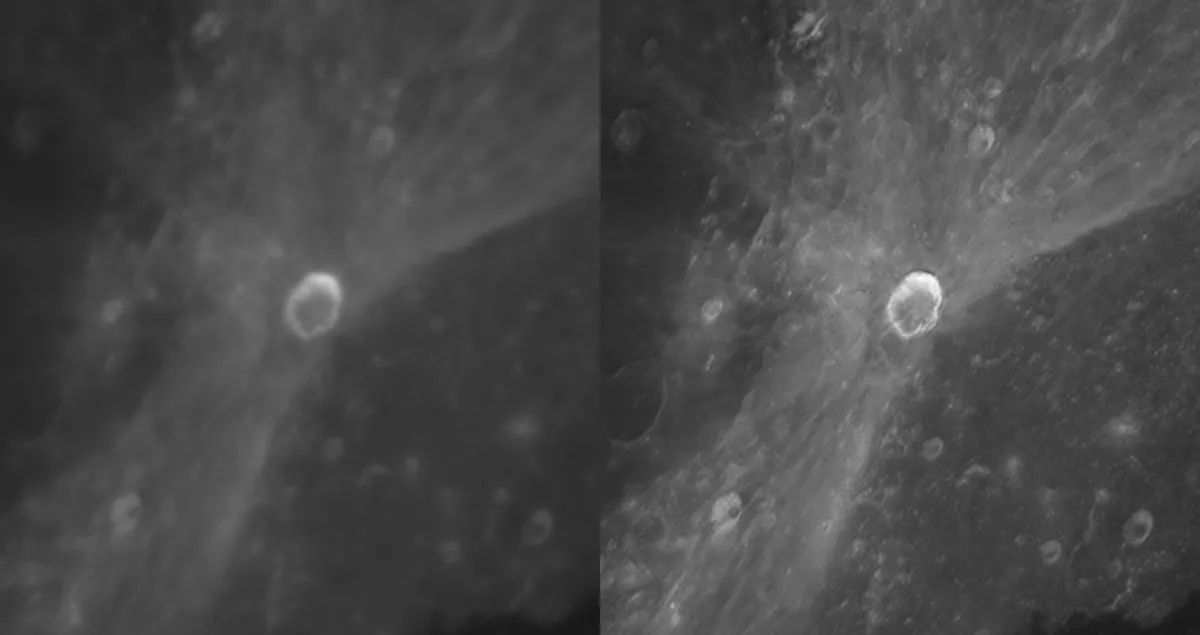
Messier

When the Sun is high over the Mare Fecunditatis, a small telescope will reveal an intriguing ray system emanating from the twin craters of Messier and Messier A. The system’s most prominent rays appear as two slightly diverging lines pointing towards the western edge of Mare Fecunditatis, and they stand out quite clearly against the darker lunar sea. The bright rays appear to stretch at least 160km, and may be even longer.
How to photograph ray ejecta systems
Catch ray ejecta systems with a high frame-rate camera and a telescope.
Find the right illumination for your target

Lunar features change appearance dramatically with varying illumination, and ray systems are no different. While craters look interesting when lit obliquely, ray ejecta appear far more striking – and more visible – when the Sun is high above them. To get the best images, plan your imaging sessions for nights when these features are located away from the terminator.
Use the lunar limb or terminator for focusing
Without shadows contrasting with bright edges as you’d find on obliquely-lit lunar features, focusing your camera on a ray system that’s lit from a high angle can be tricky. Point your scope over to the terminator, focus there and move back; even if the Moon’s ‘full’ there will often be obliquely-lit craters near the limb which you can focus on before framing up your target nicely.
Don’t blow out the highlights
Ray systems are bright features and we need to take extra care when we set the camera’s exposure level. If you overexpose the rays you won’t capture their fine structure in detail, as the highlights will be ‘blown out’ and unrecoverable in post-processing. A basic way to avoid this is to make sure that nothing in the frame appears near to solid white in the imaging preview.
Generate a smooth stack
We’re going to apply sharpening and enhancements to our final picture, so we now need to create a smooth starting image – one in which the noise ‘graininess’ that you see in a single frame is reduced. Take a short AVI-format video of your target consisting of a few thousand frames and run it through AutoStakkert! or RegiStax, which will identify and stack the best frames.
Bring out the detail with ‘Wavelets’ sharpening
The image created at the end of Step 4 should be smooth, but will look a little soft, so we now need to make the crucial sharpening adjustments in RegiStax to make the ejecta details ‘pop’. Open the image and tweak the top three sliders on the left hand side of the ‘Wavelets’ tab. Pay attention so you don’t over-sharpen, where noise starts to overwhelm fine details and the view looks crunchy.
Use ‘Curves’ tweaks to improve contrast and definition
Apply contrast and brightness adjustments in an image editor to make the ray systems stand out; the ‘Curves’ tool is good for this as it allows for greater control of which tones are being tweaked. You can duplicate the image as another layer and apply a gentle ‘High Pass’ filter; then blend the filtered layer with the original layer using a ‘Soft Light’ mode to improve the latter’s definition.
Have you managed to captured a beautiful image of the Moon? We'd love to see it! Find out how to send us your images or share them with us via Facebook, Instagram and Twitter.
This article originally appeared in the November 2021 issue of BBC Sky at Night Magazine.