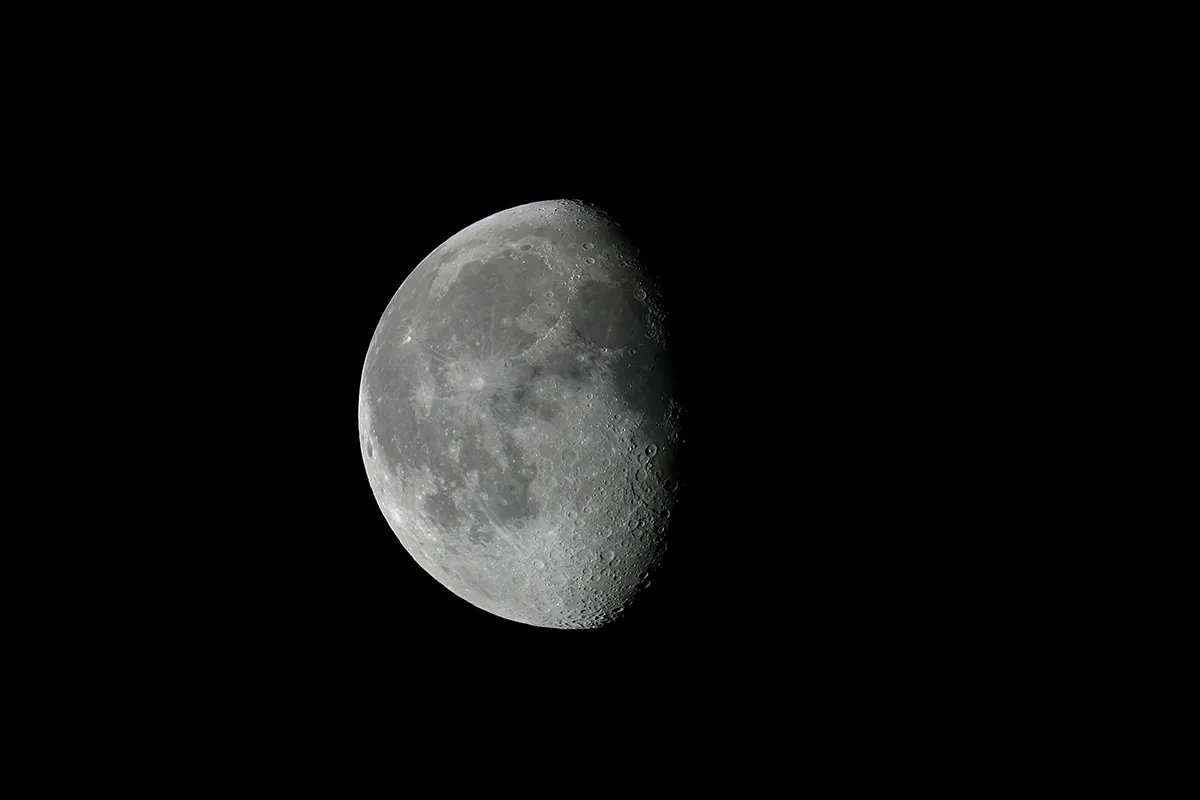
The Moon's terminator is the line that separates the illuminated and the shaded sections of the Moon from Earth's perspective.
In general, the best time to view a given feature on the Moon is when the terminator line is nearby.
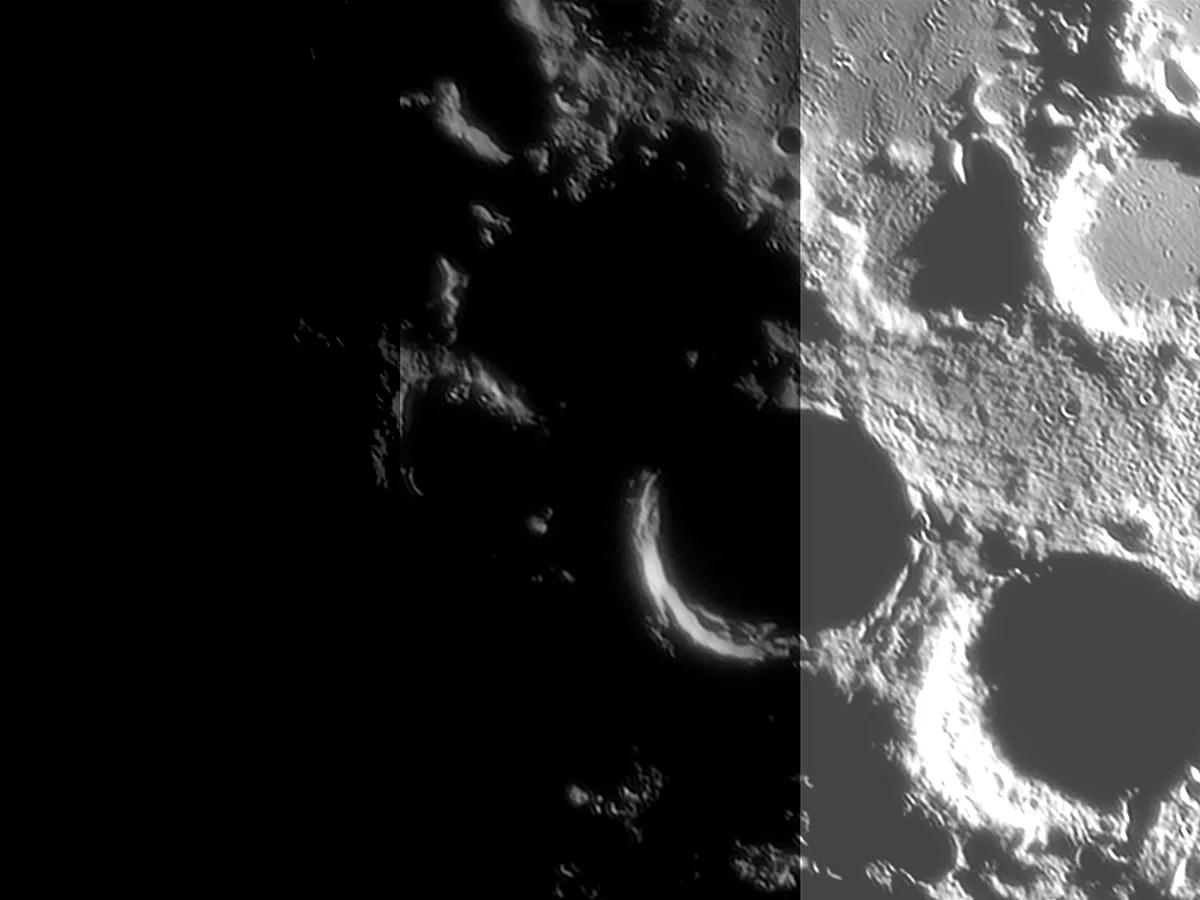
The lunar terminator is the region where the Sun is either rising or setting, where crater rimsand mountain peaks stand out in stark relief, casting inky black shadows across the lunar surface that exaggerate their presence.
Get weekly lunar times and phases sent directly to your email inbox by signing up to the BBC Sky at Night Magazine e-newsletter.

Lunar features further from the terminator show hardly any shadows and are harder to make out.
At day zero of the phases of the Moon – new Moon – the whole of the dark lunar hemisphere points towards Earth.
Over the next 15 days the terminator slowly creeps across the surface of the Moon from east to west until the disc is fully illuminated at full Moon.
Read our guide to find out when the next full Moon is visible.
Then the tables are reversed as the encroaching darkened hemisphere heads west with each passing day, until the diminishing crescent becomes lost in the pre-dawn twilight.
Here we'll discuss how to make the most of the terminator; how to observe and photograph the play of light and shadow on the surface of the Moon as it changes for a particular lunar feature.
Observing the Moon's terminator
. Credit: Pete Lawrence")
Whether you’re observing the Moon through an eyepiece or via a camera sensor, the features you see will initially appear fairly static.
Butif you pick a feature close to the Moon's terminator and monitor its appearance over 30-minute intervals, you will see changes.
For help picking a feature, read our guides on the Moon's best features or interesting clair-obscur effects.
The view you get from one night to the next is different and changes must have occurred over the hours between views.

Each night the Moon's terminator moves about 12˚ in longitude around the Moon’s globe.
For the best results you’ll need to start observing a lunar feature when the Moon is visible for (at least) a few hours above the horizon.
The Moon’s altitude needs to be 30˚ or higher for the most stable results.
Try and pick surface subjects that have a good relief height as these will generate the most dramatic and fast-moving shadows.

Look for flatter surrounding areas as these are better than complex, contoured ones for showing faster moving shadows.
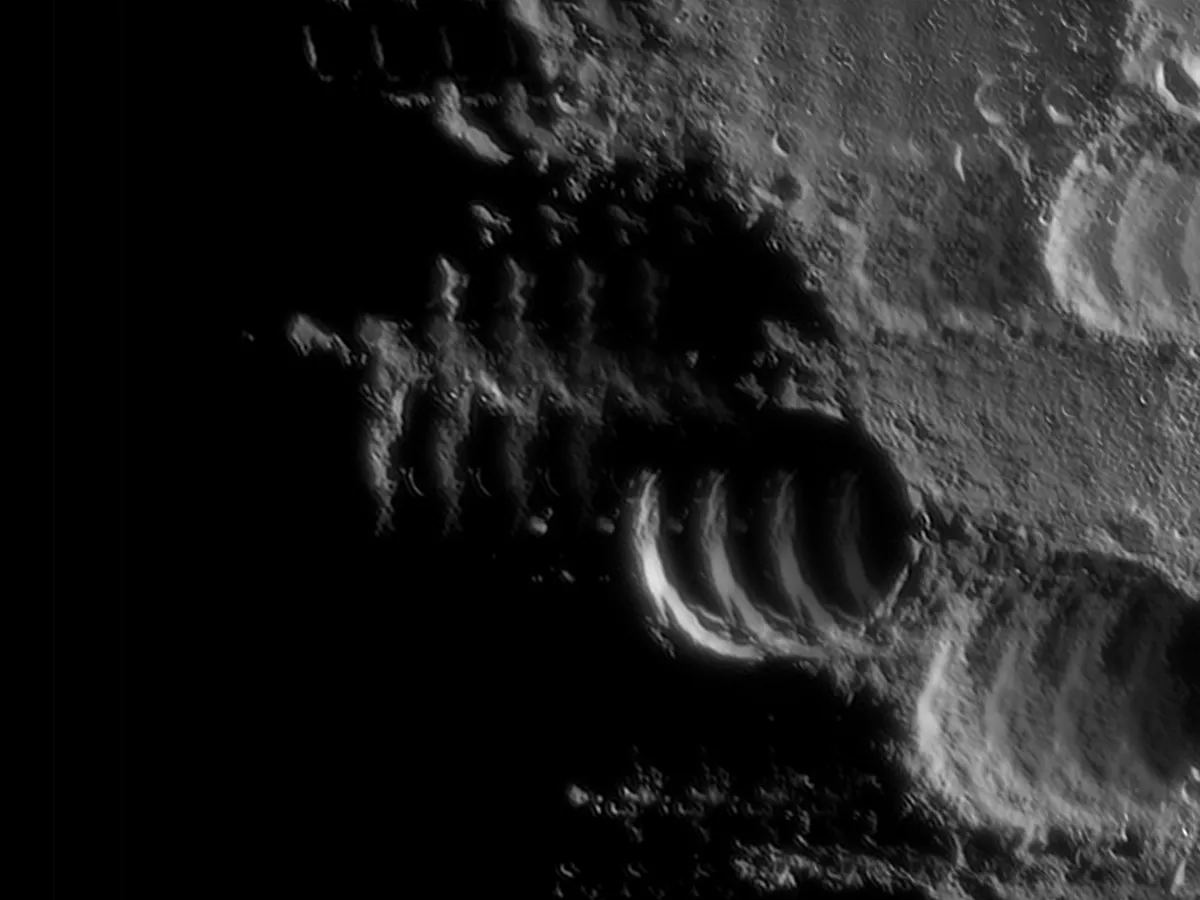
Mountain ranges make excellent subjects for this as many border the relatively flat lava surfaces of adjacent lunar mares.
High peaks will cast dramatic pointed shadows across a mare’s surface and these appear to move surprisingly fast, certainly quickly enough to show the sort of motion we are after here.
For more advice, read our guide on how to observe the Moon.
Photographing the Moon's terminator

One way of really capturing the changes in light and shadow across a specific lunar feature is to photograph it.
Choose a night that looks as if it will give you a few hours of clear sky.
There’s nothing more annoying than having to terminate an astophotography sequence due to cloud or high haze.
The latter will also affect the appearance of your results and, if creating an animation, will cause unwanted frame flickering which will detract from the overall effect.
Shadow movement animations need magnification for the best results.

Low image scale shots of the Moon's terminator can show shadows change over time, but it takes longer for the movement to be revealed.
But a high-resolution, highly magnified image can show impressive shadow movement over a short time.
High frame rate captures work best for this, as they give the sharpest results.
Use a high frame rate camera and capture around 1,000 frames for each shot.
Carry out image processing on the results with your preferred registration-stacking software (eg AutoStakkert!) combining the final results into your animation.
Be sure to maintain a constant interval between sequences, or the shadow movement will appear to judder.
Start with 30-minute intervals to give a decent number of frames to animate.
If you like the end result, consider doing animations using shorter time intervals to give more frames.
Below we'll show you how to image a feature like the Lunar X as it changes over time.
For more advice, read our guide on how to photograph the Moon.
Equipment you will need
- Telescope fitted with a high frame rate camera
- Polar aligned, driven tracking mount
Photograph the Moon's terminator, step-by-step
Step 1
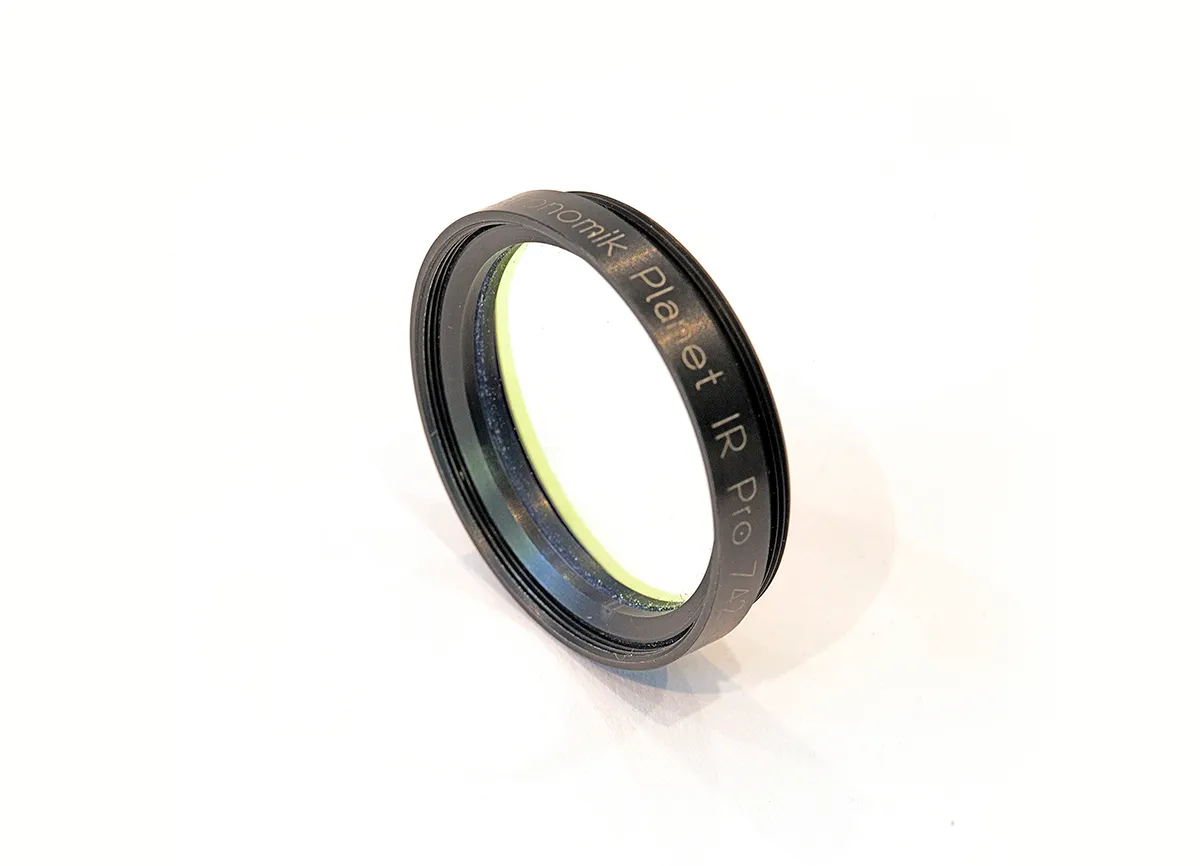
The best results will come from using a telescope with a high frame rate imaging camera. If using an infrared sensitive mono camera, consider fitting an infrared pass filter (pictured), which will help stabilise the view, delivering sharper results.Use a polar-aligned, driven equatorial tracking mount. For help with this, read our guide on how to polar align a star tracker.
Step 2
While low image scale is easier to capture, it’s less adept at showing shadow movement over short time intervals. High image scale requires more imaging skill and higher telescope precision, but even short capture periods should show good movement. A focal length of 4,000mm or more is recommended.
Step 3
Ideally, select a night when the Moon will be higher than 30° altitude for a few hours and the weather forecast shows good clarity for that period. Your capture attempts should be taken under dark-sky conditions to avoid contrast variation. A gap of 30 minutes between shots is best to start with.
Step 4
Choose a relief target near the terminator, preferably showing a lot of height variation, such as a mountain. If the Moon is waxing the target slowly reveals over time. If waning, the target slowly disappears. Rotate the camera so slewing in RA (Right Ascension) moves the target parallel to the bottom edge of the imaging frame.
Step 5
Re-centre the target and focus accurately. Next, make a note of features near the corners of the frame. These can be used to re-frame should the telescope drift position between captures. Adjust camera settings to optimise exposure while maintaining a decent frame rate. Capture 1,000 frames and process the result.
Step 6
Repeat and process after each capture. When the run is complete, load all the frames in order into a layer-based editor, one result per layer. Align all layers and create an animated sequence if your software allows animation. Or save the frames individually and use a program like PIPP to create a sequence.
This article originally appeared in the February 2022 issue of BBC Sky at Night Magazine.