Telescopes look great in the glossy pages of a magazine and, in the hands of dedicated and patient observers, they can deliver excellent views.
However, in practice it is often a different story: a telescope frequently needs adjustment and a number of accessories before it becomes user-friendly.
In this guide we'll reveal how to soup up and improve not just your telescope, but your astronomy observing set-up as a whole, with tips, hacks and advice on how to streamline the process and make your telescope give you better views of the night sky.
With a few simple adjustments to your telescope and an overhaul of your night workspace, you can make those observing bugbears disappear.
For more observing advice, read our guide on how to become a better astronomer.
Keep notes during your observing sessions
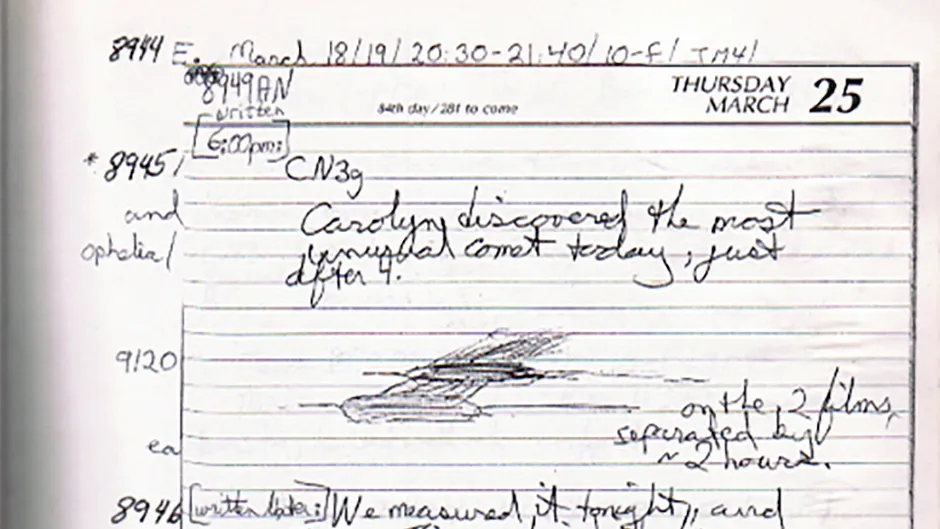
Many observers use an astronomer's log book to note down what they've observed through their telescope, but how about making notes on the observing session itself?
Were you comfortable? Was there anything you needed that you had to temporarily stop your observing to go and fetch? Could anything have made it better?
It's easy enough to think of these things at the time, but it's just as easy to forget them between one evening observing and the next night with clear skies.
Make sure you have a notebook and a pen packed in your observing kit. The next night you head out with your telescope,note down all the little, minute-by-minute improvements that you think you could make.
This will be key to methodically deciding where and how to make improvements.
Consider a permanent telescope enclosure
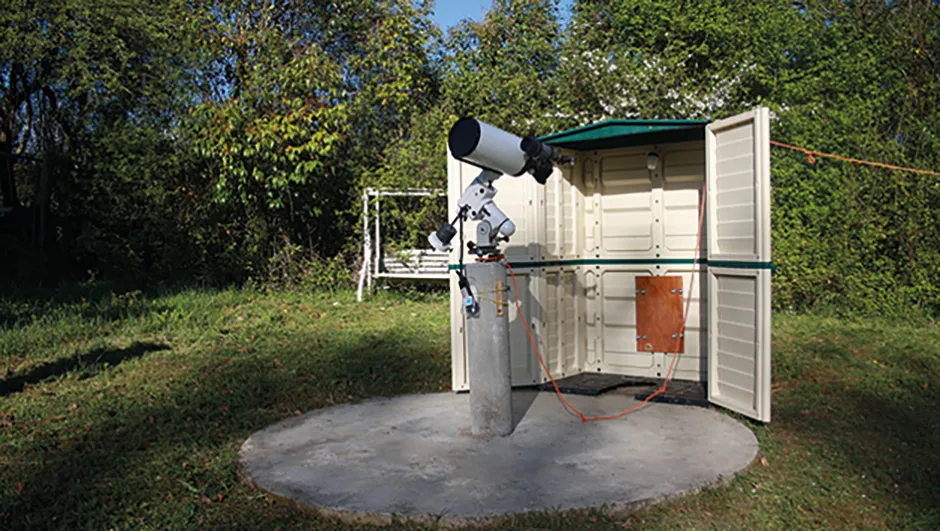
For starters, unless you have a small altazimuth-mounted telescope, there will have been plenty of nights when you wished your telescope was permanently stored outdoors.
We’re not all super-strong and most people find lugging anything heavier than 15kg (30lb) about on damp and cold nights a less-than-relaxing experience.
So if you have a garden, think seriously about improving your observing facilities by permanently storing it in an enclosure.
You could build a wheeled telescope tripod, or build a telescope rolling dolly. You could also construct a telescope pier and build a protective enclosure for your telescope piller.
Or you could even trying building a home observatory.
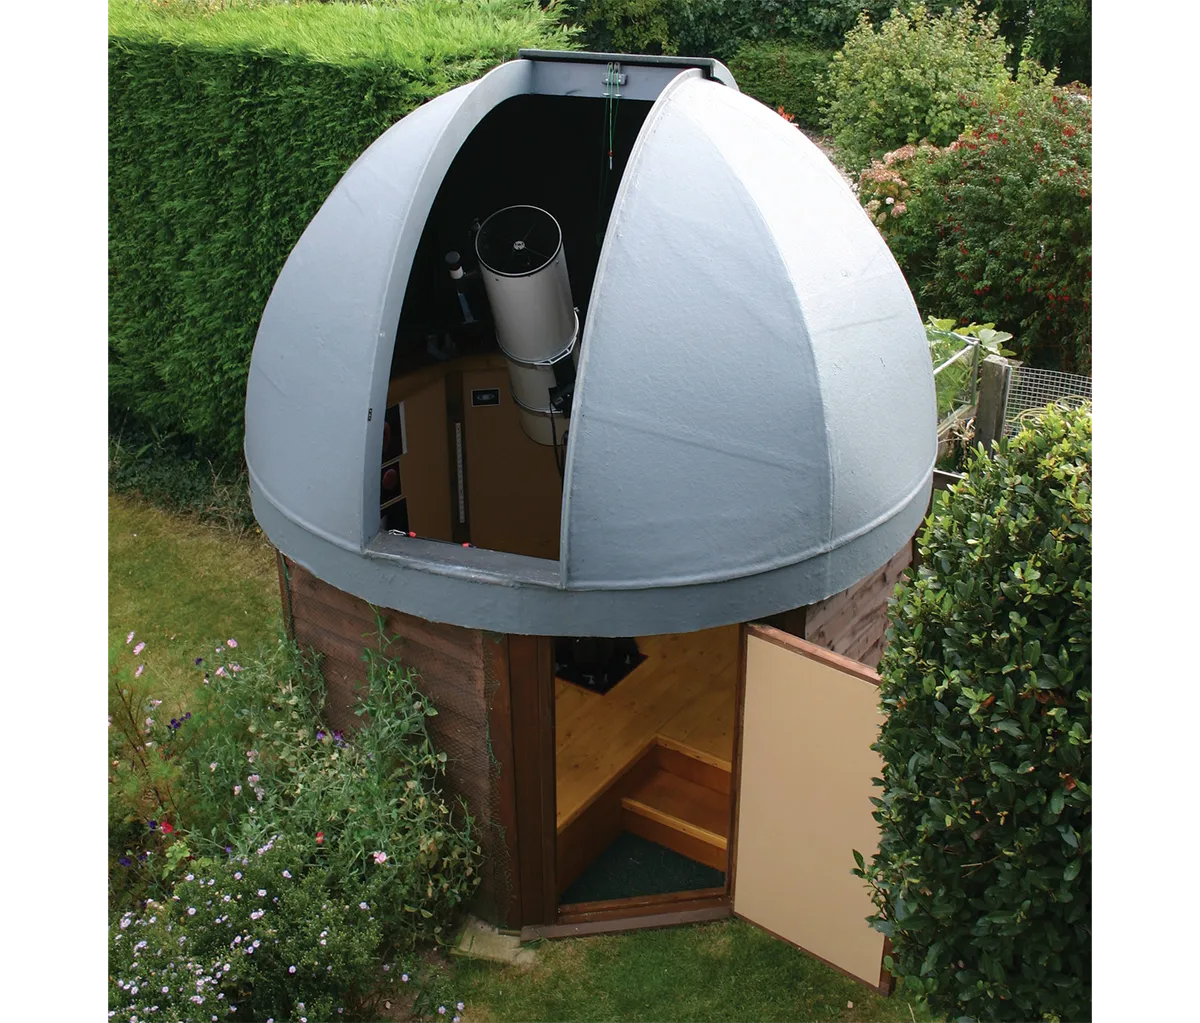
Observatories come in all shapes and sizes: as well as domes, there are run-off sheds, run-off roof buildings, hinged boxes and ‘kennels’ from which your telescope slides out. Much simpler solutions are worth considering too.
In recent years ‘wheeley bars’ have proved popular for improving telescope set-up times and accessibility.
These consist of castors attached to a skeleton arrangement that fits to the bottom of the telescope tripod or pedestal, enabling even large telescopes to be moved easily.
Use finderscopes and circles

A decent set of finderscopes is essential. They should all be thoughtfully mounted in the most convenient position.
Whenever possible, site your finders near to the main scope’s eyepiece. This will make it easy to go from the finder to the main telescope when you’ve identified an object.
Illuminated cross-hair finders are worth their weight in gold and it’s not extravagant to get more than one.
There’s nothing more satisfying than finding an object by star-hopping, but many small Go-To systems miss the target completely.
A zero-power ‘red dot’ naked eye finder and an illuminated 10x50 model will help you to home in on an object in three easy steps: firstly naked eye, then moving on to a 5° field and finally through the telescope eyepiece.
Here’s a finderscope tip: tie your finder caps to the finder supports using string and a hole punched in the cap side so they dangle safely down. You’ll never lose the elusive things in the dark again.
For locating bright planets in twilight, a single, accurate declination circle can be a godsend.
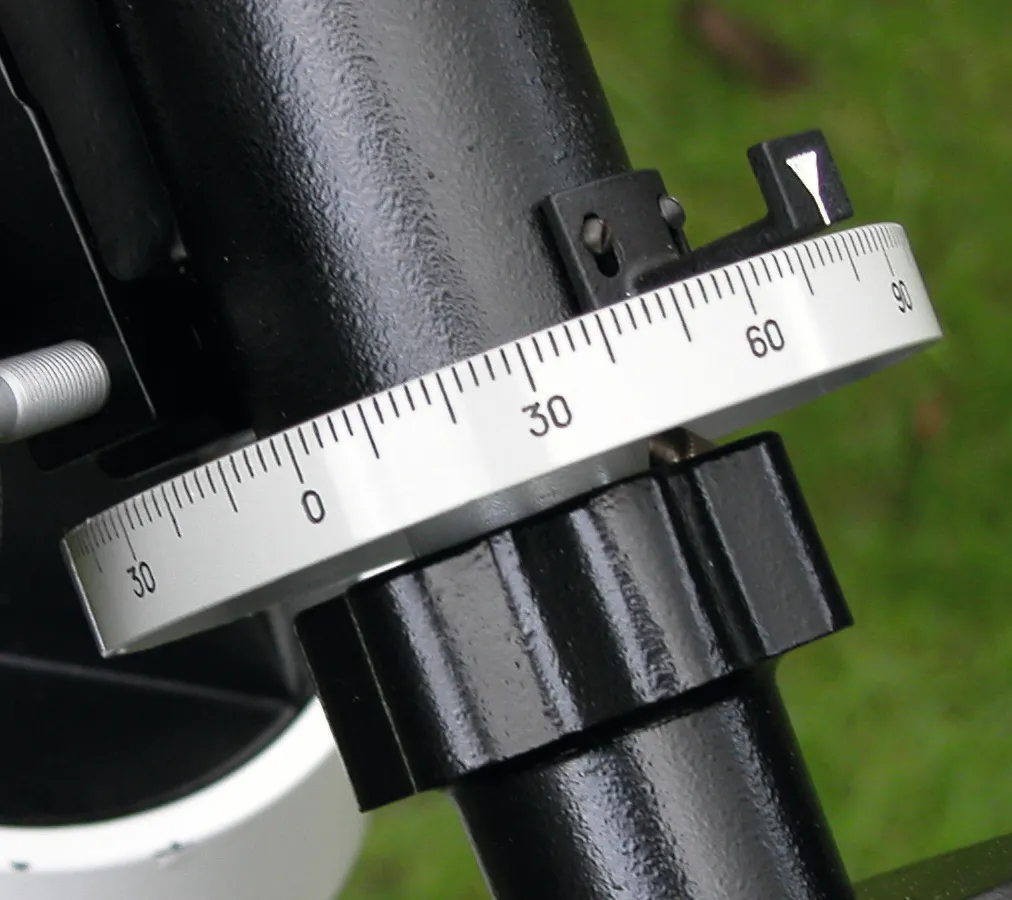
Many older observers miss the presence of old-fashioned mechanical setting circles on new scopes. They have a reassuring reliability, without a mass of wires, cables and batteries.
With just a bit of sweeping in right ascension you’ll easily find the planet you’re looking for.
With a bit of care and accurate marking, you can make homemade setting circle discs or bands using a strip of thin, pliable plastic and a permanent, waterproof marker pen.
Next, make sure your telescope is polar-aligned, then calibrate the declination circle on a star of known declination. Finally glue it in place with a strong adhesive like Super Glue.
Keep your telescope optics in shape
As far as the cleanliness of precision telescope optics is concerned, prevention is better than cure.
Any telescope mirror regularly exposed to the elements will need re-aluminising every few years.
The easiest way to prevent early degradation is to cap the ends of the tube with airtight covers and place a very low-wattage tubular heater (like the sort recommended for small greenhouses) on a time switch inside, but not touching, the tube.
Lenses don’t degrade, but they do get stained and dirty. Many professional astrophotographers swear by the lens cleaner Caliope Opti-Clean.
You paint it onto the lens and it turns into a polymer film that can be peeled off, taking all the atmospheric muck with it.
For more advice, read our guide on how to take care of your telescope.
Regularly check your telescope is collimated
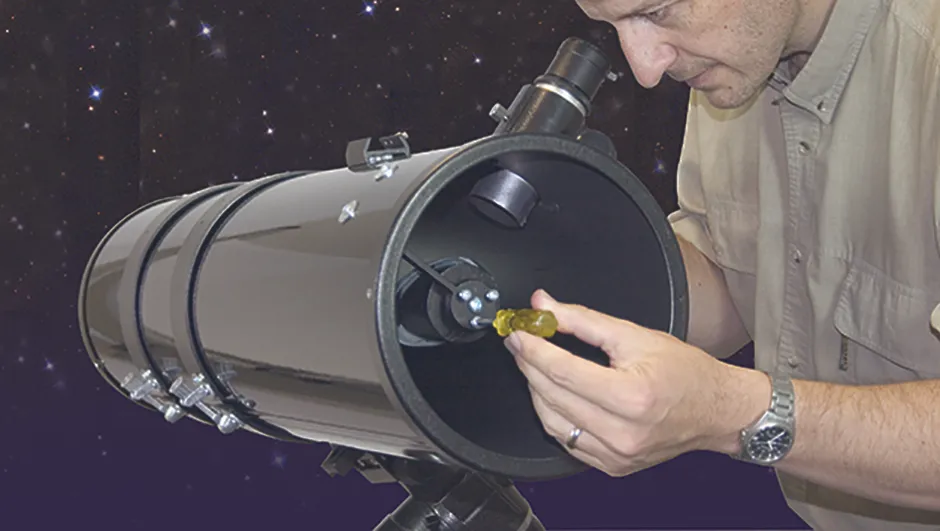
Precisely lining up the optics for optimum performance strikes fear into the heart of most observers.
Understandably, many newcomers to astronomy dread fiddling about with a screwdriver, adjusting fragile precision optics in the damp and dirty outside world.
A lot depends on your telescope’s deficiencies but, as a minimum for basic telescope maintenance and collimation a set of small screwdrivers, Philips screwdrivers, Allen keys and small spanners are essential.
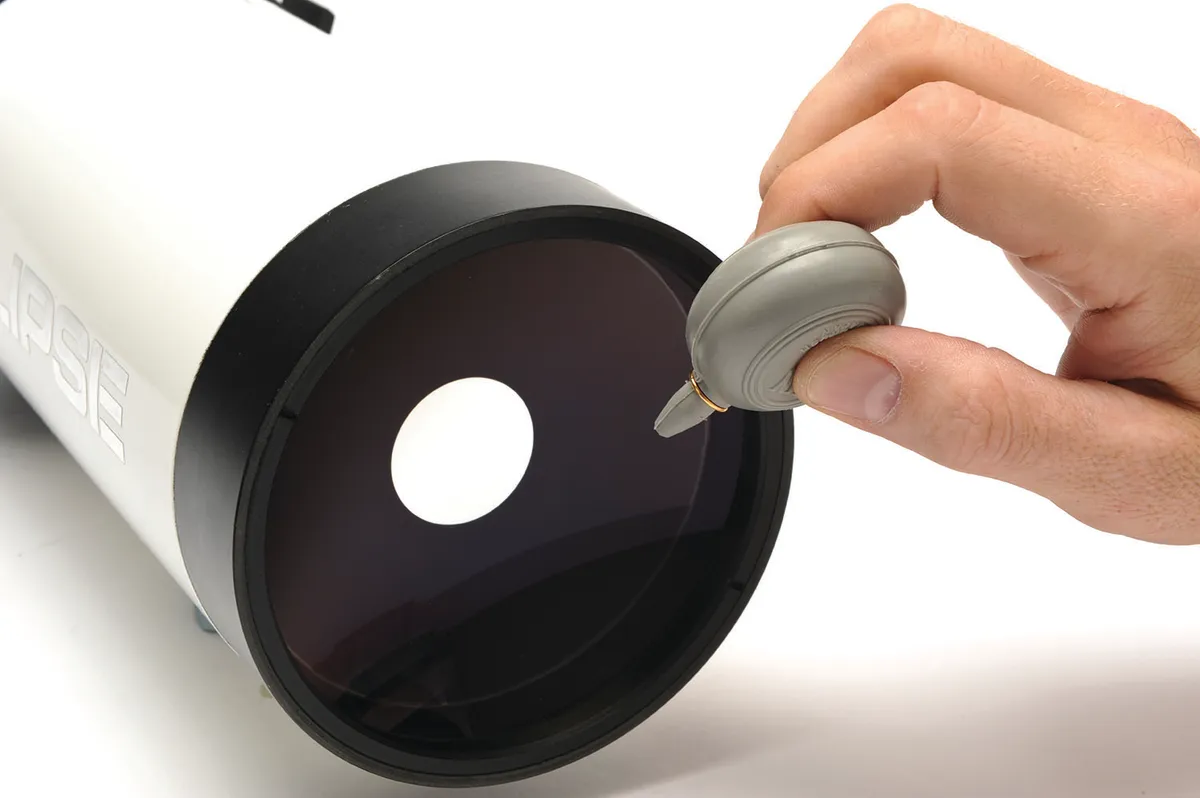
Schmidt-Cassegrain users who hate fiddly, Allen key collimating tools are well advised to install some of ‘Bob’s Knobs’ collimation thumbscrews.
Astro-Engineering’s Picostar can also lessen the pain by providing an artificial star that lets you collimate your telescope on a cloudy night without worrying about atmospheric seeing.
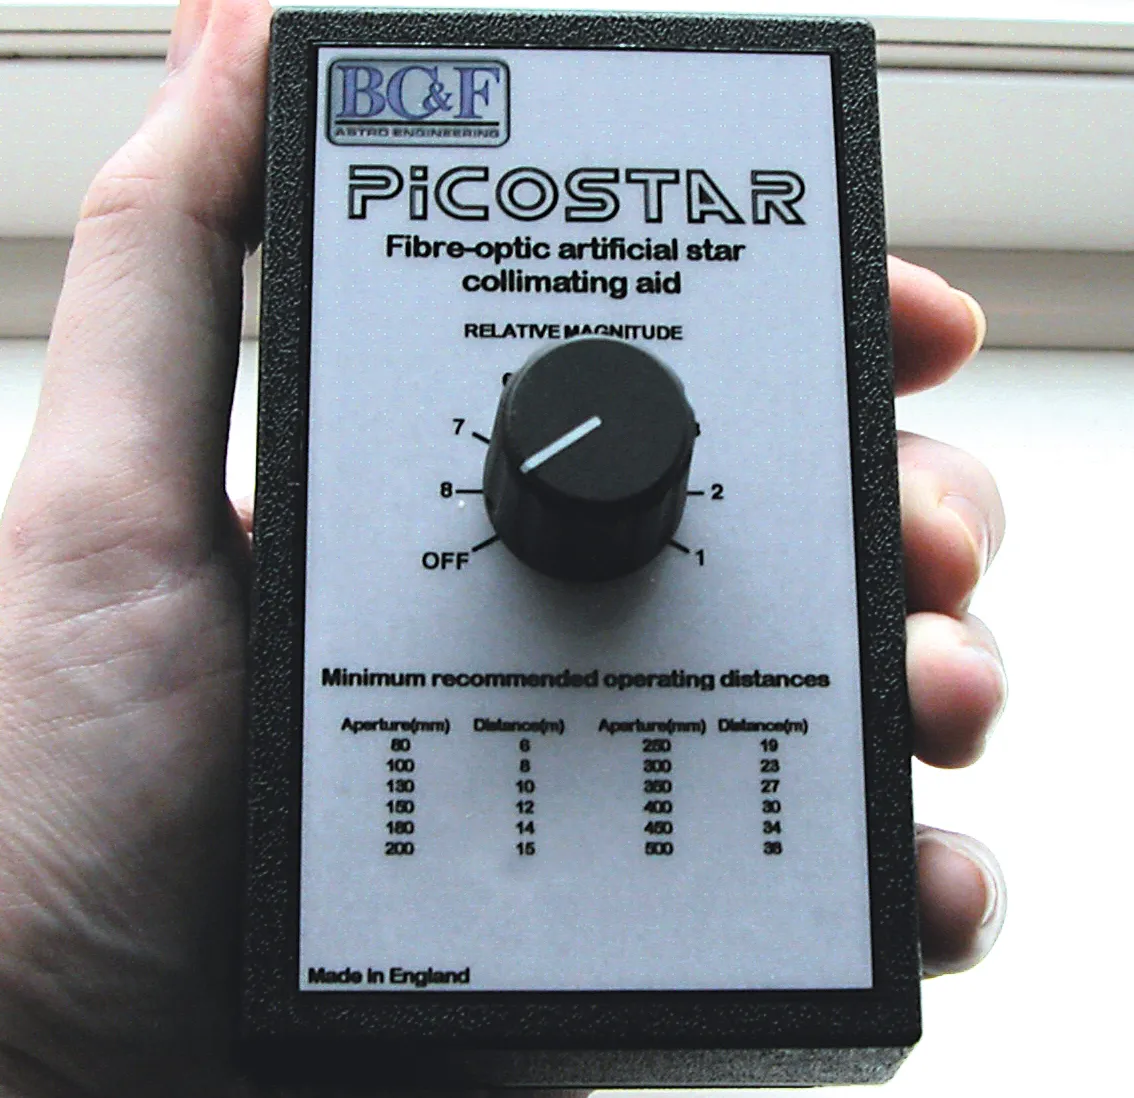
All you need is a long garden (at least a metre for every centimetre of aperture) because the point source must be far enough away to appear star-like.
The brightness is variable and it should be placed at 25m for a 250mm telescope.
You can make your own device by putting a pin-prick in tin foil stretched in front of a torch bulb, although getting the hole small enough is tricky.
You could also use a laser collimator to keep your telescope collimated.
Make sure your observing site is tidy and organised
Last but not least, give some thought to staying comfortable at the telescope on those cold, dark and damp nights.
Kneeling, bending and stretching in sub-zero conditions can drain your enthusiasm in minutes, as can tripping over an infinite number of trailing cables.
Everything you need should be within arm’s reach and at a convenient height, including the eyepiece, your torch, pen and paper, star atlas and hairdryer (for dew removal).
Improving your stargazing experience is not just about the telescope; it’s also about the workspace surrounding it.
By making a few well-planned improvements, you’ll take the stress out of setting up your scope and have a much more pleasant, stress-free time at the eyepiece.