When Sting gloomily sang "There’s a little black spot on the Sun today…" he probably didn’t know that there are at least a couple of small ones visible on the disc most days.
They're called sunspots, and provided you are safe and sensible and only use proper equipment to observe the Sun, it is possible to observe them for yourself.
Learn how to photograph the Sun
- Sign up for our latest online series, The Art of Solar Imaging, beginning April 2025

However, you must never observe the Sun with the naked eye or without proper solar-observing equipment bought from a reputable seller and which has been thoroughly checked for damage or imperfections.
A history of observing sunspots

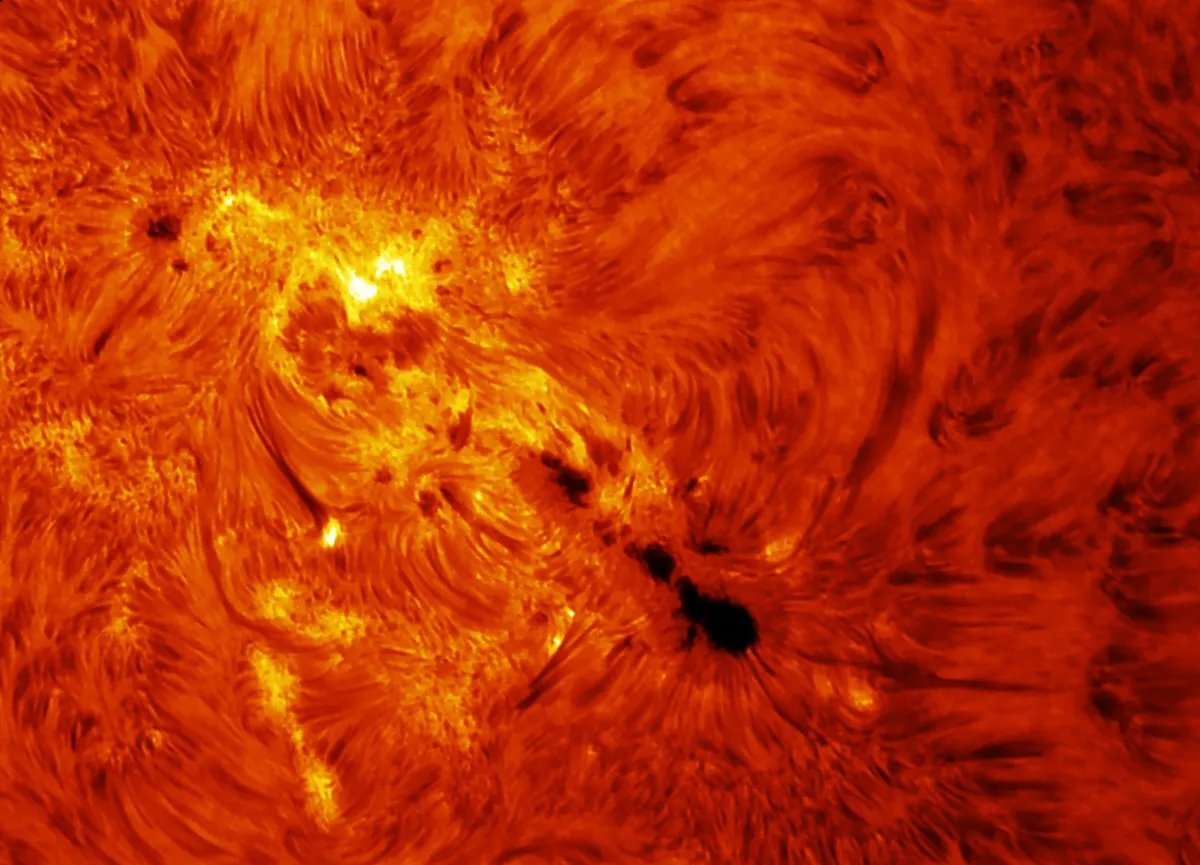
Harold Soto, Jacksonville, Florida, USA, 24 February 2024
Equipment: ZWO ASI290MM camera, Lunt LS60MT solar telescope, Sky-Watcher SolarQuest mount
Sunspots have been observed for many centuries. In 1610 Galileo used his telescope to project the Sun’s image onto a screen, allowing him to see sunspots and record them being carried across the Sun’s face.
(He didn’t damage his eyesight by looking at them directly tho, that’s just a shaggy sunspot story).
But records show that long before then others had seen sunspots with their naked eye, probably when the Sun was dimmed by cloud.
Ancient Chinese astronomy records show they were being observed and recorded in that part of the world as early as 28 BCE, and the Greek philosopher Anaxagoras may have observed one in 467 BCE.
What are sunspots?

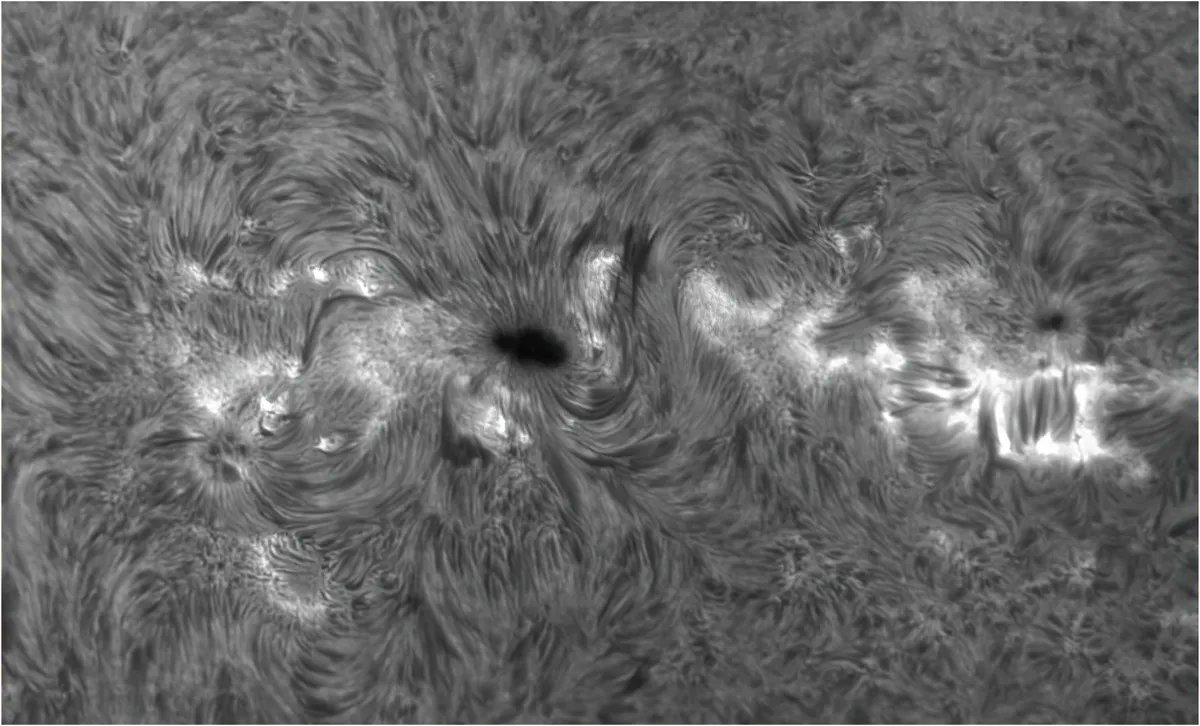
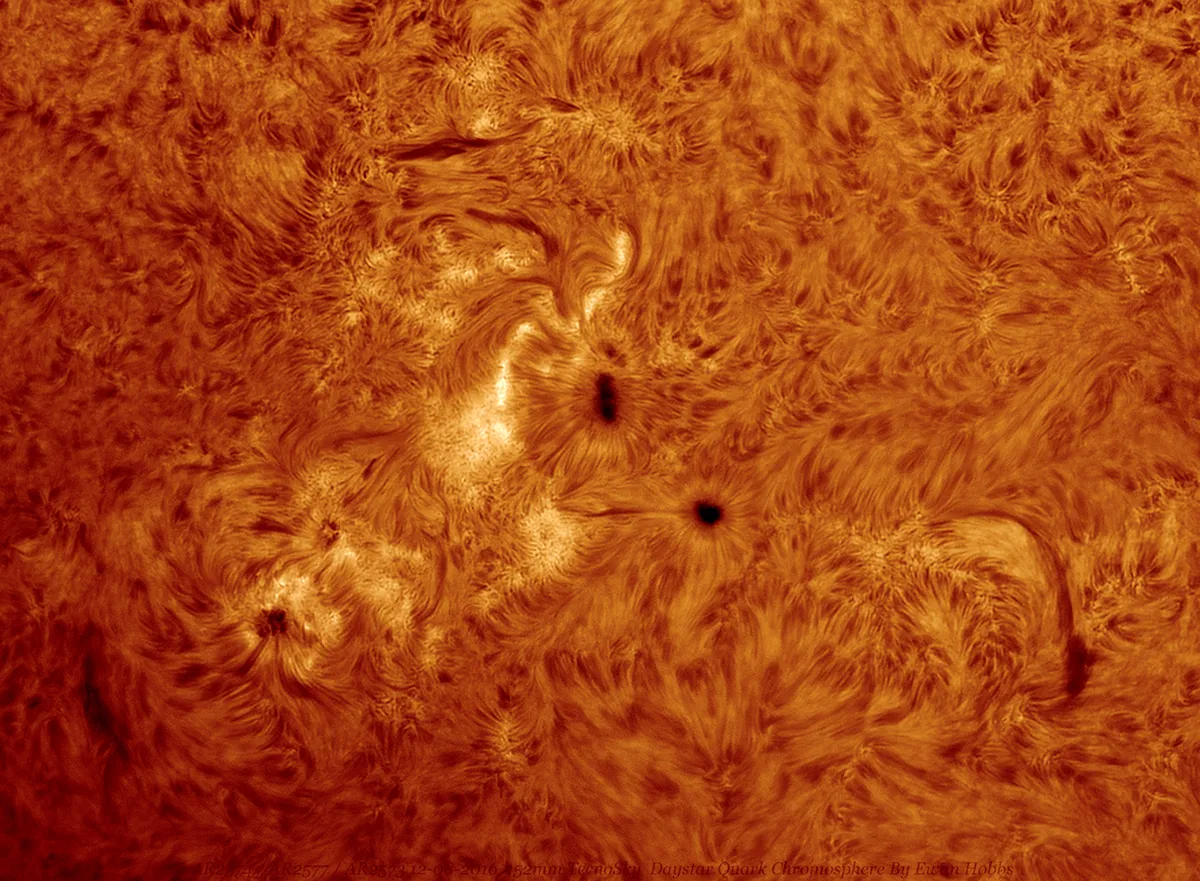
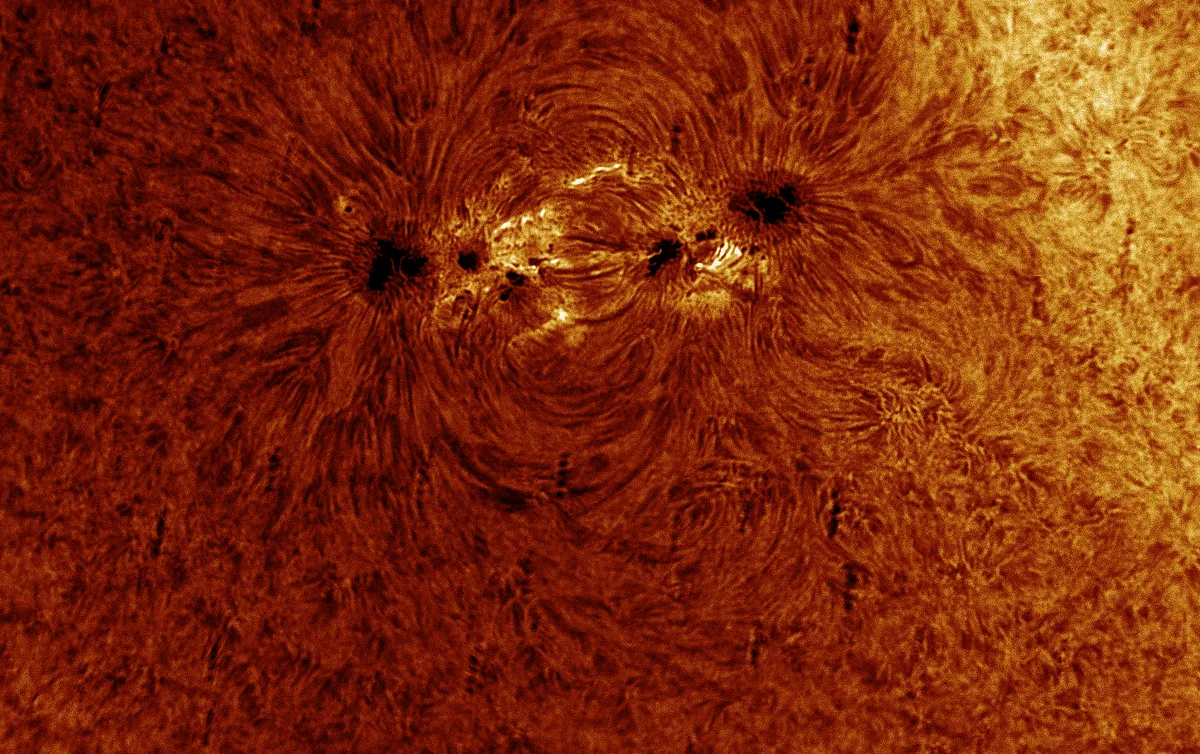
Sunspots are disturbed areas on the seething surface of the Sun, caused by increased magnetic activity.
Although sunspots are dark on images taken at visual wavelengths they only appear dark because they are cooler than the surrounding material.
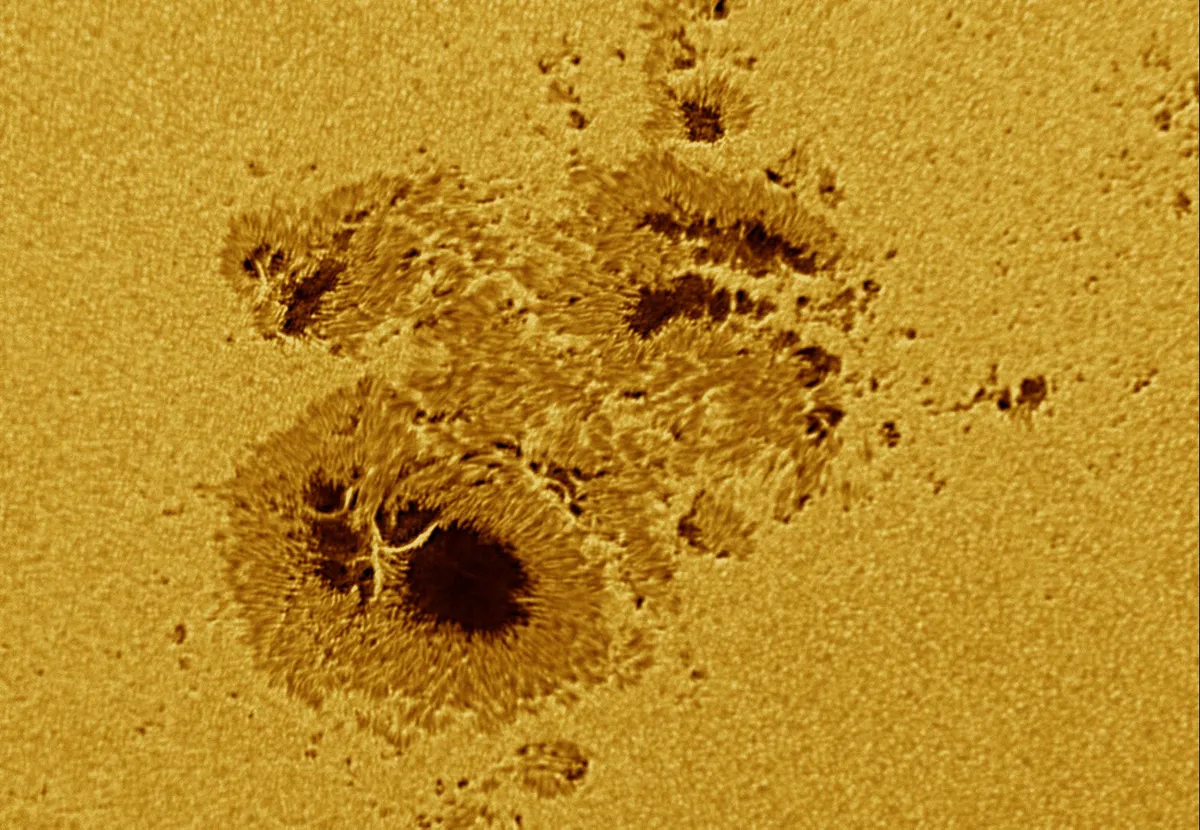
Sunspots can be large or small. Of course, when you’re talking about an object as huge as the Sun, 'small' is relative: even minor sunspots are still the size of our planet.
However, the Sun goes through cycles of activity known as a Solar Cycle.
Every 11 years or so, at the peak of that cycle, the Sun suffers a serious case of stellar acne and breaks out in many more and larger sunspots than usual.
We're currently approaching the peak of Solar Cycle 25, which is why we're seeing more activity.
Why is the Sun more active than usual?
You may have seen an increase online and in astronomy magazines of images showing sunspots on the surface of the Sun.
As the Sun approaches Solar Maximum all the dedicated solar observers who have been starved of targets for the past few years are now enjoying great views again, with equipment Galileo could never have imagined.
Their gleaming solar telescopes can see specific wavelengths, revealing unbelievable detail within sunspots and feathery, crimson prominences fluttering above the limb of the Sun.
How to see sunspots yourself
But you don’t need expensive, high-tech gear to observe sunspots. Here are a few ways amateurs can observe sunspots.
Projecting images of sunspots
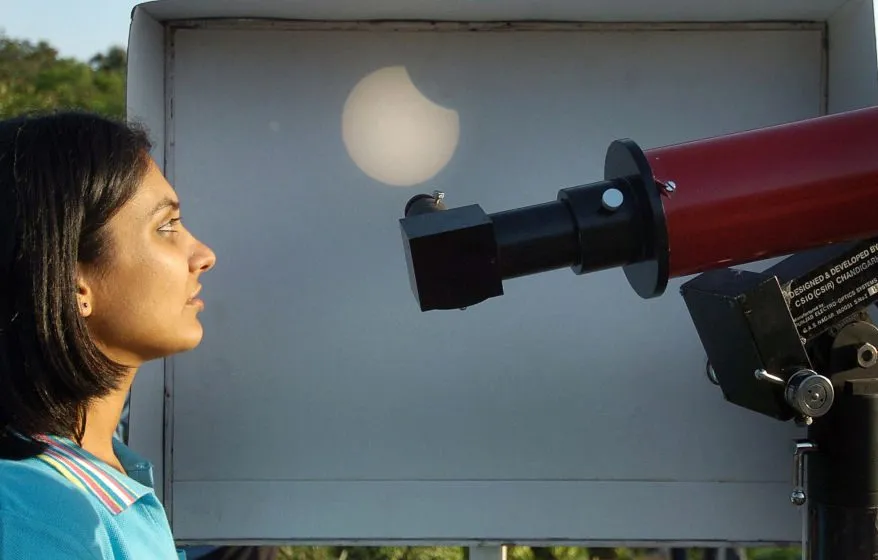
The easiest way to observe the Sun is by projecting its image, as Galileo did.
You aim your telescope or binoculars at the Sun – without looking through it - until a bright circle appears on paper or card held a short distance away from its eyepiece.
This is very fiddly at first, but once you’ve managed it a few times you’ll be able to do it easily. Do not be tempted to look through the eyepiece.
You should never observe the Sun directly unless using certified solar observing equipment.
The further away from your eyepiece the card is, the larger the Sun’s image will be, but the dimmer it will be too.
When it is just right you’ll be able to see any dark sunspots on the Sun’s disc very clearly.
You can also build your own solar projector to help make the task a bit easier.
Solar filters

You can also use a dedicated solar filter, made of a special material that blocks over 99% of the Sun’s light.
These allow you to look at the Sun directly through your telescope in perfect safety, and zoom in on sunspots using its high-power eyepieces to see very fine detail.
This material fits over the front of your telescope’s tube, and you can buy it either pre-mounted in a snug-fitting embroidery ring-like frame, or as a loose sheet that you make a mounting for yourself.
Depending on which material you buy the Sun will look either a cold blue-white or a warm orange through your telescope.
It should be obvious that you must never look at the Sun directly through any instrument that isn’t fitted with a filter.
And only ever buy certified solar filters from a reputable supplier. Accept no homemade or secondhand filters.
Check your filter carefully for holes and scratches before use. If you find any, discard the filter.
Did you burn holes in paper with a magnifying glass as a kid? Now imagine the heat of the Sun concentrated into your jelly-filled eye by your telescope...
See sunspots online
Even if you have no equipment there are now many websites and apps that display live images of the Sun taken by terrestrial solar observatories or orbiting satellites, so with just a couple of clicks you can follow sunspots 24 hours a day.
Check out NASA's Solar Dynamics observatory and the NASA SOHO mission for amazing images of the Sun.
Solar telescopes

If you have the budget for them and you really want to get serious about observing sunspots, you could invest in a solar telescope.
Solar telescopes are all-in-one, ready-to-go instruments that are specifically designed for safe observing of the Sun.
For more info, read our guide to the best solar telescopes.
Approaching solar maximum
What can we expect as we approach Solar Maximum? We're see progressively larger and more complicated displays of sunspots.
Some form in isolation, others merge together to form huge trails visible to the naked eye if the Sun is dimmed by a misty sunrise or sunset.
There’s something else to consider too. As more sunspots appear the chances of major displays of aurora lights will increase, as we saw during the 10 May 2024 aurora display.
There’s a very good chance that this solar maximum will trigger more auroral storms: displays so vivid and powerful they are seen across the whole of the UK and even further south.
Observing sunspots: the next step
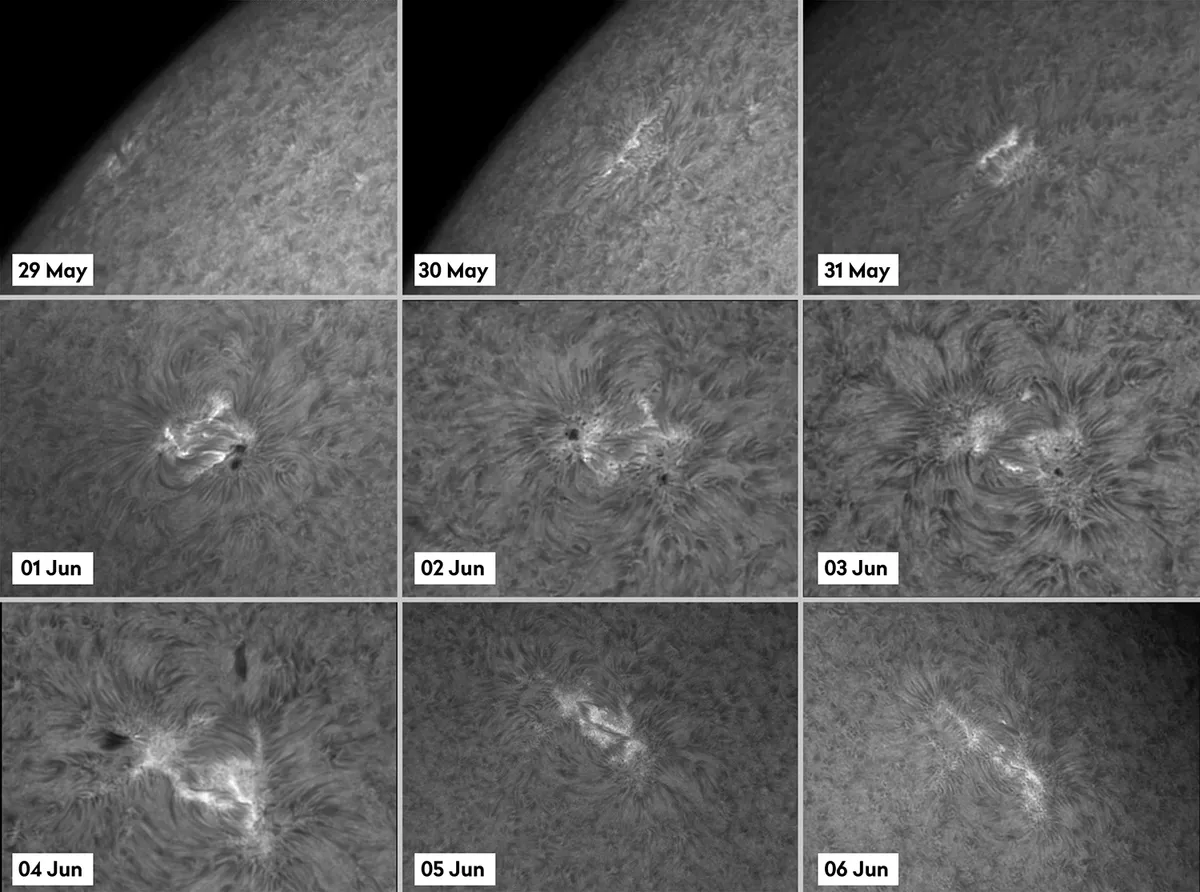
Once you've got the hang of observing sunspots safely, you might like to try tracking a group over time and noting how they move or change on the Sun's surface.
During the Sun's solar cycle, it goes from displaying few if any sunspots, before ramping up in numbers to a point where there is a regular procession of spot groups across the Sun’s Earth-facing hemisphere.
The time taken for the spot group numbers to go from minimum to maximum, and back to minimum again, is approximately 11 years.
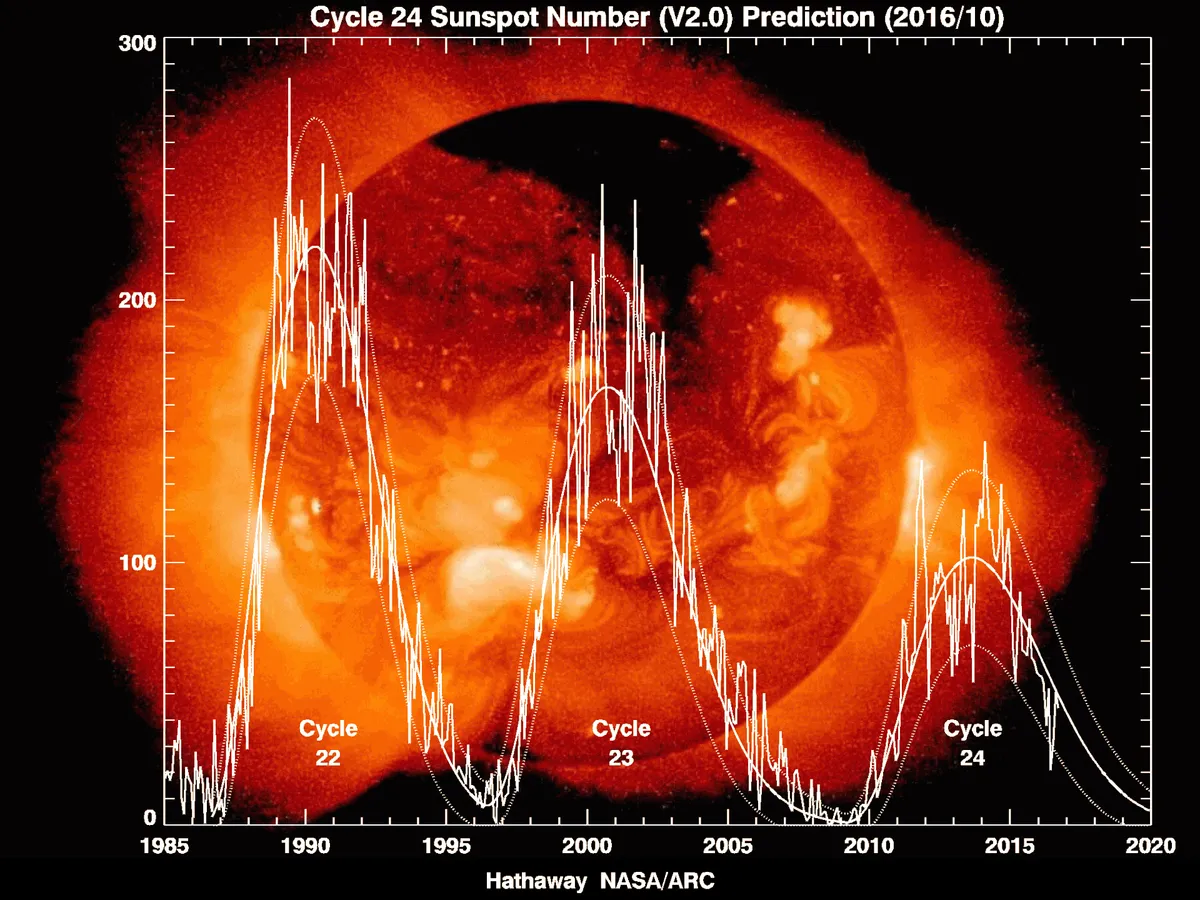
We’re currently in the build-up to a maximum, with the peak of Solar Cycle 25 expected around 2025.
As sunspot groups are now reasonably common, a good challenge is to follow one or more groups on a daily basis, monitoring for changes.
The Sun rotates differentially, its equatorial rotation being 25 days, and the rotation in its polar regions being 35 days.
Sunspot groups appear at the eastern limb and appear to move across the Sun’s disc on a path parallel to the solar equator, which itself may appear tilted north, south or be presented sideways on to us.
Sunspot observations can be done using a telescope with the correct filters. The most common option is to cover the entire aperture of the scope with a certified white-light filter.
However, sunspot monitoring can also be done with narrowband filters such as hydrogen-alpha (Ha) and calcium-K (Ca-K).
For more on solar filters, read our guides on how to observe the Sun and how to photograph the Sun.
You should never observe or image the Sun with the naked eye or any unfiltered optical instrument.
Finding then tracking sunspots
Finding a spot on the limb can be a matter of being lucky with timing and the weather. Often you’ll be picking up your first view of a spot after it has rotated well onto the disc.
Once found, sketch or image the spot on as many days as possible, and maintain the same equipment setup between sessions.
If you manage to grab a number of results you can animate them together.
For sketches, scan each one into a computer and use an animation-capable software to make a flick-book sequence.
With each observation, make a note of the date, time and orientation of the view.
Programs such as WinJUPOS and TiltingSun can help. The Gong H-alpha network is another great repository, which will show you current activity.
To keep your Sun images aligned with one another, orientate the camera so that when slewing an equatorial mount in RA (Right ascension), features move parallel to the base of the imaging frame.
Programs such as TiltingSun can assist with the orientation of altazimuth mounted setups.
The weather can play havoc with an observational sequence like this and it may take many attempts to get a run of daily results.
Achieving a 12–13 day run across the disc may seem impossible at times. However, as ever in astronomy, persistence and tenacity are the key to success.
If you do manage to observe or image sunspots, let us know by sending us your images or get in touch via Facebook, Twitter or Instagram.
This guide originally appeared in the April 2022 issue of BBC Sky at Night Magazine.