A lunar eclipse is one of the most wonderful and easily accesible astronomical events.
But what about photographing it? Have you ever tried to photograph a lunar eclipse?
If you're familiar with how to use a DSLR camera, this branch of astrophotography should come pretty easy.
For more advice, read our guide on how to observe the Moon and how to photograph the Moon and when the next full Moon is visible.
Or find out how to photograph the Moon with a smartphone camera.
Find out when the next eclipse is visible.
What is a lunar eclipse?
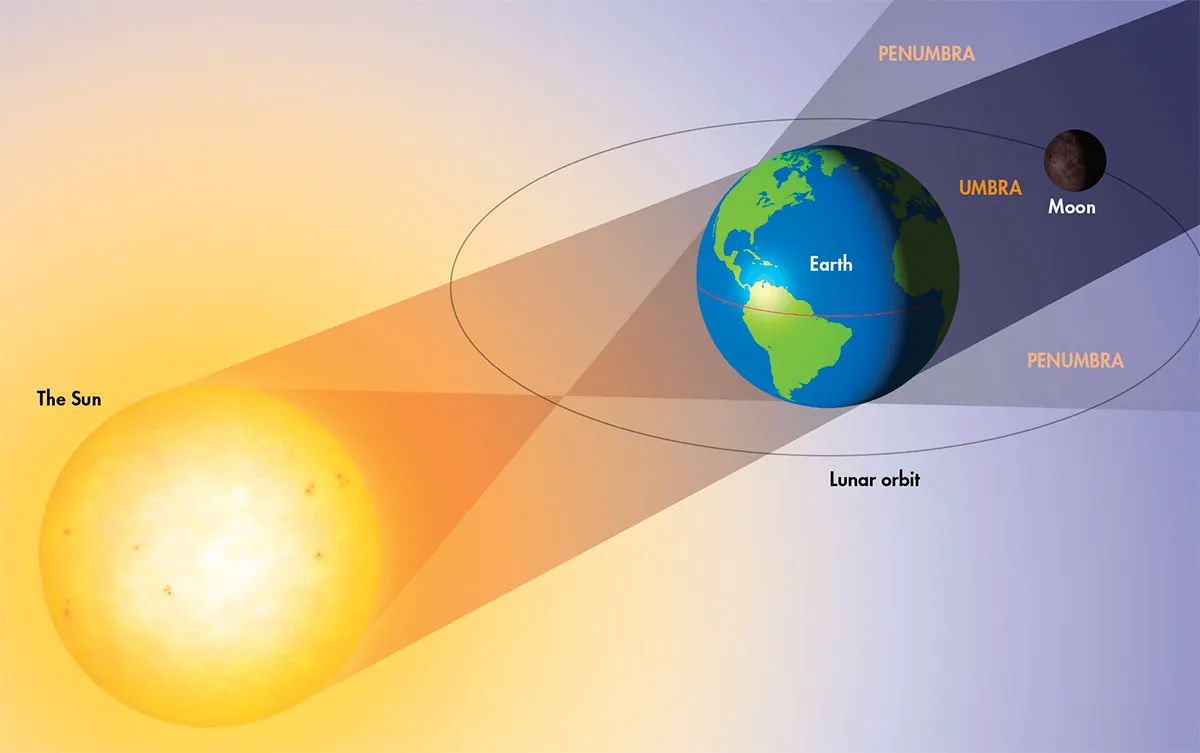
A lunar eclipse occurs when the full Moon passes into the shadow that Earth casts in space.
Despite the shadow being quite large at the distance of the Moon, the 5º inclination of the Moon’s orbit relative to that of Earth means that most full Moons miss the shadow completely.
They simply pass above it or below it.
The shape of this shadow is determined by the Sun appearing to us as a circular extended light source, with a diameter of 0.5º.
This creates a shadow of two parts: a dark central portion called the umbra and a less intense portion called the penumbra.
If you piloted a spacecraft into the umbra the Sun’s disc would be completely hidden behind the Earth, but inside the penumbra only part of the Sun’s disc would be hidden.
Entering the penumbra would result in a drop in light levels, which would become more noticeable as you moved towards the umbra.
If Earth were airless, the umbra would be really dark.
However, Earth’s atmosphere refracts sunlight and this partially illuminates the umbra.
This light is from the red end of the spectrum – shorter wavelengths in the blue region get scattered – so the umbral shadow appears reddish in colour, essentially illuminated by a circle of sunsets and sunrises.
How and when to photograph a lunar eclipse
As the leading edge of the Moon enters the penumbral shadow, the penumbra tends to be very weak, and at its outer extremes you are not likely to be notice this transition.
As the Moon passes towards the umbra, the amount of light it receives decreases.
By taking correctly exposed photographs of the Moon’s disc at regular intervals – say a minute or two apart – and animating them, this gradual darkening of the penumbra can be revealed.
Photographing the penumbra
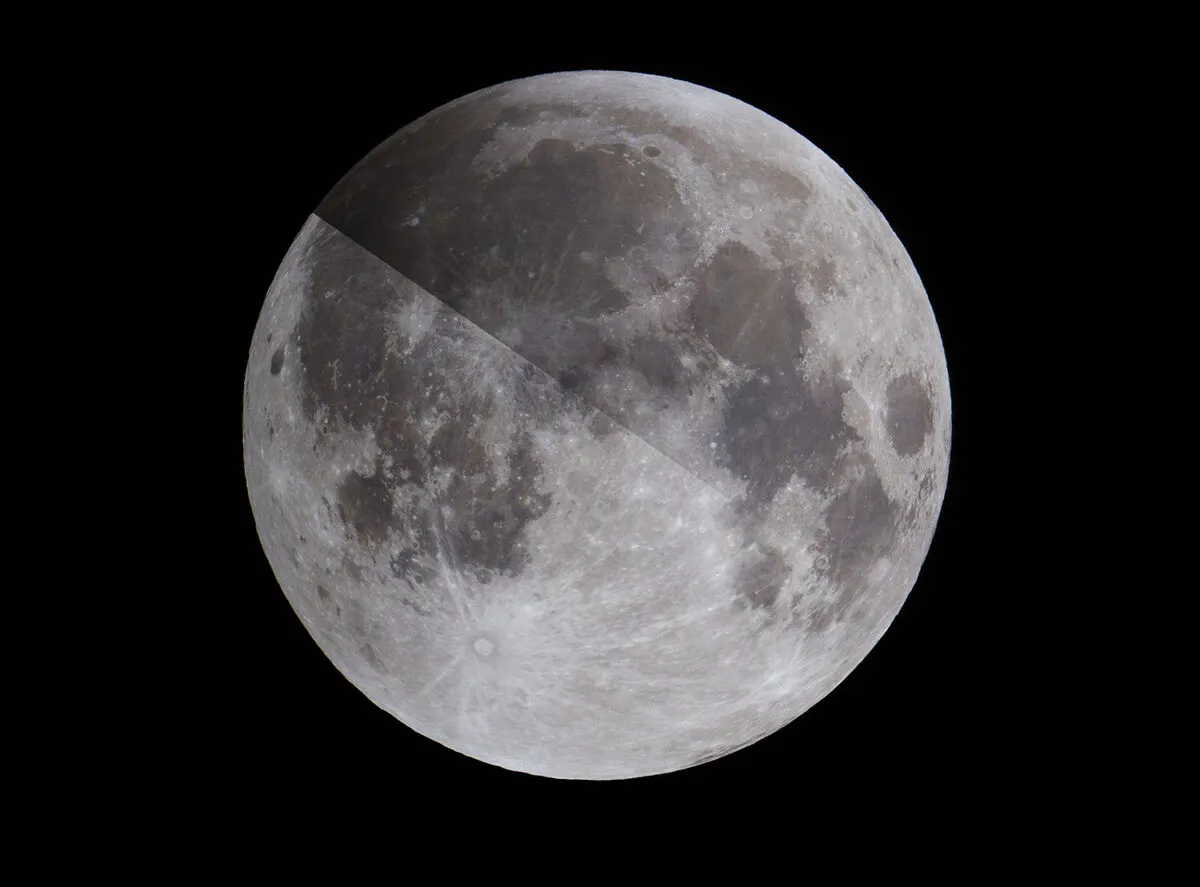
The penumbra is about 0.5º wide, similar to the apparent diameter of the Moon. It takes the Moon just less than an hour to cross it.
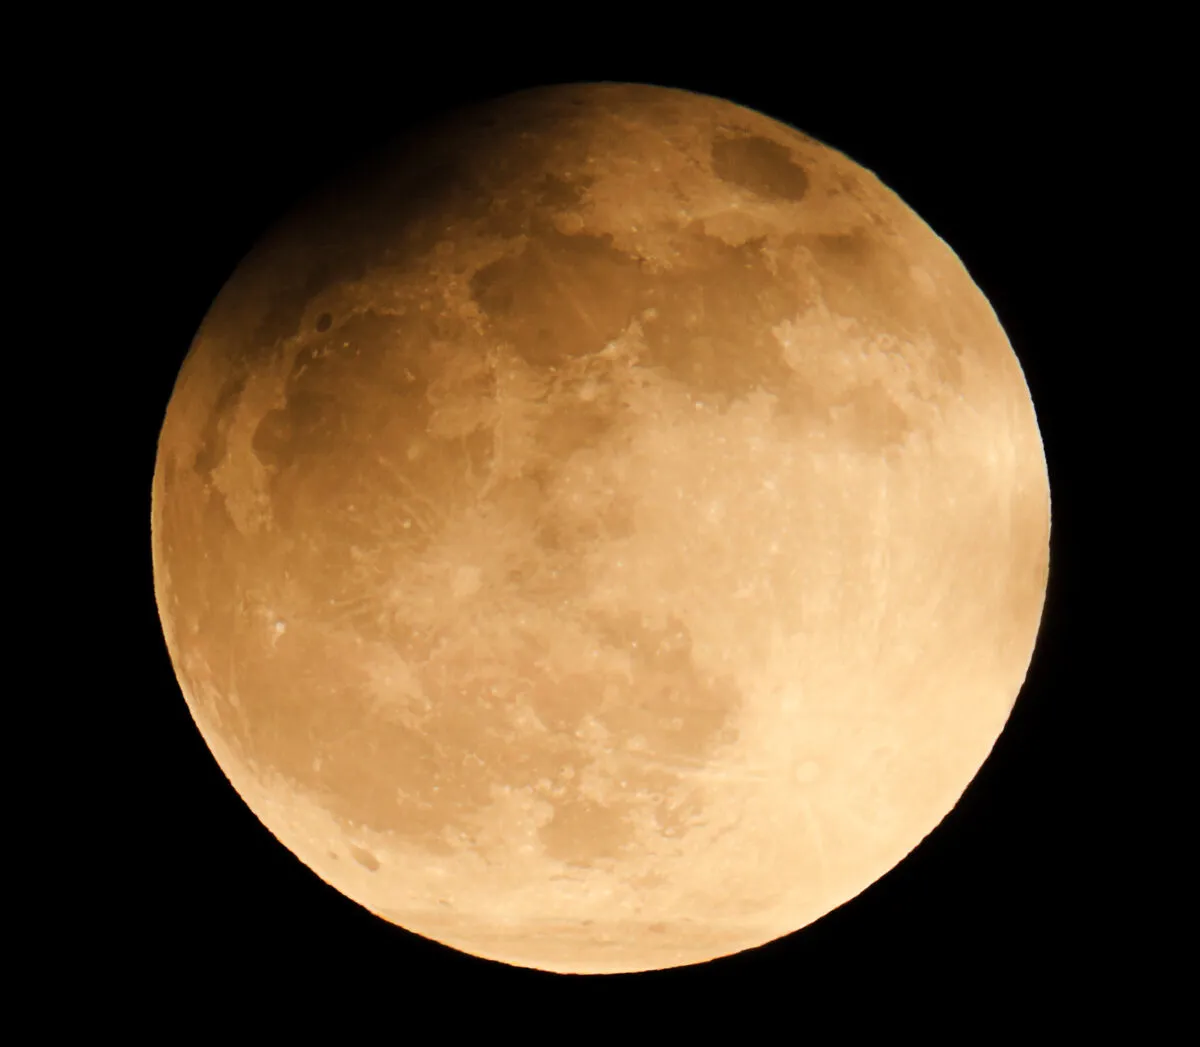
After first contact, the umbral partial phase begins.
The visual appearance of the Moon looks quite odd after first contact, almost as if something’s taking a melting bite out of it.
Expose a photo for the bright portion of the Moon’s disc and the umbral shadow will appear dark, without features.
If you increase the exposure red-hued detail will appear inside the shadow, but the bright surface will become overexposed.
Photographing the partial phase
During the partial phase, a low ISO of 200-400 is ideal.
A lens with a focal length of 100mm will produce a recognisably eclipsed disc, but a 1,000mm focal length lens will really bring out some stunning detail.
A low ISO will also result in a better tonal range. This is really important for the edge
of the umbra, where the colours can be glorious.
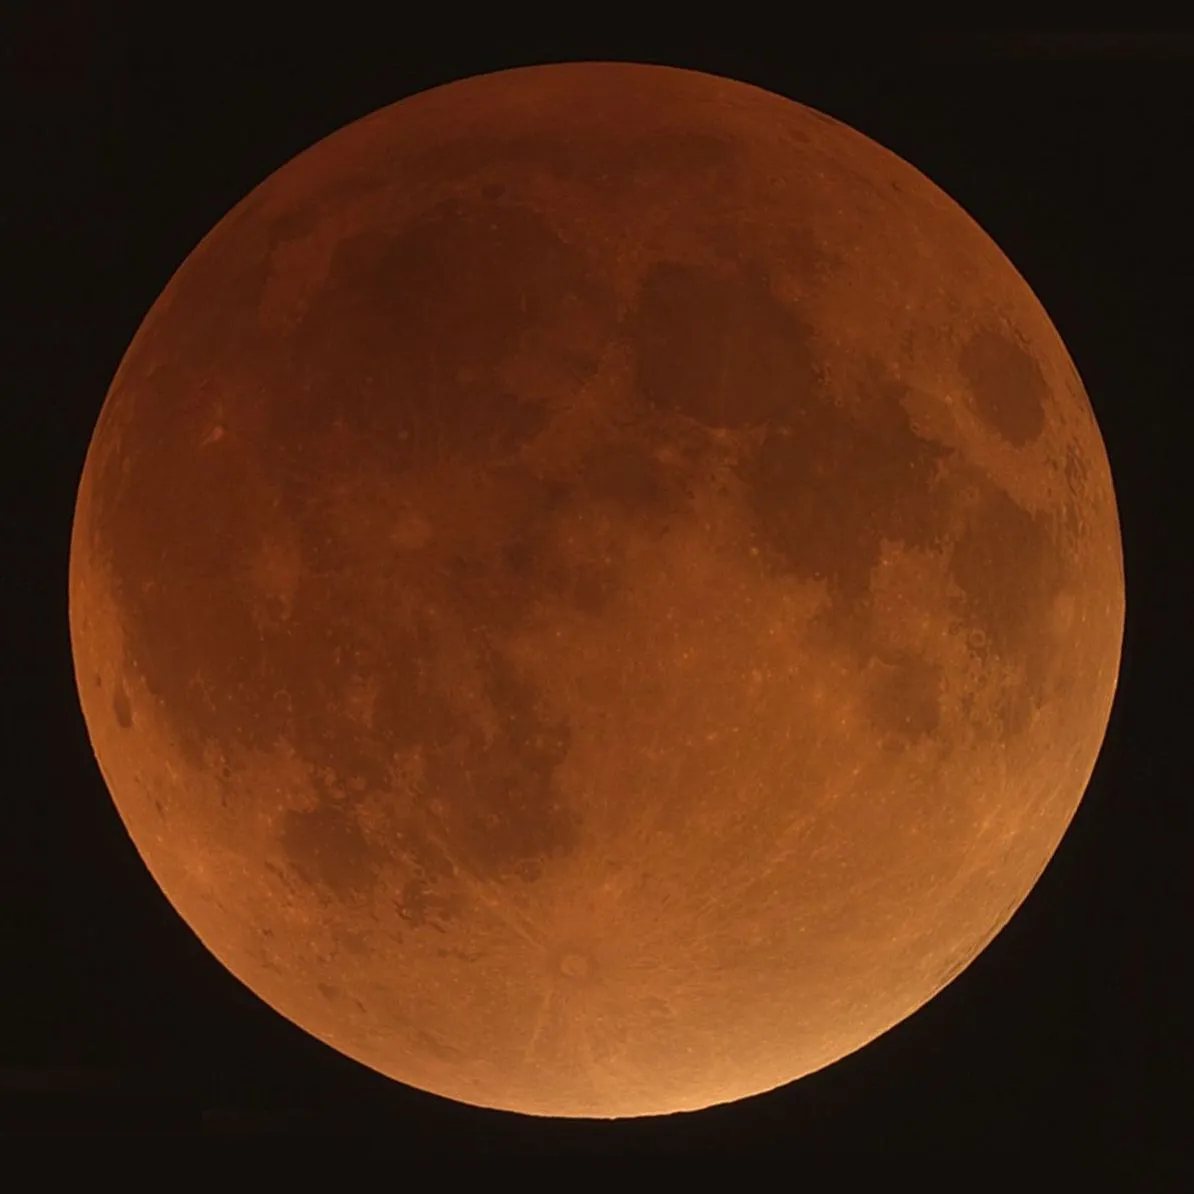
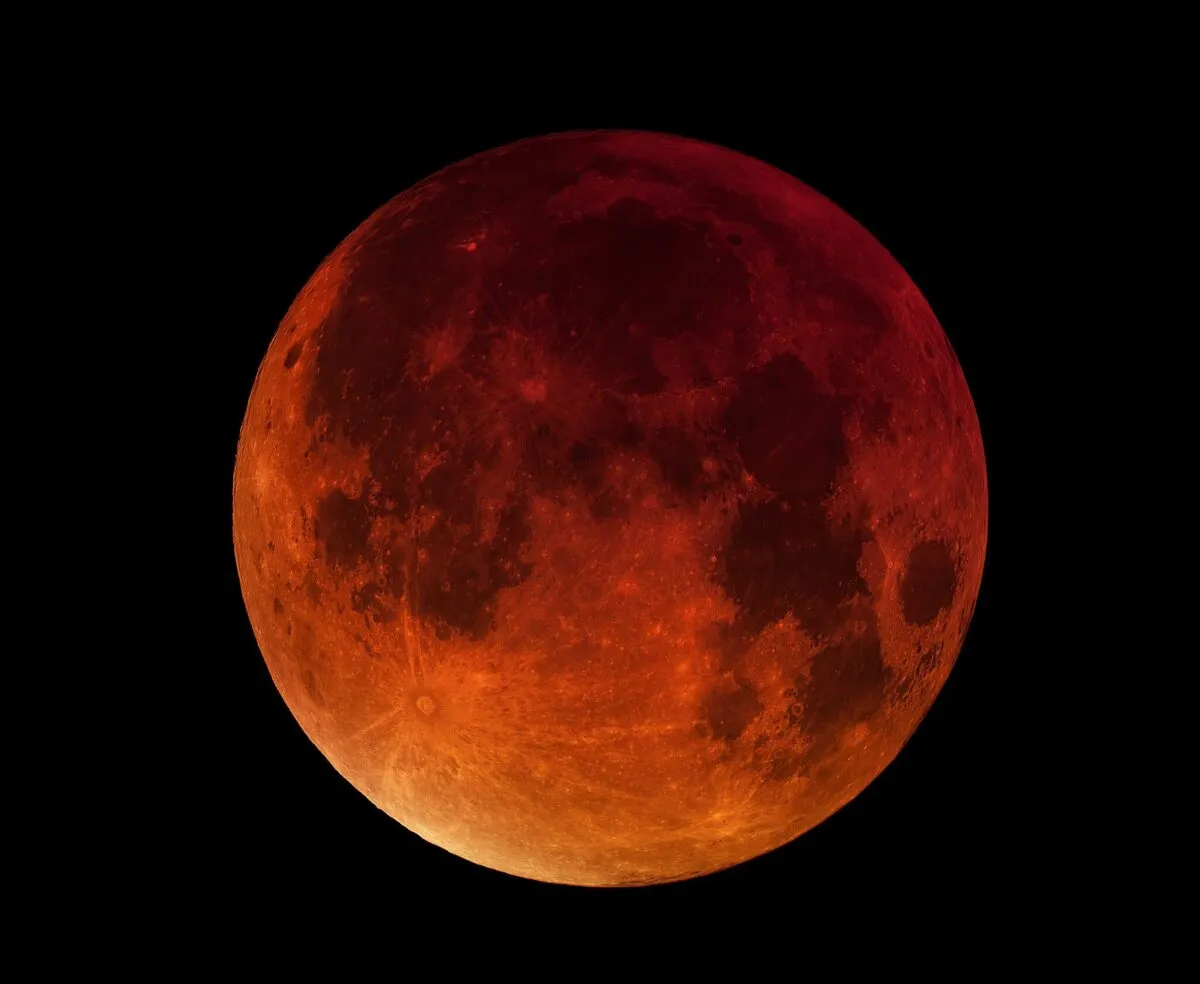
The umbra itself may appear anything from a golden orange to a deep blood red.
At the edge, subtle yellows and grey-blue bands may be recorded.
The blue seen here is due to light refracting through the Earth’s ozone layer; in this case it’s the red light that gets scattered, leaving blue to pass through.
The last portion of the Moon’s disc to darken will be that close to the southeast limb.
Total immersion in the umbral shadow is achieved at second contact.
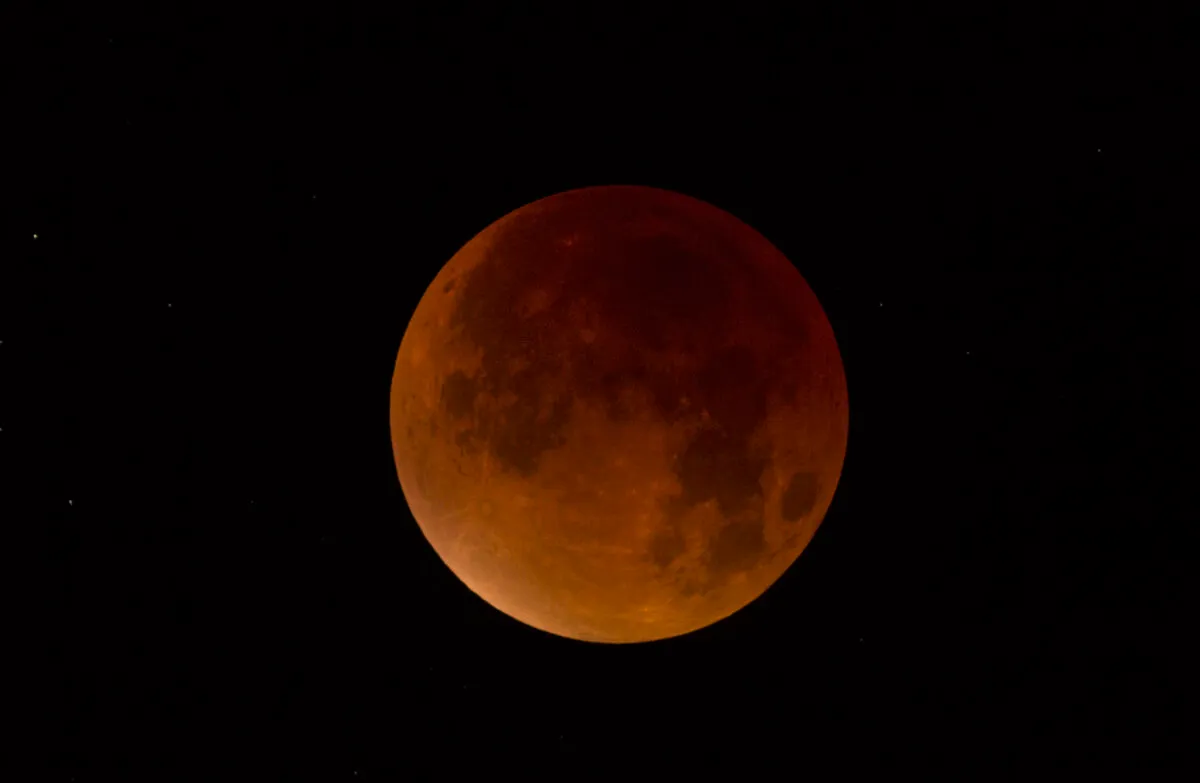
Photographing totality
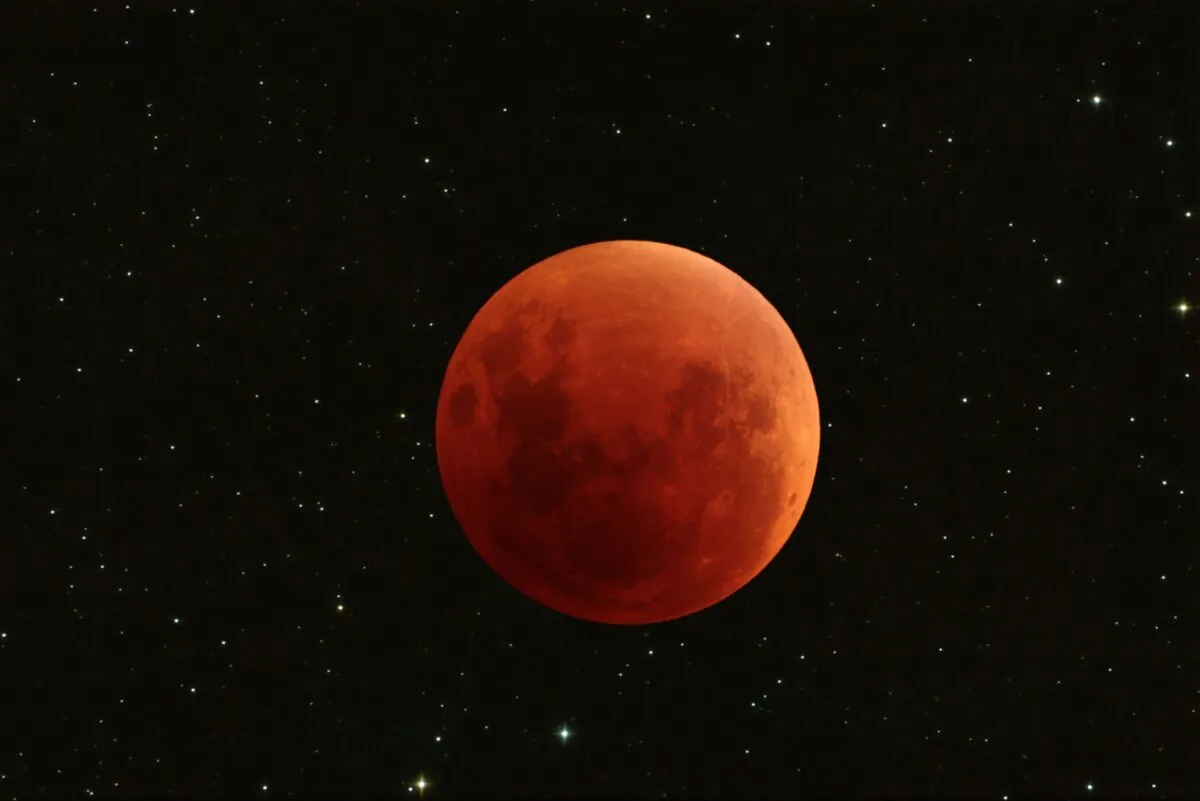
Totality, as it is known, is easier to deal with photographically as there’s no bright surface visible to overexpose.
The exact colour and darkness of totality isn’t easy to predict.
Some are very dark with the Moon virtually disappearing from view.
Others are light, showing a golden-yellow colour. The variation means that reviewing camera feedback is really important to get the exposure right.
The technical bits
It’s important to check the camera’s histogram regularly. A good result shows the tone value ‘mountain’ peaking between the left and right extremes of the graph (the black and white points).
If they sit hard against either end, then your image is either underexposed or overexposed.
Keeping the lens aperture wide and exposure short will alleviate problems caused by the Moon’s movement or from wind shake.
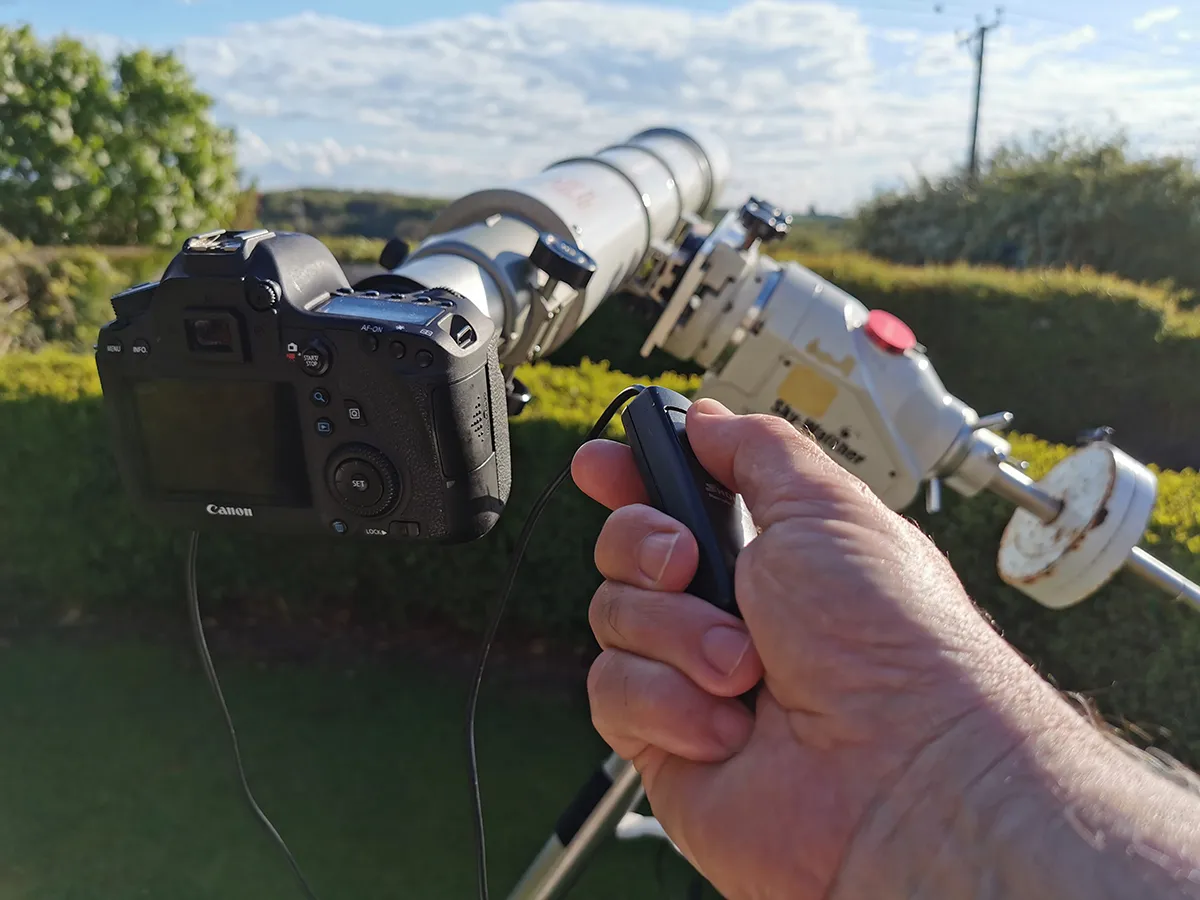
A fixed tripod is great but a driven equatorial mount makes life easier, especially for the longer exposures needed during the totality.
A remote shutter release will alleviate shakes caused by physically having to press the shutter button.
When totality finally arrives, you will need to raise the camera’s sensitivity.
This is done by raising the ISO or lengthening exposures.
A dark totality can surprise, so be prepared. The best advice is not to panic: there’s plenty of time to take it all in: totality in a lunar eclipse lasts over an hour.
Totality officially ends with third contact. After this the second umbral partial phase begins.
This continues until fourth contact, and the Moon finally leaves the penumbral shadow.
Photograph a lunar eclipse with a smartphone
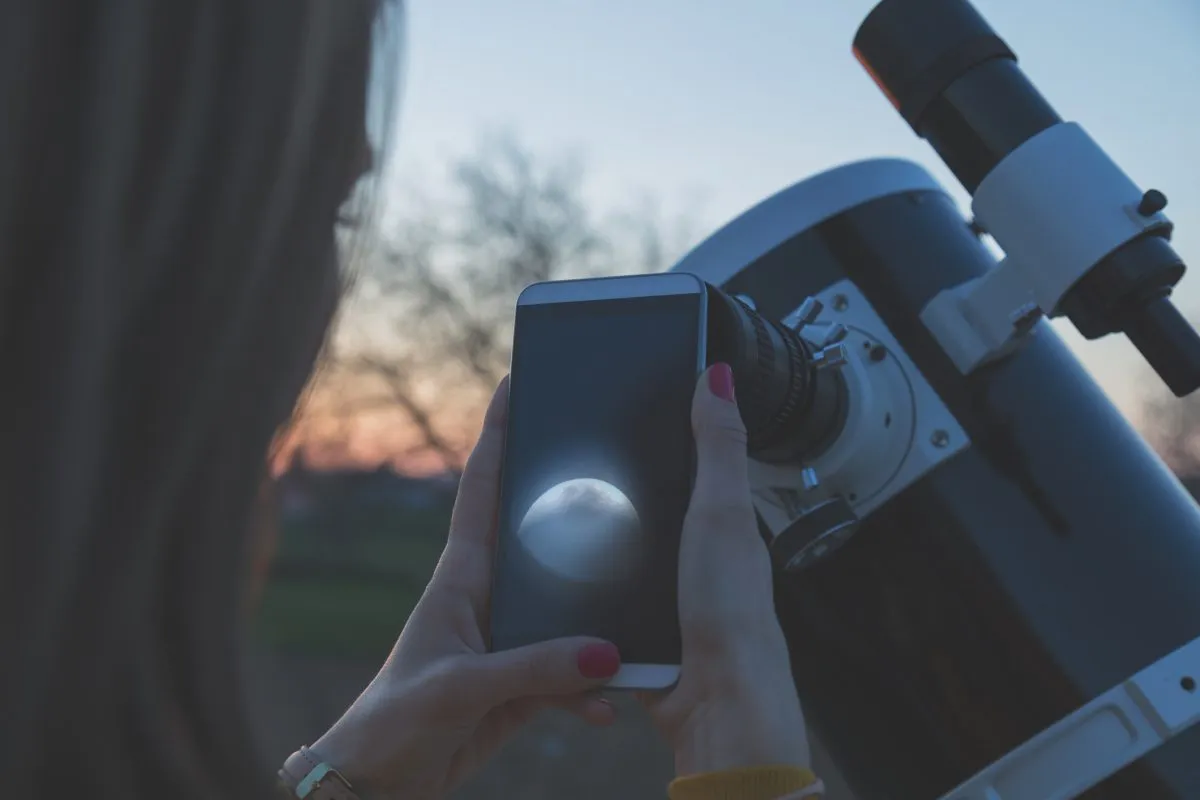
Photographing the Moon with a smartphone is best done by pointing the phone down the eyepiece of a telescope.
A low- or medium-power eyepiece works best, though you’ll also need a steady hand to line everything up.
Start by holding the phone some distance away from the eyepiece and gradually bringing it closer, while guiding using the phone’s screen.
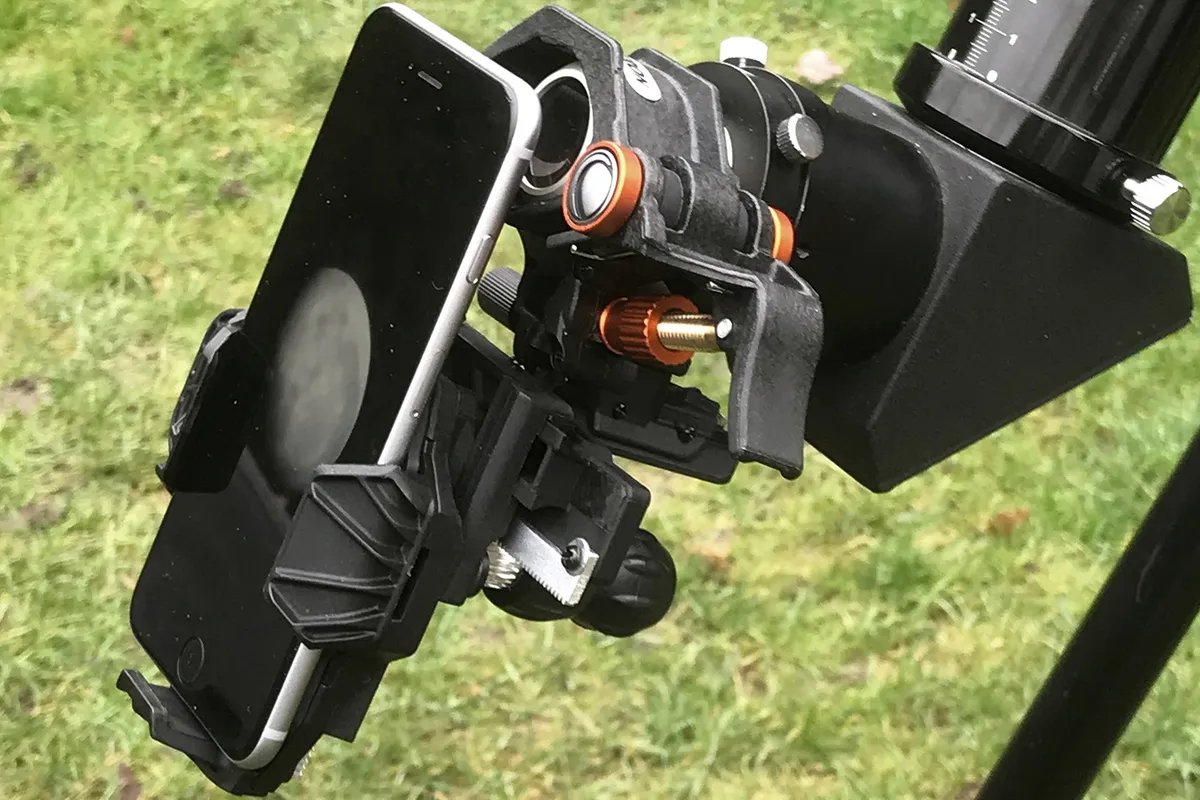
Or, you could use a smartphone telescope adapter.
Once in position, carefully press the shutter button.
If you have headphones with a volume control on the lead, try plugging them in and using the controls while in the camera app.
On some phones these controls trigger the shutter and thus reduce camera shake.
Your camera’s automatic functions should adjust the settings for you, but remember to turn the flash off beforehand.
This should work well for the partial phases but the totally eclipsed Moon may be a bit hit and miss as it’s difficult to say just how dark it’s going to be. The best advice here is just give it a go.
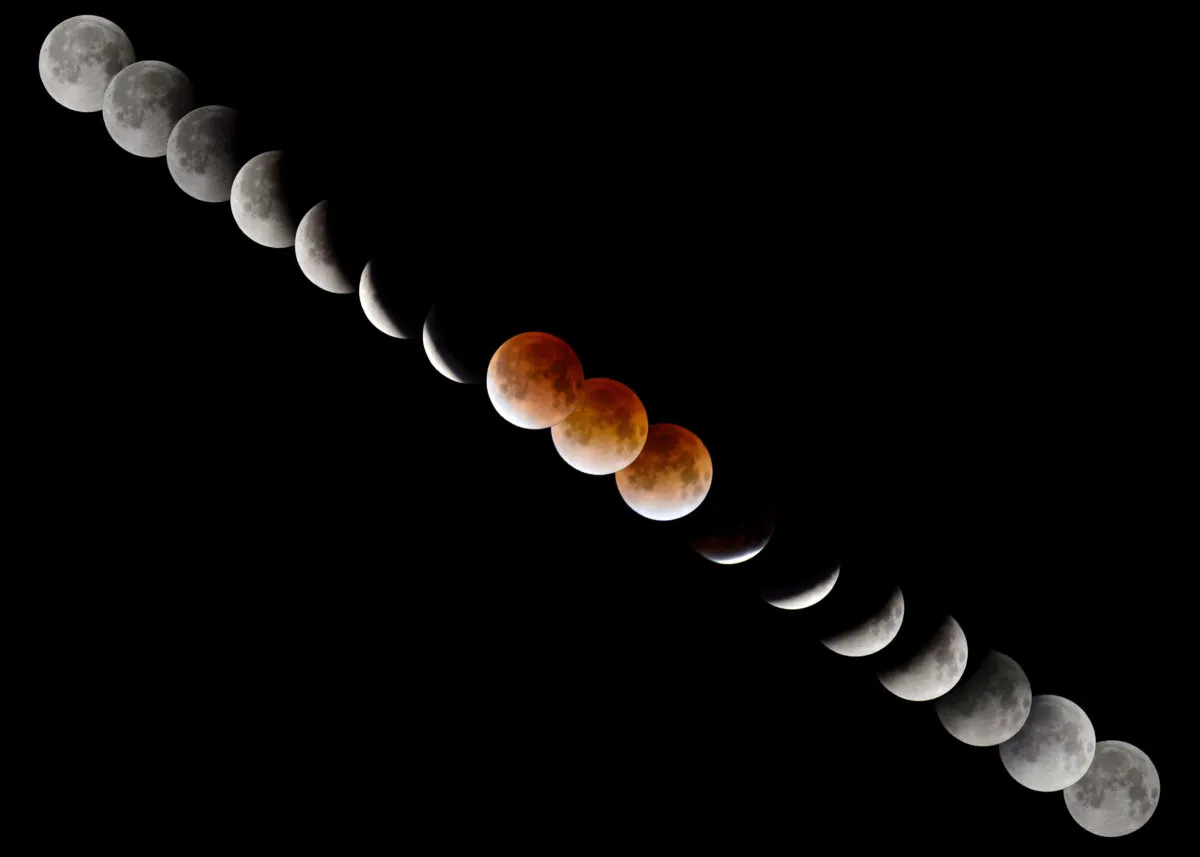
Photograph a lunar eclipse sequence
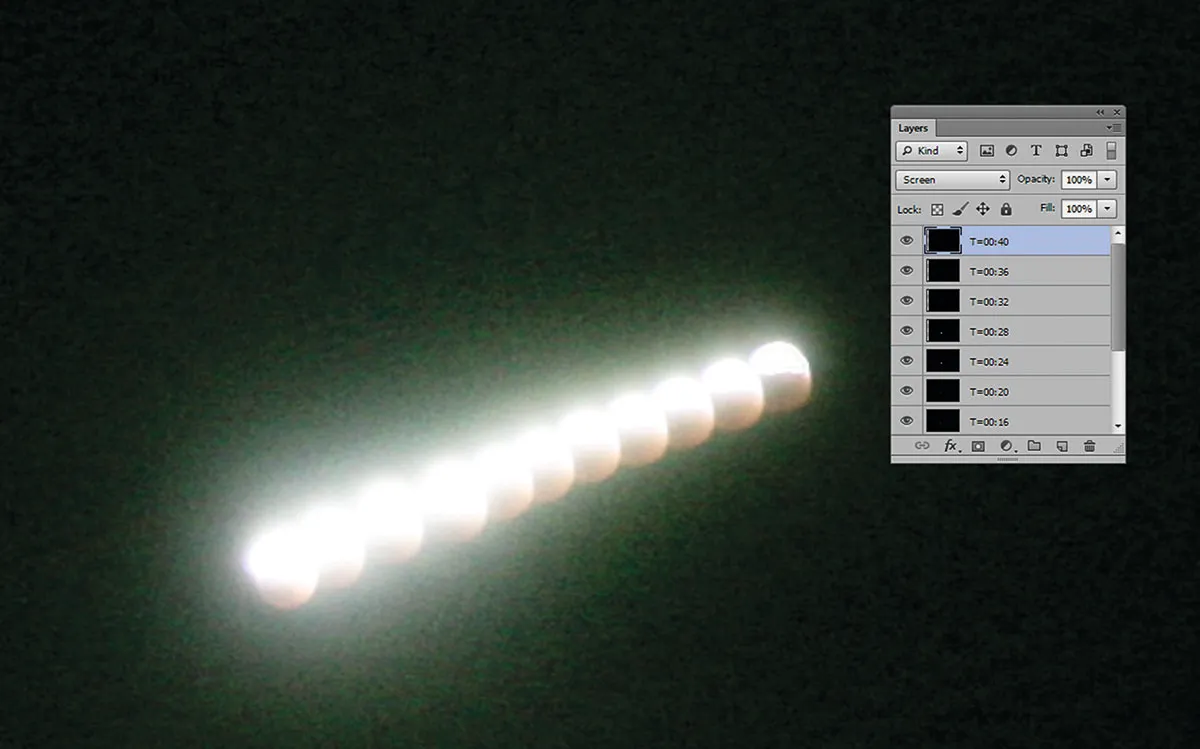
A wide-field camera on a fixed tripod can produce a stunning eclipse sequence.
Use a low ISO of 200-400 and expose so the full Moon appears bright to the point of being almost overexposed.
Take shots at regular intervals, say four minutes apart.
Load each image into a layer-based editor and draw a circular selection around the Moon with 2-5 pixel feathered edges.
Invert the selection, create a new layer above and fill with black.
Save these Moon-only shots with a sequence number – for example 001.jpg, 002.jpg and so on.
Load each Moon-only image into a separate upper layer with blend mode set to Lighten.
Merge with the layer below.
Pick an original image with a good sky and load as the top layer; set its blend mode to Lighten too.
A 12mm or shorter lens, aligned so that south is at the left frame edge, should contain the entire eclipse including the penumbral phase
A 20mm lens should be able to cover the umbral phase.
Have you captured an image of a lunar eclipse? We'd love to see it! Share it with us via Facebook, Twitter or Instagram, or send it to us via contactus@skyatnightmagazine.com.
