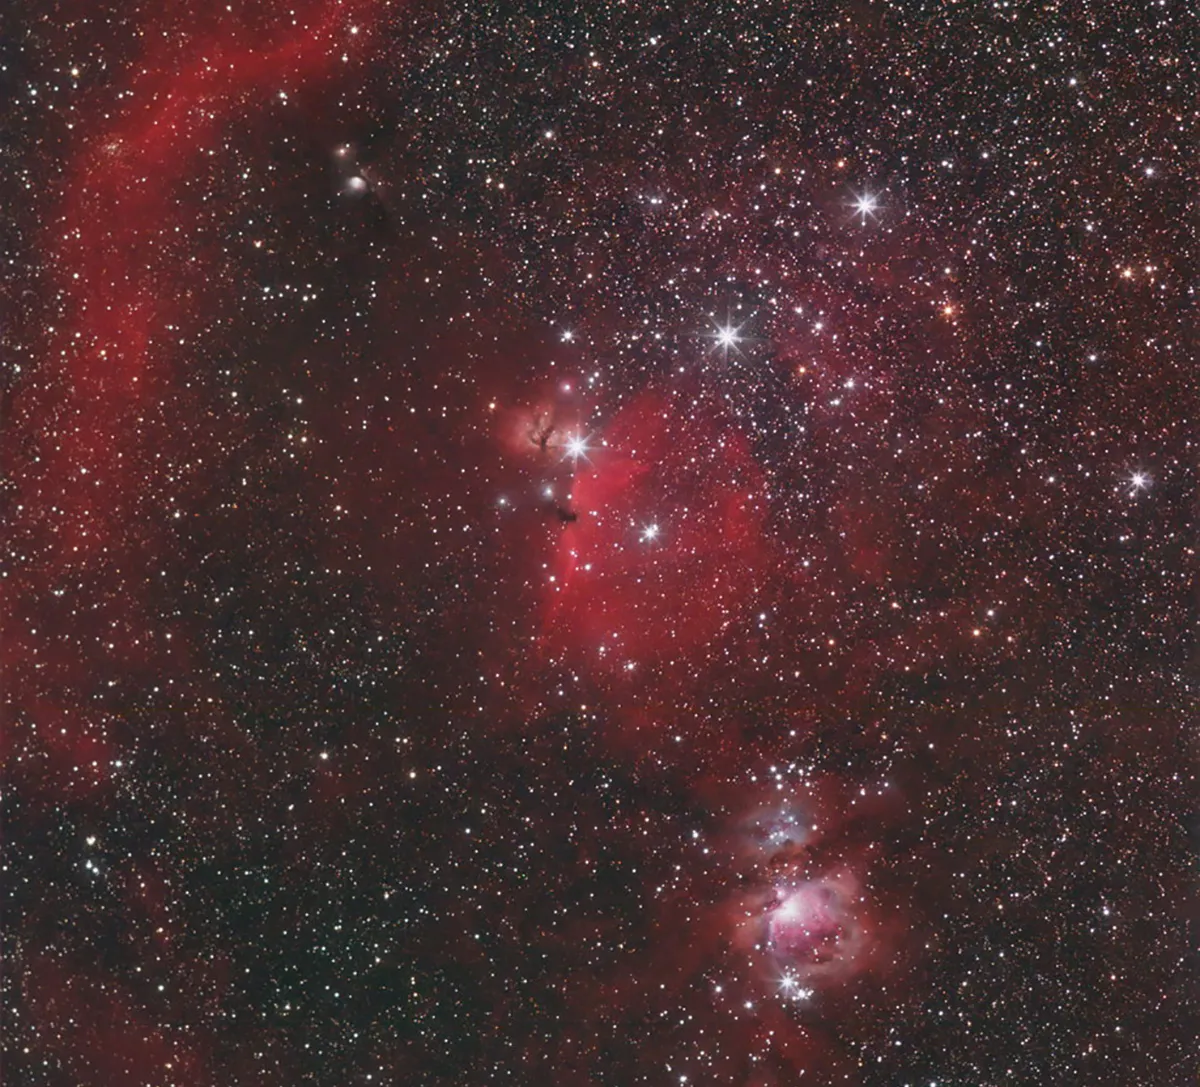
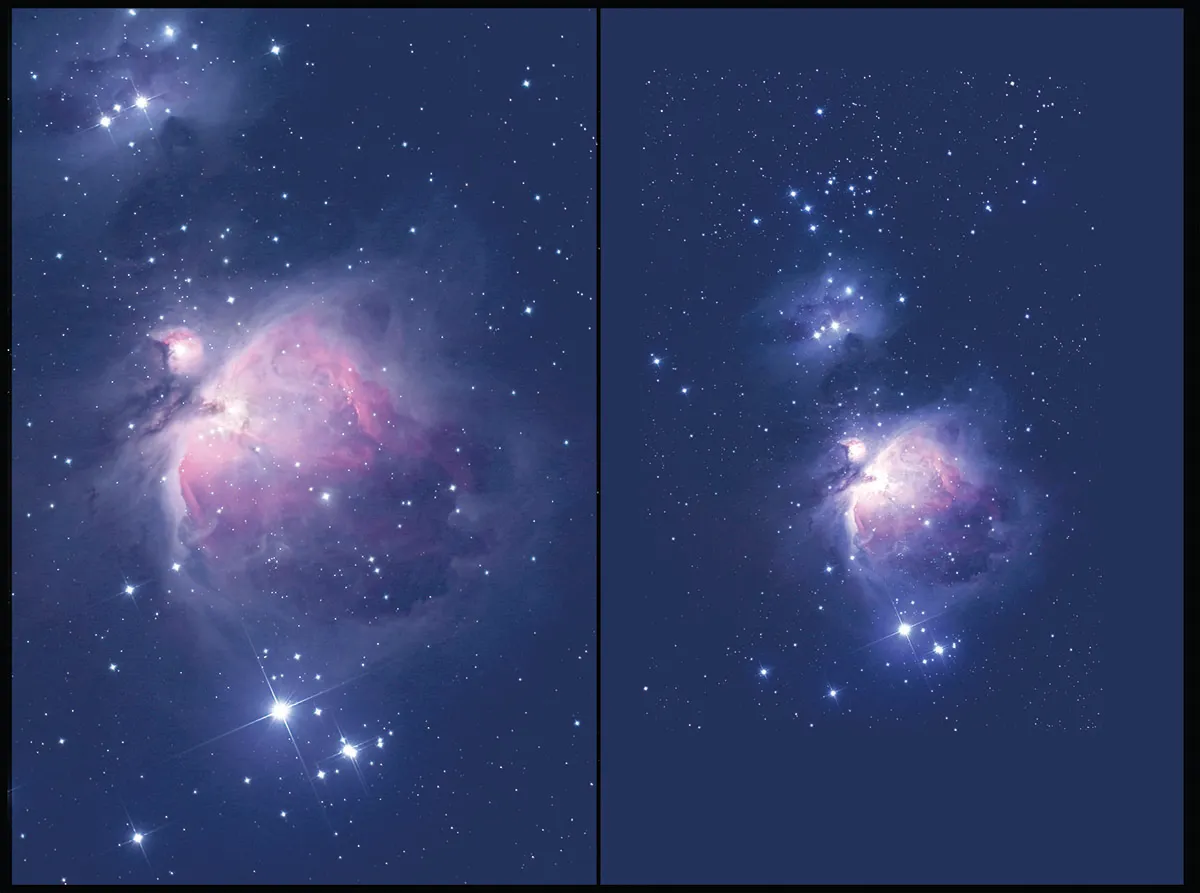
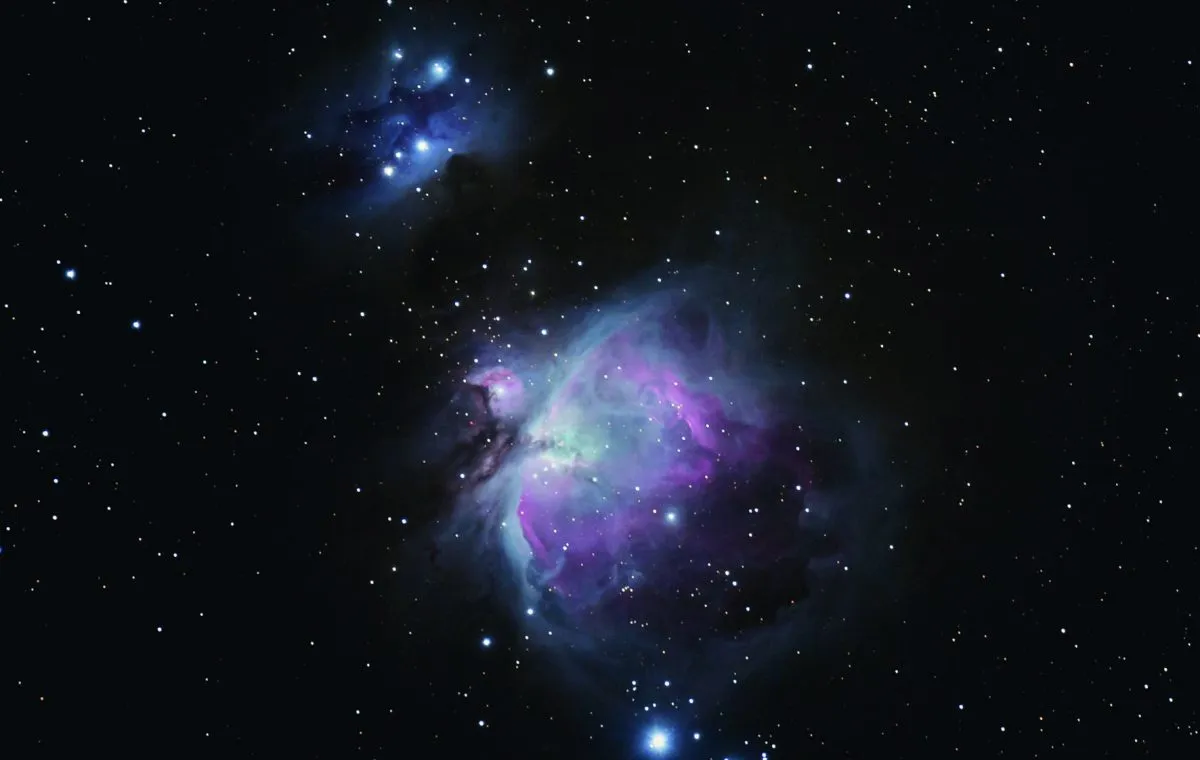
The region of sky known as Orion’s Sword is regarded as an easy object to photograph in many ways. Even a camera with a normal lens on a simple tripod will record M42, the Orion Nebula's distinctly reddish glow, although unmodified DSLRs tend to give the incorrect impression that it is more purple than red.
To photograph the Orion Nebula you’ll need a DSLR or CCD camera and a telescope to record M42 with a good image scale.
The surrounding Orion's Sword is larger – remember, M42 is just part of it – but can be captured with a 500mm lens as long as you vertically align the frame with the long axis.
These are just some of the beautiful deep-sky objects that can be seen in Orion. For more, read our guide to Orion. For inspiration, take a look at the Hubble Space Telescope's image of the Orion Nebula.
Keep your camera in tiptop shape: read our guide on how to clean a DSLR camera.
Get more out of your camera with our DSLR guide or find out how to attach a DSLR camera to a telescope..
The Orion Nebula's most beautiful regions
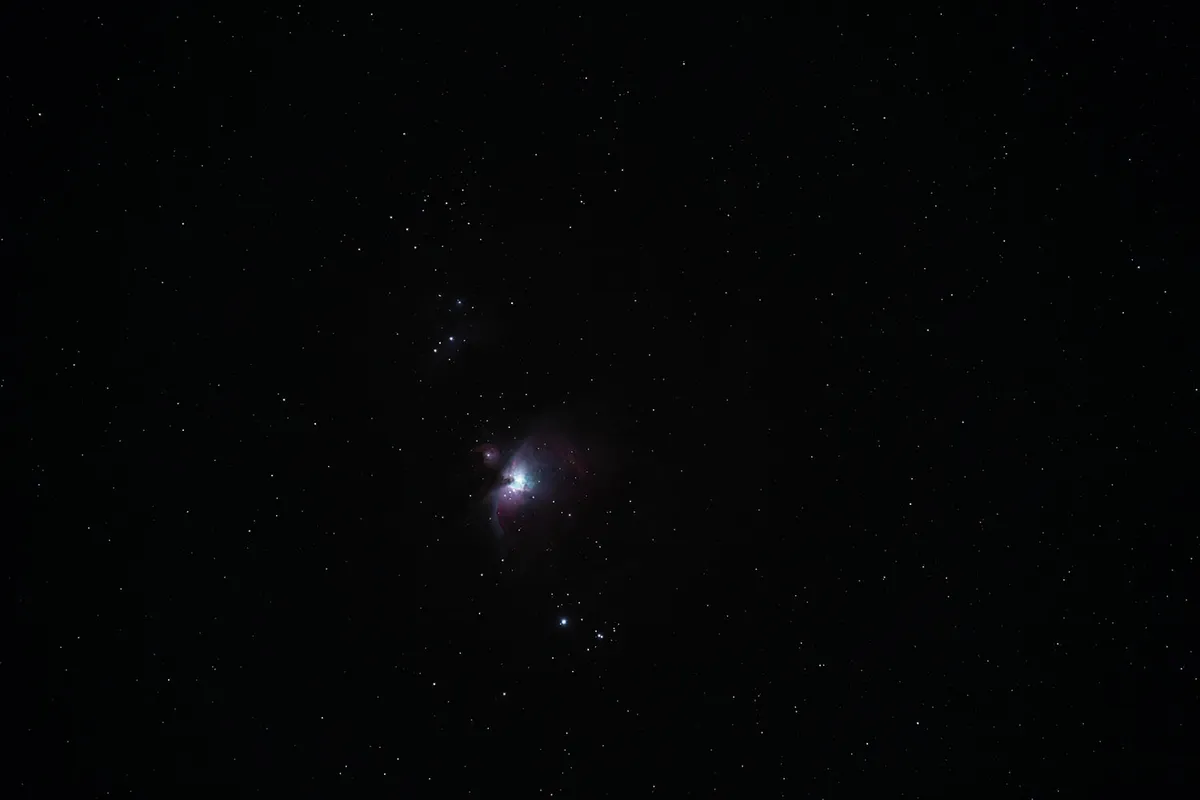
Many imagers’ initial attempts at capturing M42 involve short exposures. The fact that you can record something without having to use complicated lengthy exposures is something of a relief and many stop at this first image.
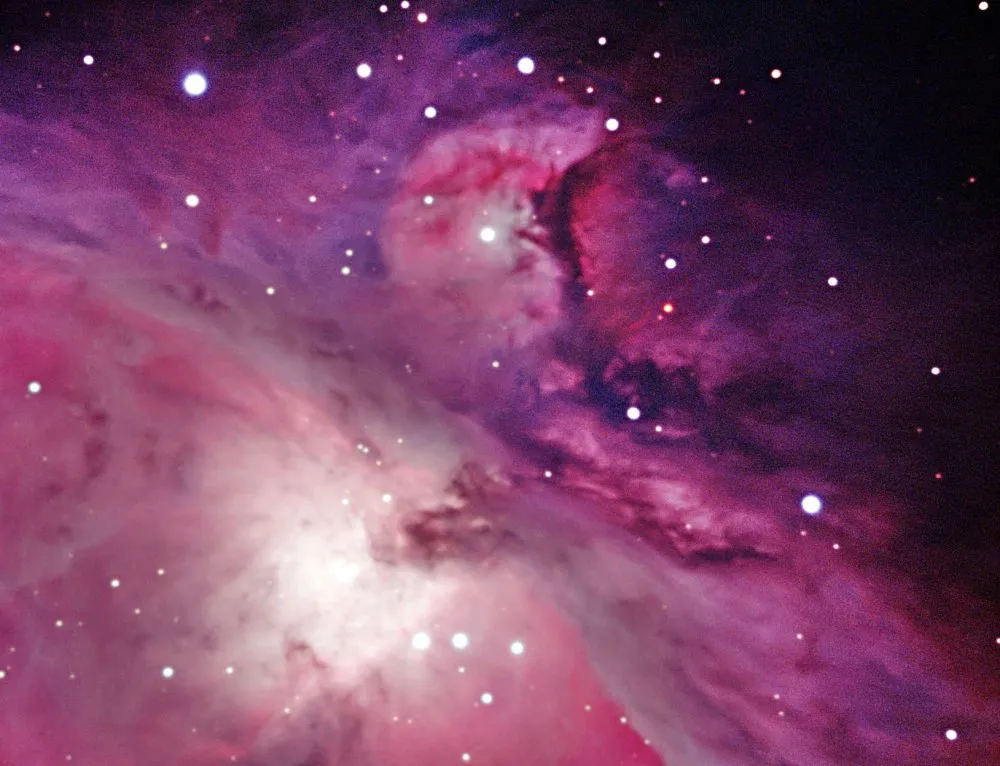
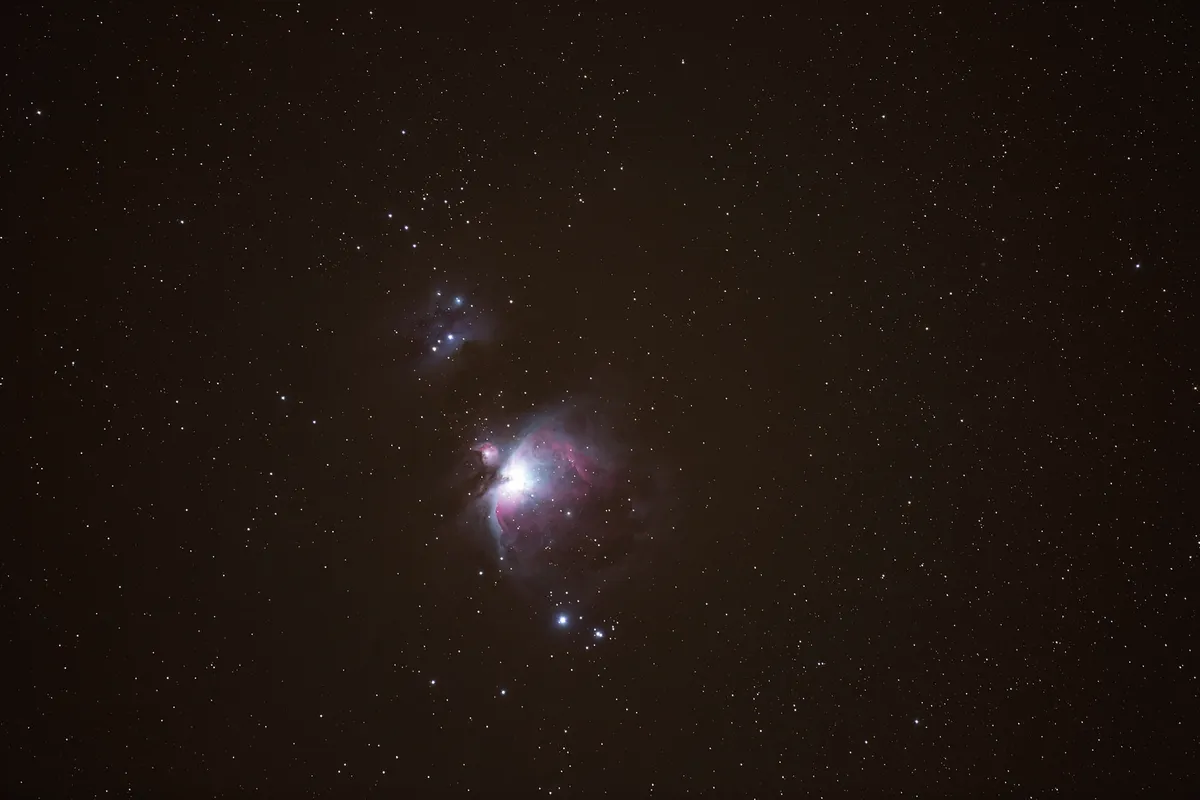
However, there is more to be had. Shorter exposures record the core of the nebula, a region known as the ‘Thrust’.
This contains the small but distinctive Trapezium Cluster, estimated to have formed just 300,000 years ago. The strong ionising radiation from the star cluster is the reason why the Orion Nebula glows the way it does.
The surrounding bright Thrust region is mottled in texture and is easy to lose in longer exposures, which are necessary to investigate the beautiful tendrils of gas that spread away from the Thrust.
Here you’ll find two prominent features known as the ‘Sail’ and (confusingly) the ‘Sword’. In this case, the Sword is the southeast tendril with a sharp edge to it.
These two regions arc around and eventually reconnect. This extended loop is fainter than the main part of M42, and considerably harder to record.
As you start to pull out the whole of the loop, it becomes obvious that its interior is also full of nebulosity. A dark indented part of the kidney-shaped Thrust also becomes quite noticeable: a region of the nebula called the ‘Fish’s Mouth’.
Longer exposures also start to show the fainter M43 nebula, a comma-shaped region of nebulosity separated from the Thrust by a dark lane of gas.
M43 has some lovely sharp edges thanks to these interloping dark lanes. Overexposure However, pulling out the fainter parts of the region results in an overexposed blob where the delicately mottled Thrust should be.
There’s something rather uncomfortable in reducing the beauty of this region to nothing more than a white patch – it just feels wrong – but remember while you’re doing it that it can be reliably dealt with.
The correction process is actually quite straightforward but it does take a bit of discipline.
First, remember not to fret over the deliberate sacrifice of one part of an image for another.Then don’t forget to take the exposures that will correct the situation.
Taking a series of images that will overexpose the centre is a waste if you forget to take a set of short exposures to record the core.
If your field of view is wide enough to capture the star cluster immediately to the north of M42, longer exposures will reveal a blue reflection nebula known as NGC 1977.
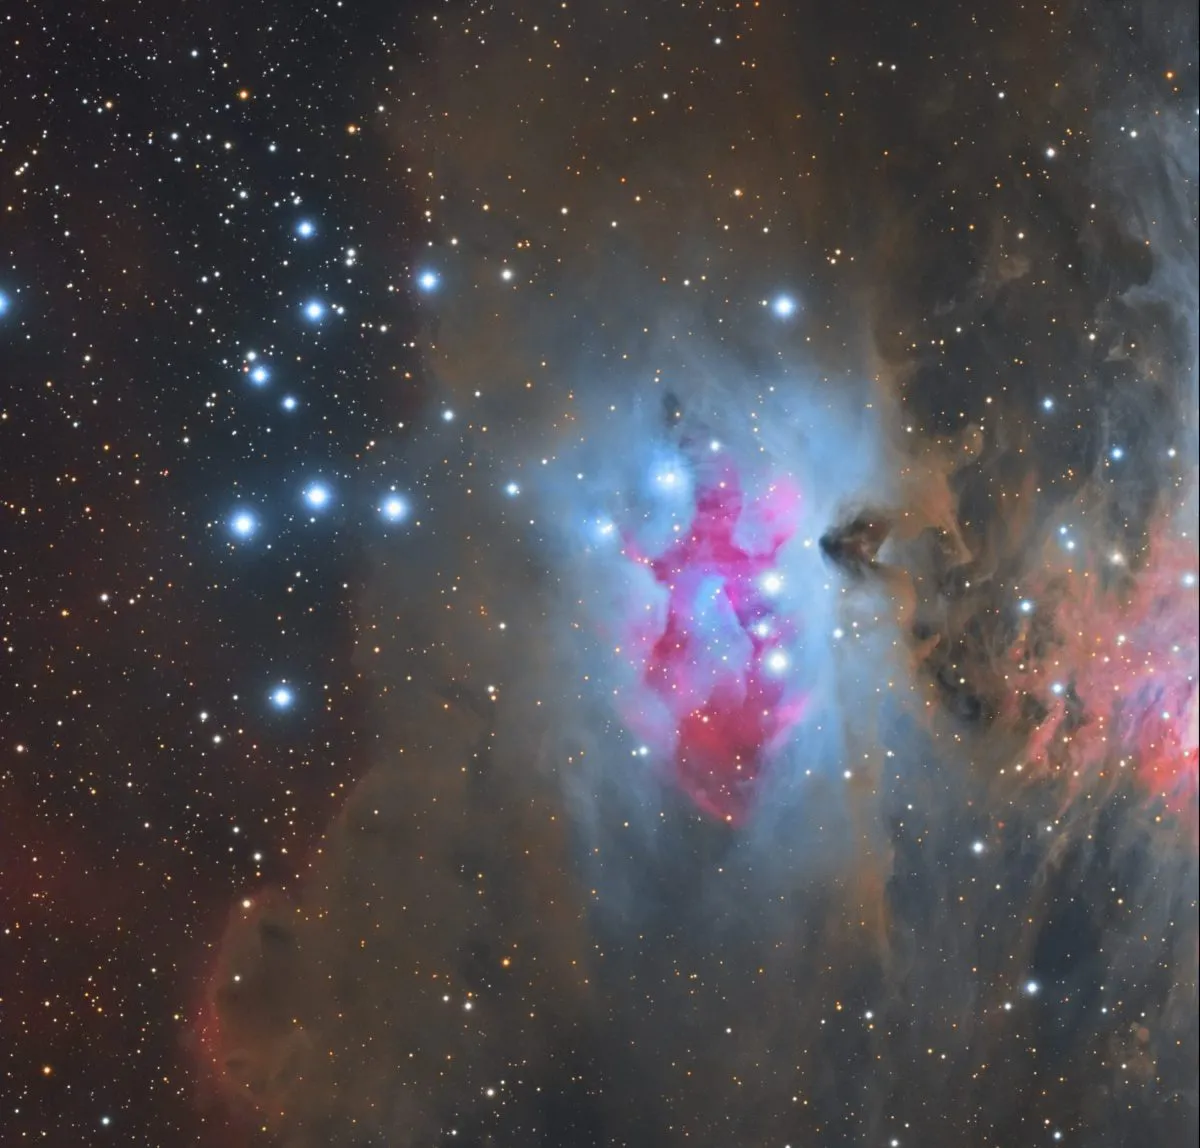
Dark lanes cross this glowing region, like a ghostly figure racing across the cloud. For this reason, it is also known as the Running Man Nebula.
Follow the step-by-step process below and see just how deep you can go into the magnificent Orion Nebula.
Equipment for photographing the Orion Nebula
To photograph the Orion Nebula you’ll need to use a DSLR camera fitted with a lens or attached to a telescope with a focal length of 500mm or longer.
The arrangement will also need to be on a driven mount, to permit you to capture the long exposures without features trailing across the image. For help choosing what mount to buy, read our guide to the best telescope mounts available.
Scroll further down for David Tolliday's guide to processing your image of the Orion Nebula in Photoshop.
Photographing the Orion Nebula: step-by-step
Step 1
Your first decision is to decide how close to M42 you want to get. Longer focal lengths increase image scale but need more accurate alignment and driving. Coupling a DSLR to a scope is a good way to get a decent magnification. Around 1,000mm focal length will give a comfortable scale with lots of detail if available.
Step 2
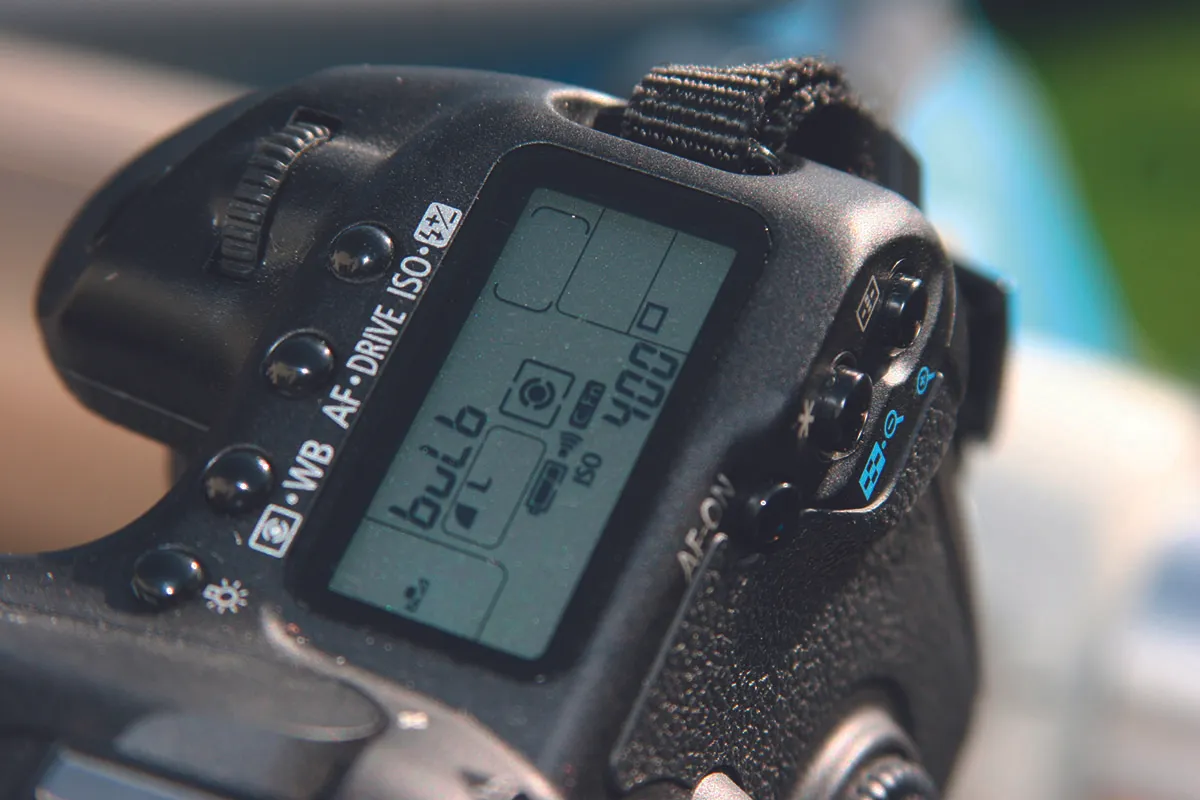
Keeping the ISO setting of your camera away from maximum will reduce noise and give your image better tonal resolution. Anywhere between ISO 200-800 is probably about right. Poor mount accuracy leading to star trailing may limit exposure times; in this case, a higher ISO may be used at the expense of image quality.
Step 3
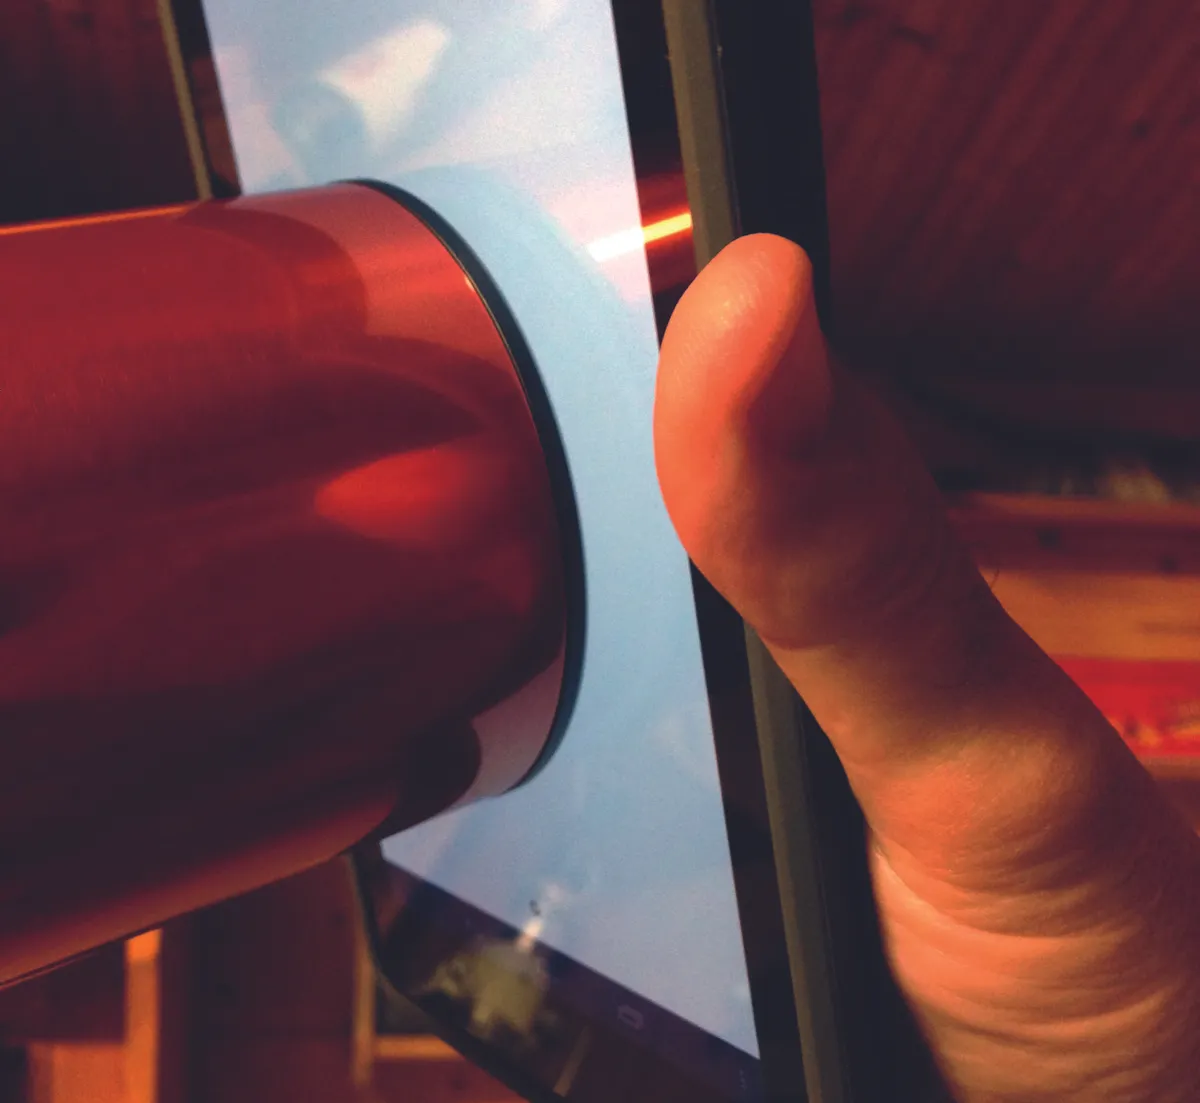
Take a set of 16 15-second shots, then the same at 30, 60, 90 and 120 seconds (longer if mount accuracy permits). After each set, cap your lens or scope and take nine dark frames. Take flat-fields by pointing your setup at an evenly lit light source. Expose so the image histogram shows peak saturation of 0.5-0.75 towards white.
Step 4
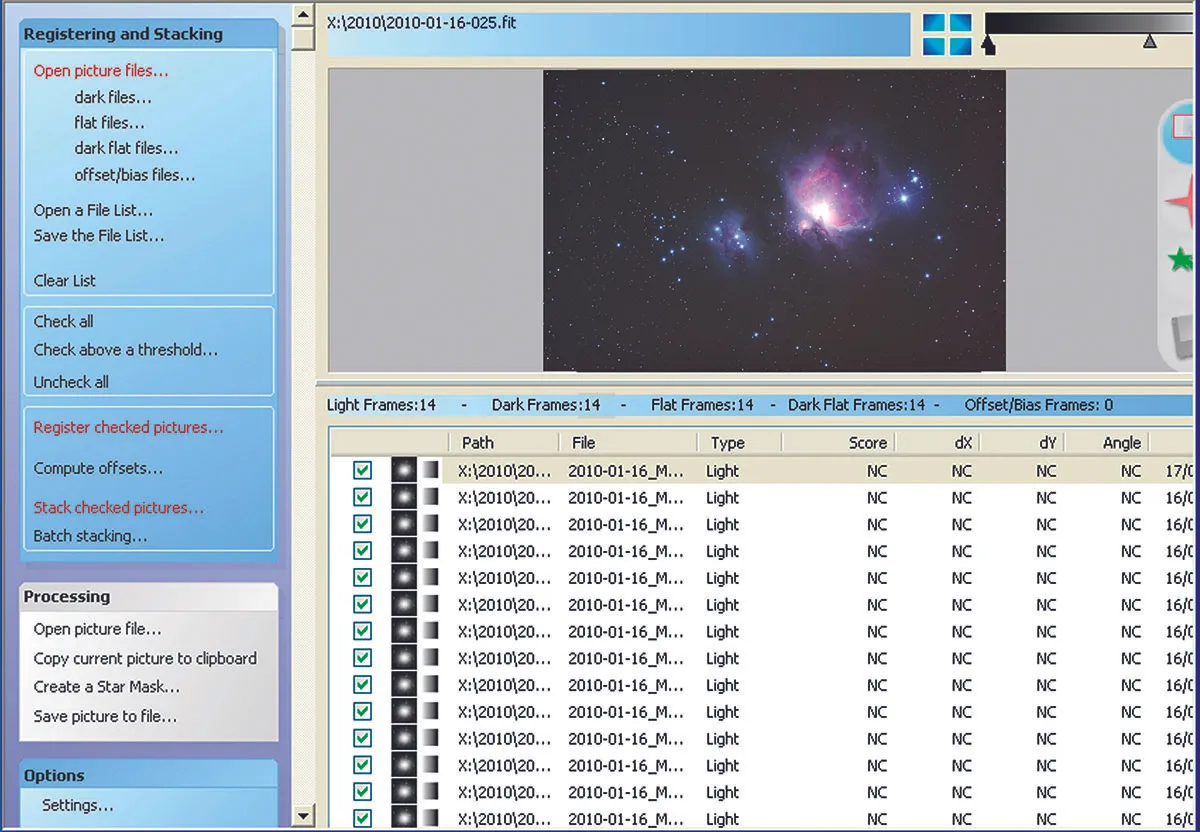
An image processing application such as DeepSkyStacker can process matching light, dark and flat-field images. One set of flats works for all exposure groups. Follow the software’s instructions and process each exposure set to a final image. Load each into a separate layer in a graphics editor such as Photoshop or GIMP.
Step 5
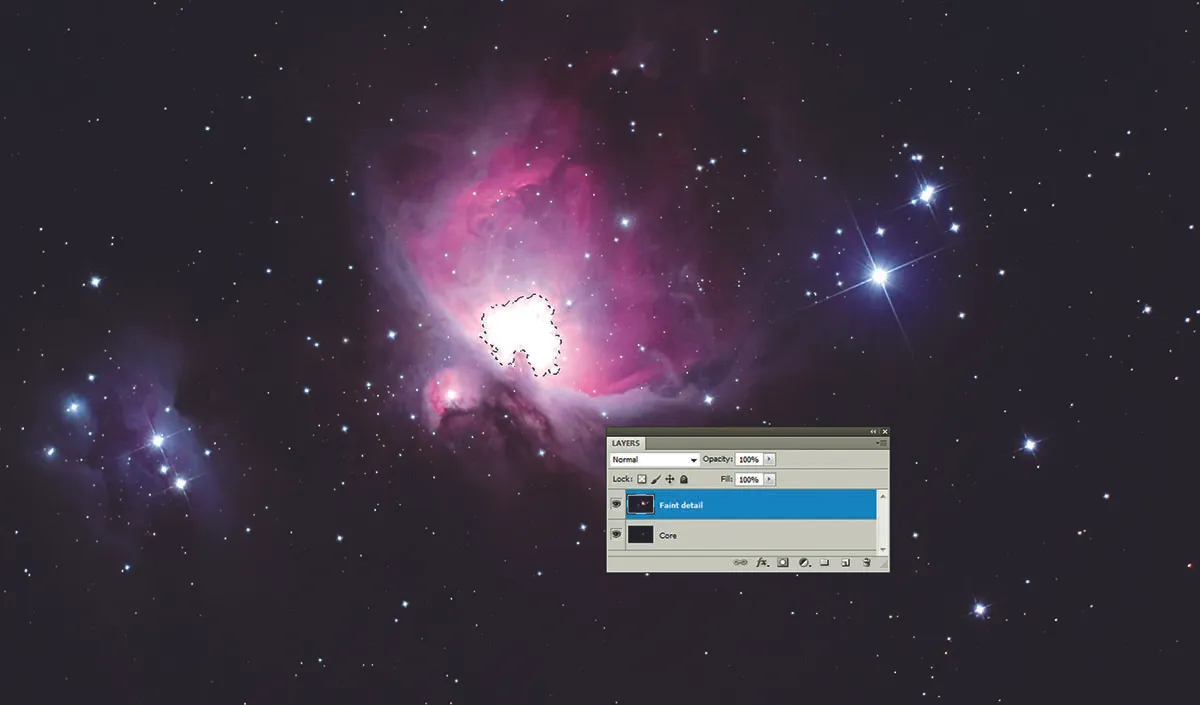
Process each layer to taste using the Levels and Curves tools. Pick a result showing good outer detail and one exposed for the core. Duplicate, and bring these to the top of the layer list, with the mostdetailed on top. Align and create a selection of theoverexposed core in the top image.
Step 6

Copy the selection and paste it as a layer mask. The dark part of the mask allows the lower image through, white blocks it. Select the mask and apply a Gaussian blur to soften the sharp mask edges. This should result in the detailed upper image blending into the lower image exposed for the core. Merge the layers and save.
How to process your image of the Orion Nebula
Words: David Tolliday
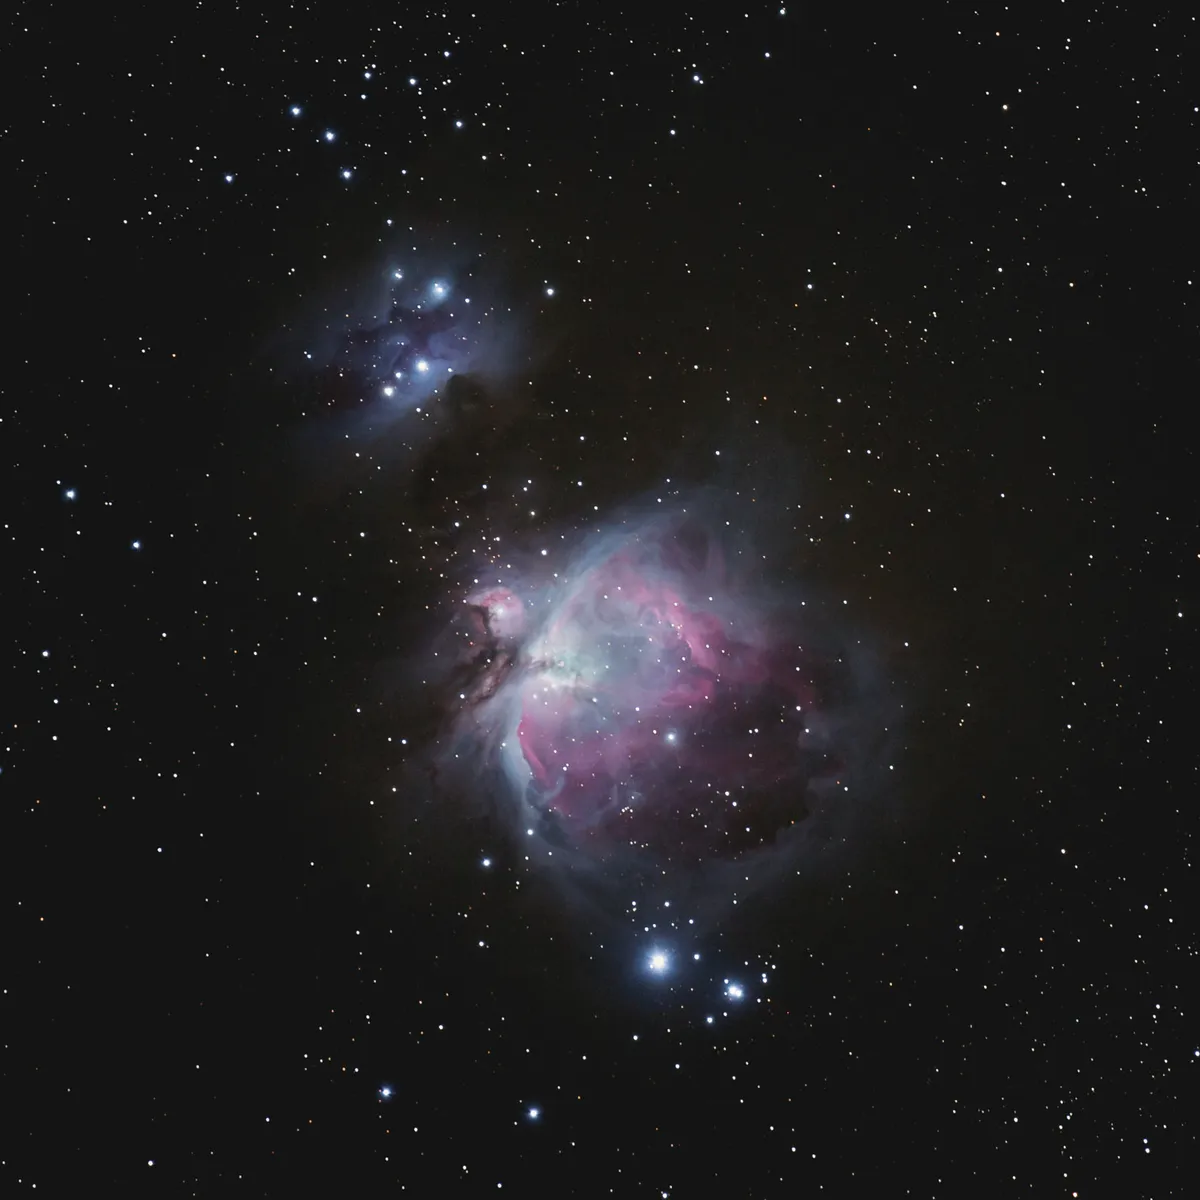
To produce my image of the Orion Nebula (above) I had to take three exposures of 19, 44 and 117 seconds. These images were saved as Tiff files and named Orion 1, Orion 2 and Orion 3.
When I reviewed them it was immediately apparent that detail in the brightest areas had been lost and the outer areas of the Orion Nebula did not contain much colour or structure; I had to use Photoshop to bring out these finer details.
The Shadows/Highlights tool is a simple and easy way to make adjustments to the light and dark areas of an image.
For the shortest exposure image, select Image > Adjustments > Shadows/Highlights and set the shadows to 0% and highlights to 100%.
This darkens the burnt out areas but leaves the stars bright. Save this image as Orion 0. Next use the longest exposure image (Orion 3), and repeat the process but set shadows to 50% and highlights to 0% (this brings out more detail in the underexposed areas), then save as Orion 4.
The five images have different colour balance and exposure levels, which need to be corrected, but you have to take care not to create a totally black, unnatural sky. This is done by adjusting the image’s black and white points.
Select the eyedropper tool and in the menu at the top of the screen set the sample size box to ‘3 by 3 average’. Hold the shift key and click on a dark point in the image to create colour sample point #1.
Now zoom in to the brightest part of the image and repeat to create colour sample point #2.
Click Image > Adjustments > Levels and double click on the ‘set black point’ eyedropper icon.
In the RGB boxes type 20, 20, 20 and click OK; now use the eye dropper tool to click on colour sample point #1.
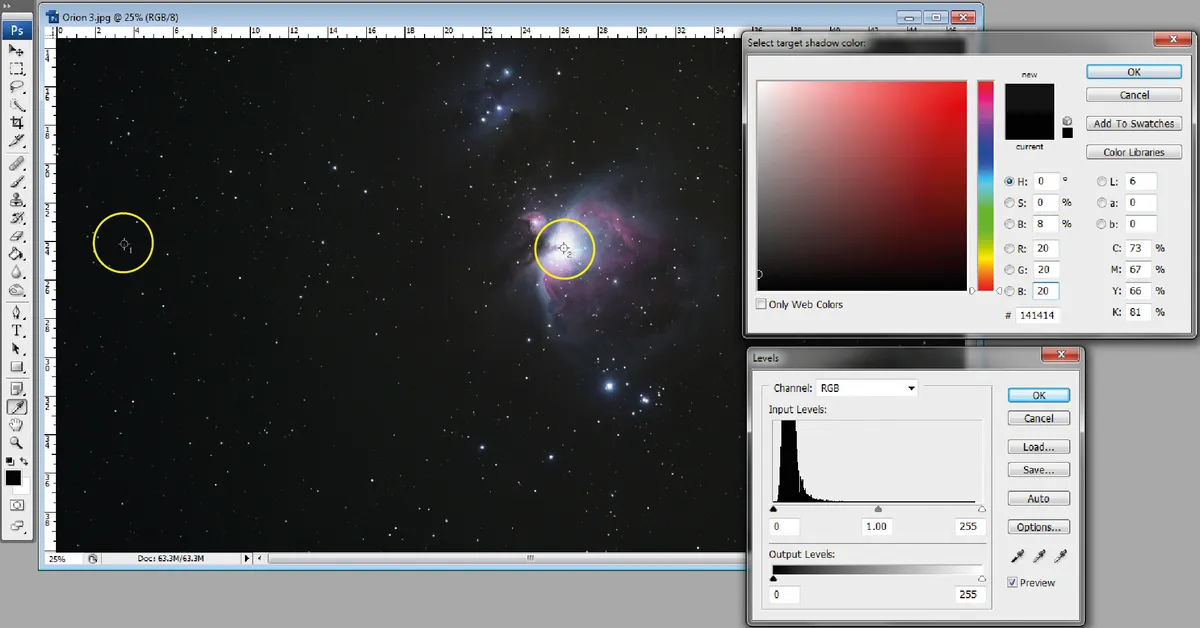
Repeat for the ‘set white point’ eyedropper icon, setting the RGB values to 245, 245 and 245, and clicking in colour sample point #2.
This process needs to be repeated for all of the five images, and you need to ensure that the two sample points are in the same position in each one.
Save the individual images at the end of each stage. Using these settings will not give a burnt out or too black an appearance to the sky.
Each image should now have the same exposure range and colour balance but differing amounts of detail.
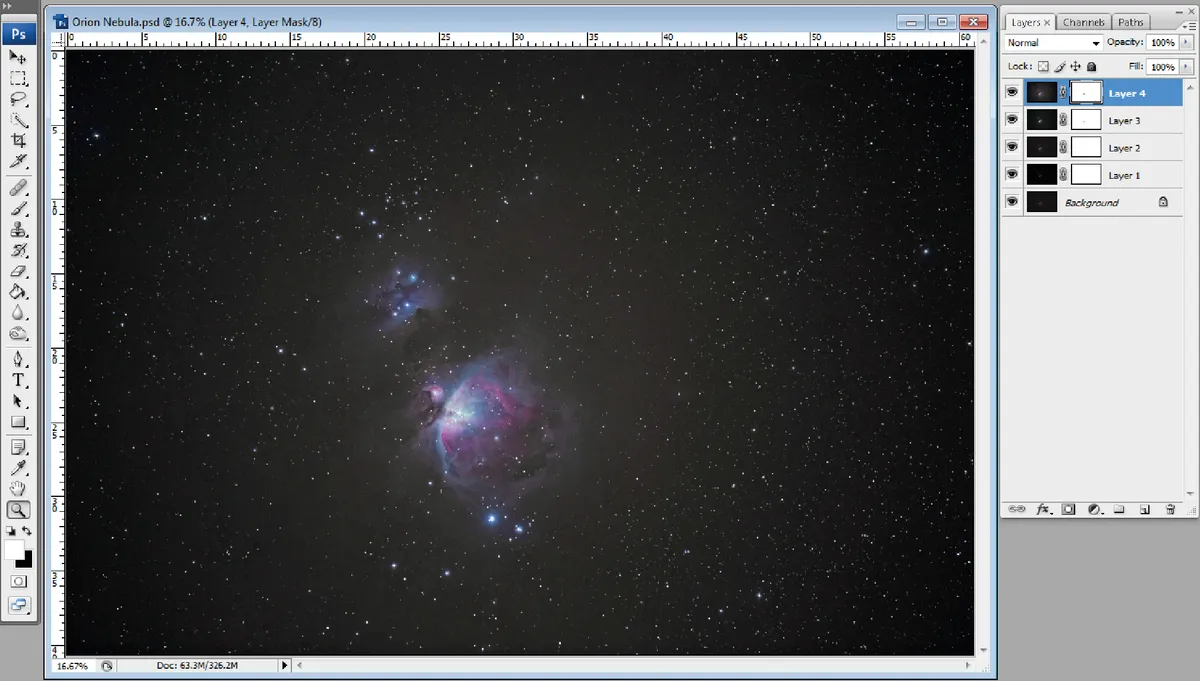
Now we need to blend the five images together while keeping the appropriate detail from each. Open Orion 0 (the darkest image) first, as your background image, then open Orion 1-4 sequentially as new layers above it.
Make sure the alignment of each layer is correct. You will be left with a stack, with the darkest image at the bottom and the brightest image at the top.
You can change the title of each layer by double clicking on it, but this is not really necessary.
Select the Background Layer and Layer 1, with Layer 1 being the active layer. Select Layer > Layer Mask > Reveal All to create a layer mask.
Set the paintbrush tool to colour black, size 20, hardness 0% and opacity 50%, then click in the layer mask (the white box) to make it active.
Paint over the burnt out area of Layer 1 to reveal the darker area of Layer 0 below. Any errors can be painted over by using a white paintbrush.
Repeat this process for the remaining three layers, with the layer blending mode set to Normal. Once you are satisfied that the best selections have been made for all layers, save your file in the PSD format.
Finally click Layer > Flatten Image and crop as required. Make any other minor adjustments – perhaps the dodge and burn tools, or adjust colour saturation –and save the final image with a different file name.
Pete Lawrence is an experienced astrophotographer and a co-host of The Sky at Night.
David Tolliday won the Astronomy Photographer of the Year 2015 Sir Patrick Moore Award for Best Newcomer with this image. His image processing guide originally appeared in the October 2016 issue of BBC Sky at Night Magazine.


