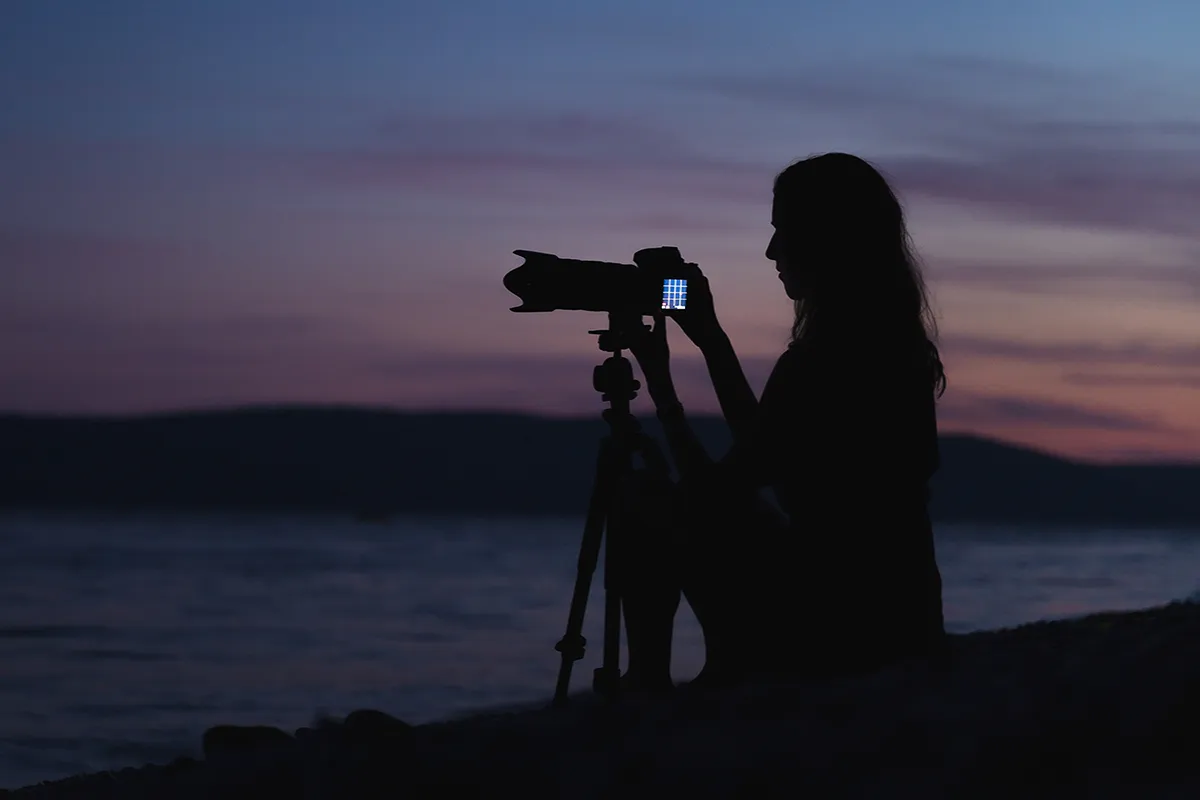
There are many branches of astrophotography to explore, from capturing the Moon’s craters, to wide-field starscapes of our Milky Way. But perhaps the most demanding images to take are those of deep-sky objects.
Deep-sky photography includes images of nebulae, galaxies and star clusters, and whether you’re a seasoned daytime photographer or a complete beginner, doing justice to these faint fuzzy objects takes time and patience.
However, practice makes perfect and deep-sky photography is extremely rewarding right from the word go: you can image a target and unlock details that are simply invisible to visual astronomers.
For more help, read our guide to astrophotography or for equipment advice, our guides to the best cameras for astrophotography and thebest telescopes for astrophotography.
With a bit of practice, amateur astrophotographers can capture images of the deep sky reminiscent of the Hubble Space Telescope.
If you’re curious about deep-sky imaging and want to know what equipment you need (versus what you may want to buy later once you’ve honed your skills) and what techniques you'll need, below we'll run through some key elements that will have you photographing galaxies and nebulae in no time.
Sign up for our latest online astrophotography Masterclass
Find out more about the BBC Sky at Night Magazine DSLR Astro Imaging Masterclass.

Deep-sky photography equipment
Deep-sky imaging makes great demands on your kit because you need to achieve long exposures to capture the maximum amount of detail in your images. The good news is there are many setup options for beginners.
The type of camera you use is particularly important, but there are other things to consider, so we’ll also look at telescopes and then move on to astronomy accessories including telescope mounts, autoguiding systems and filters.
Cameras
You can start deep-sky imaging with a DSLR camera. This meets the basic needs, as most have a Bulb mode to run long exposures, adjustable light sensitivity (ISO) and are relatively easy to operate.
But perhaps a DSLR’s great advantage for a beginner is that it’s a relatively uncomplicated setup. Indeed, there are some deep-sky objects you can image using a DSLR and a zoom lens, such as the Orion Nebula and the Heart and Soul Nebulae.
For more info, read our tutorial on how to use a DSLR camera or our guide to the best astrophotography cameras.
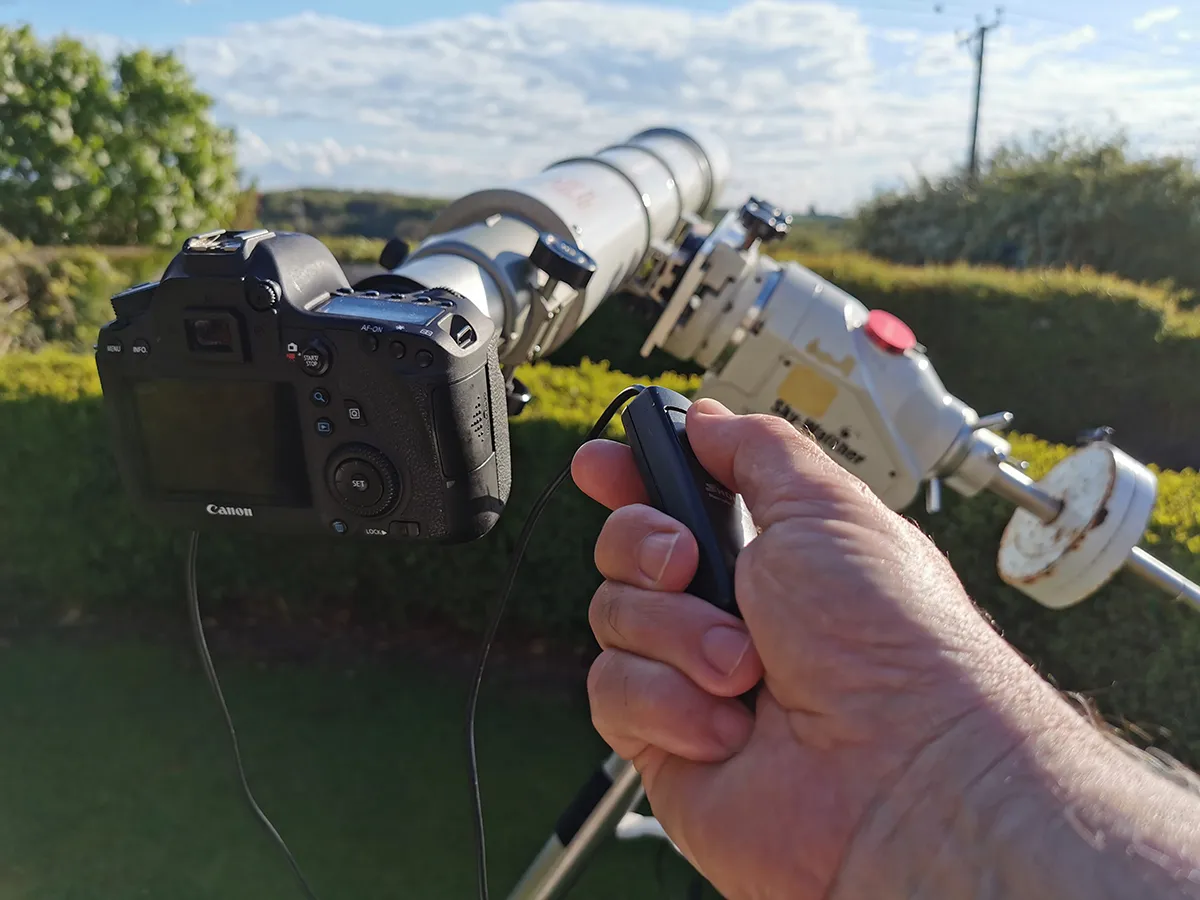
You need a sturdy mount (which we’ll discuss below), plus a remote shutter release such as an intervalometer. This will allow you to set the number of exposures to be captured and the exposure length, and it will also give you the means to start an imaging run without touching the DSLR.
DSLRs can capture impressive deep-sky images, but the sensors don’t perform well on exposures over 5 minutes For longer exposure times, CMOS and CCD cameras offer lower noise (unwanted artefacts).
CMOS and CCD cameras are similar to operate. These are dedicated astrophotography cameras, and don’t look like a point-and-shoot camera – they’re more like specially adapted industrial cameras.
They come in either colour or monochrome versions (the latter requires the purchase of colour filters). What sets them apart from a DSLR is the sensor.
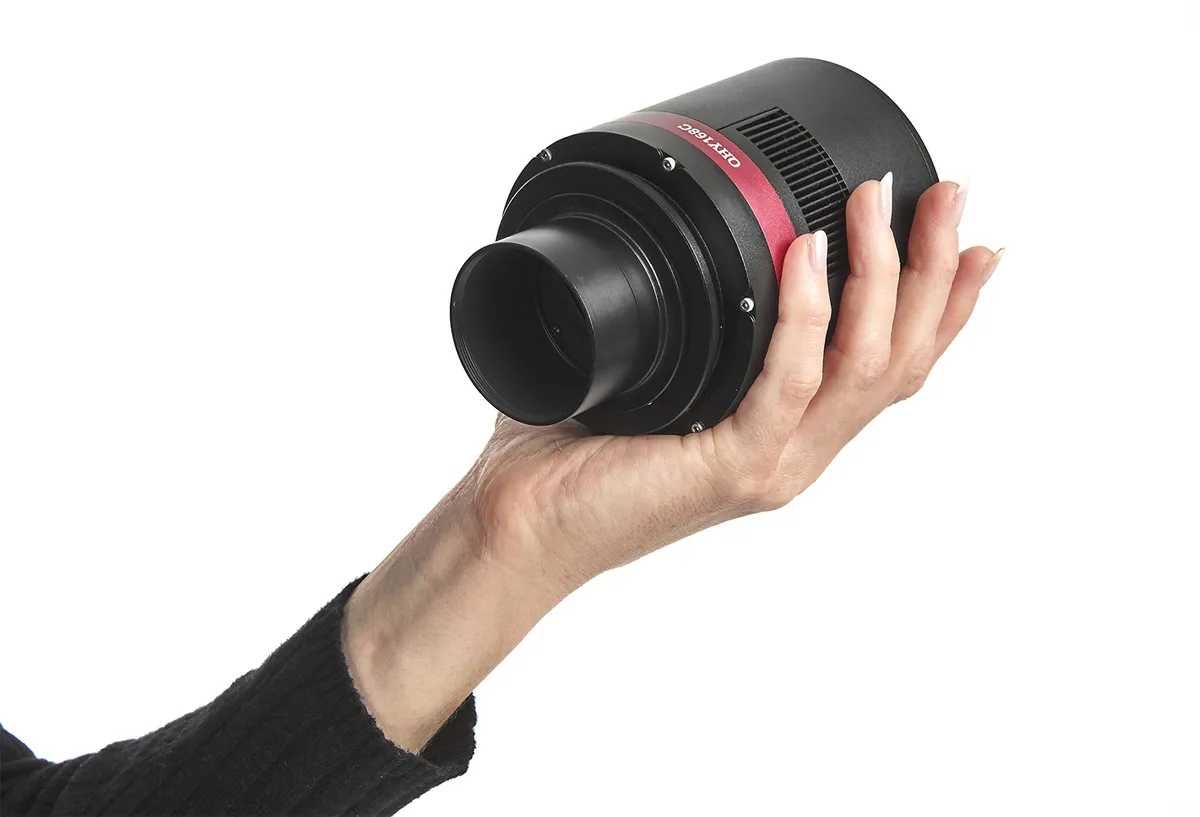
The CCD performs better at longer exposures than the CMOS, so to gain the best results expect to run a CCD with exposure times between 10 and 20 minutes.
CMOS and CCD deep-sky cameras are ‘passive-cooled’ or ‘active-cooled’, which helps to reduce noise.
Passive cooling uses fans to prevent the sensor from overheating and introducing noise, while active cooling combines fans and a Peltier system to maintain a fixed temperature.
A CMOS- or CCD-based setup is more complicated than a DSLR because you need a laptop and software to control the camera and see the images it’s taking, which also means access to mains power or a healthy battery is required.
As we’ll discuss, these cameras also bring with them the need for other accessories such as autoguiding systems.
For more on CMOS, read our CMOS astrophotography guide.
Telescopes
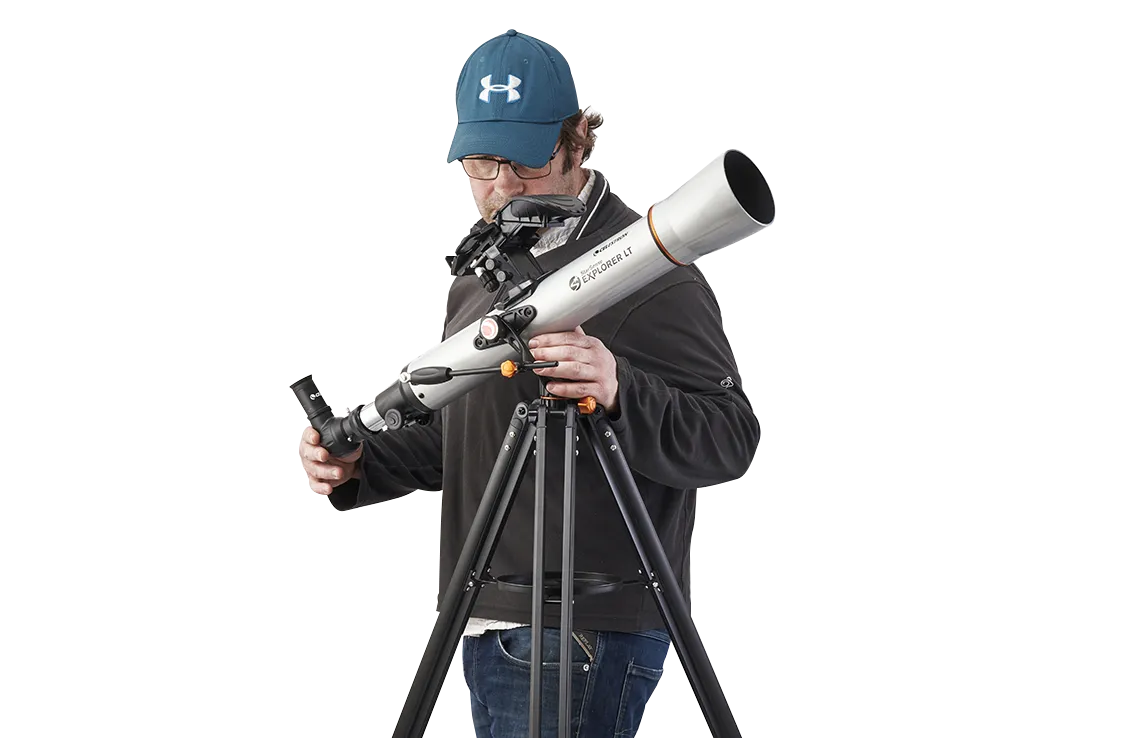
When you image the deep sky with a telescope, it takes the place of a large lens for your camera. But, unlike visual astronomy, the telescope aperture won’t limit detail – the camera allows us to capture small features even with a small telescope.
However, a telescope’s focal length versus its aperture is key as this determines the focal ratio, or f/ number (for more on this, read our guide to telescope stats).The smaller the f/ number, the greater the telescope’s light-gathering capability.
All telescopes types can be used for astrophotography, but Cassegrains are best kept for photographing the planets.
Reflectors and refractors are the preferred choices on the deep sky. Refractors offer the best optics in a small and light body, but are generally more expensive.
Reflectors come in cheaper, but at the cost of size and weight. Some reflectors also have focusing issues once a camera
is attached, which require the mirror position to be adjusted.
Field curvature can be an issue with both types of telescope, but this is easily corrected with a field-flattener.
Flatteners are one of the more expensive accessories and require precise positioning to work at their best.
For those intending to invest in a telescope and CCD camera, the Astronomy Tools CCD Suitability Calculatorhelps to determine how two models will perform together. This takes the focal length of the scope and combines it with the pixel size of the CCD to assess its potential for deep-sky imaging.
You can also use our Astronomy Field of View Calculator to help.
Browse all of our telescope reviews.
Getting set up for deep-sky photography

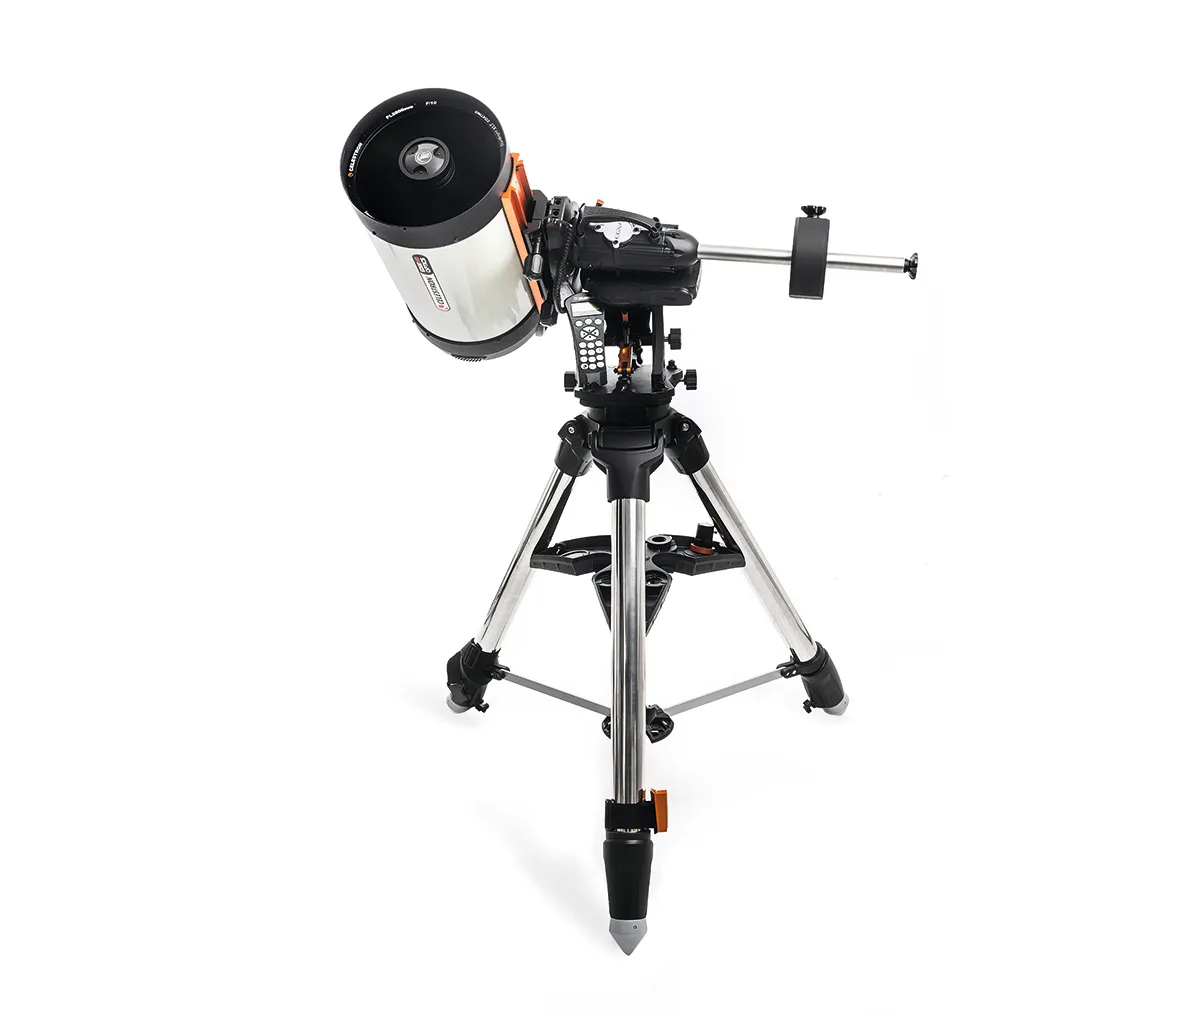
The first thing to ensure for deep-sky imaging equipment is that you have a sturdy mount. For astrophotography this is an essential bit of kit because the maximum exposure length depends on it, and it will protect your imaging equipment and help locate your target if it’s a Go-To mount.
For deep-sky imaging you need an equatorial mount (rather than an altaz mount), in addition to motorised axes (or the declination axis at a minimum) that will allow it to ‘track’ the apparent movement of the night sky, which is known as ‘sidereal tracking’.
Tracking accuracy is paramount as this is what creates pin-sharp stars. While this is largely due to how well the mount is polar aligned, it’s also down to the motor’s efficiency.
The mount’s payload is important too, because this can also affect tracking. You will find that imaging payload requirements are different from visual ones because astro imaging requires more precision to stay on target.
The payload listed in the mount’s specifications is typically for visual purposes; halve that figure for imaging.
Guiding
As beginner deep-sky imagers develop their skill and confidence, many opt to add guiding software to their setups.
This connects with the mount to make tracking corrections: a guide camera replaces the finderscope and focuses on multiple ‘guide stars’ as reference points.
This information, fed through the guiding software on a laptop, ensures the mount stays on target and allows for increased exposure times.
Guiding makes a radical difference to images because:
- The increased image exposure times enhance detail
- Most guiding software has a dithering function
Image dithering reduces ‘walking noise’, which is an unwanted artefact that comes from stacking image files.
But when you’re starting out, one thing to remember is that guiding can complicate things – it’s not an essential step for beginners, and it can be worth parking until you’re more confident with the camera and mount.
Focal reducers & filters
Depending on the telescope’s focal length, focal reducers can come in handy. These reduce the focal length of your telescope by a factor of between 0.5 and 0.8, depending on the model.
This allows those with long focal-length telescopes to access more deep-sky targets, as it creates a wider field of view.
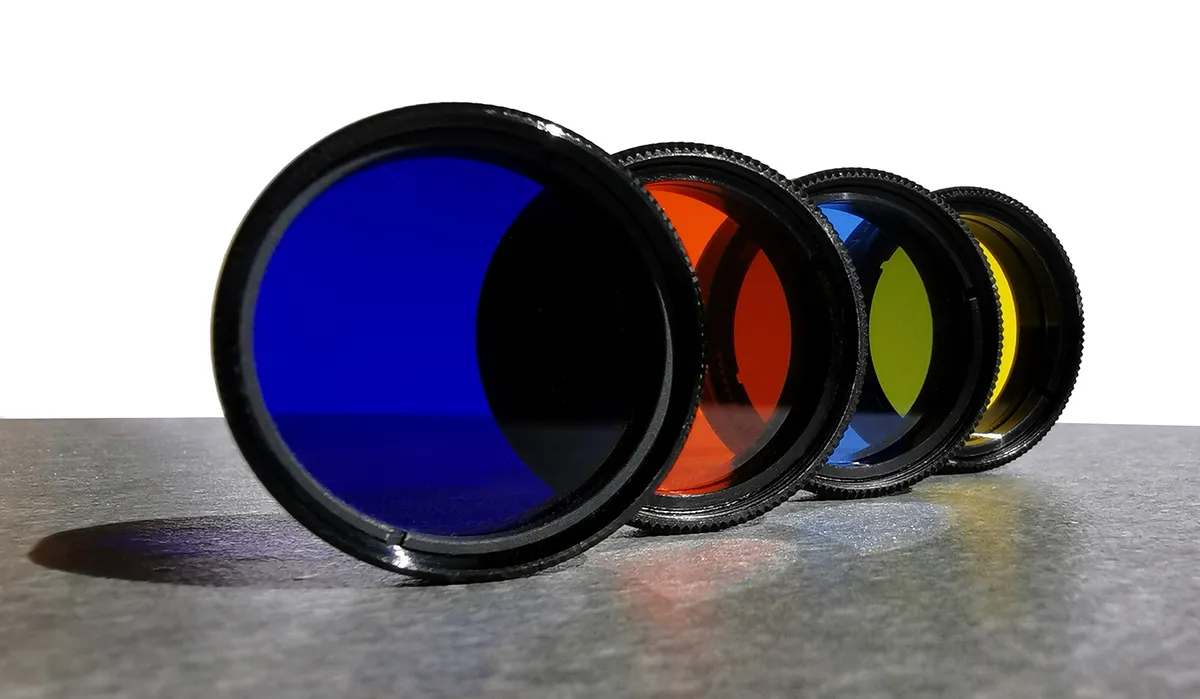
Deep-sky astrophotographers also end up investing in filters such as narrowband filters or those specifically designed for mitigating the effects of light pollution.
Light pollution filters prevent artificial light from reaching the camera sensor, while narrowband filters capture wavelengths emitted from nebulae – including Hydrogen-alpha (Ha), Oxygen (OIII) and Sulphur (SII) – and cut out most other electromagnetic waves.
Narrowband filters enhance contrast and details in a deep-sky image. These filters are available for most types of camera – not just CCDs.
Two-inch filters can be installed between the telescope eyepiece barrel and camera adaptor, plus there are also clip-in options for DSLRs.
Some astro imagers also use a filter wheel if they are using several filters in one night. These are designed to make the transition from one filter to another easier and it means you don’t have to detach the camera.
Deep-sky image processing
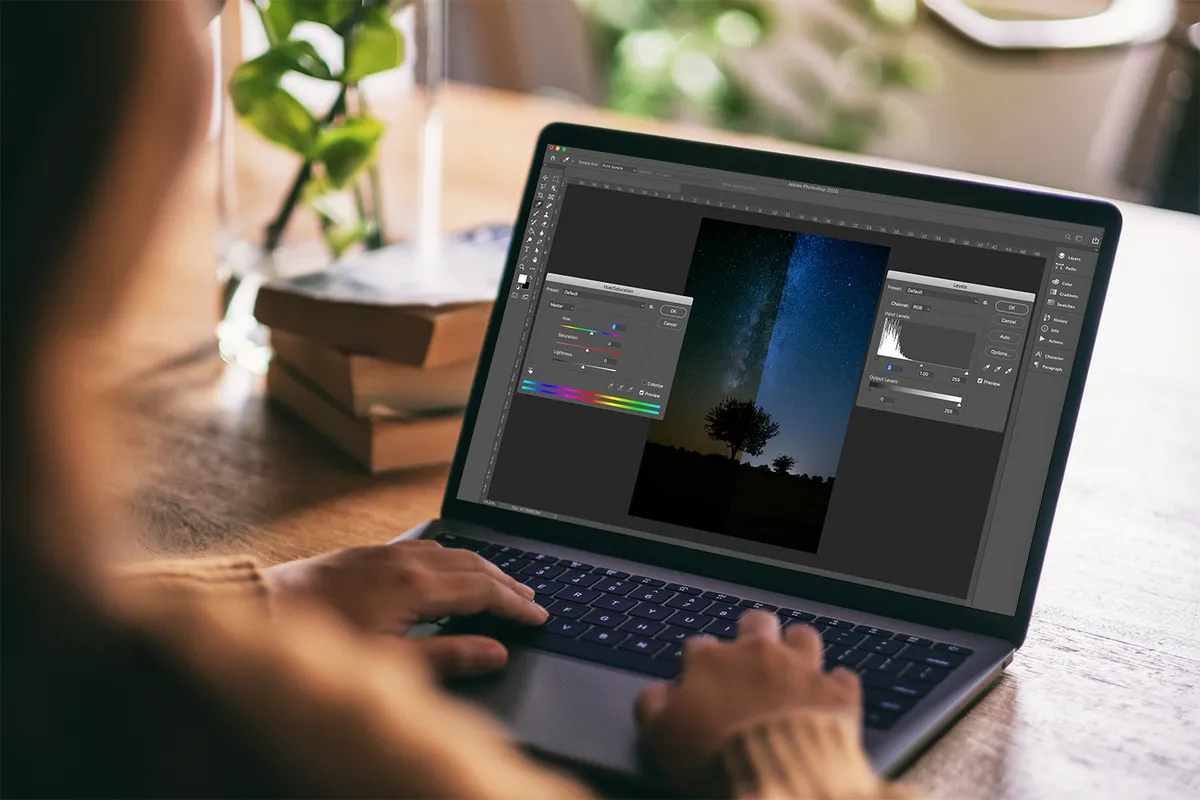
Those new to astrophotography may think that a processed deep-sky image is artificial or ‘faked’, because it looks so different to the image of the same object on the back of the camera.
However, the image processing stage is arguably as important as the capture stage – it is how you draw out the detail that cannot be seen.
As deep-sky objects are shot in RAW format, no colour corrections, exposure compensation or noise reduction is done in the camera – it’s all done at the processing stage.
Instead of seeing processing as ‘faking’ a deep-sky image, it’s better to see it as unlocking the data suppressed in the RAW files.
Processing a deep-sky object involves three main stages:
- Image registration
- Image stacking
- Final image process
All of these are done using image-editing software. DeepSkyStacker and Sequator are used for registering and stacking RAW deep-sky images, while Photoshop, GIMP and PixInsight are used for the final stage.
Calibration frames
Also important are the ‘calibration frames’ that are added during the stacking process.
Learning to take good calibration frames will make a difference to your final image. They will reduce unwanted noise, vignetting (reduction in image brightness at the edges of the field of view) and sensor artefacts like motes of dust and dead pixels from a stack of images, which then allows for more scope when processing.
The three main types of calibration frame are dark frames, flat frames and bias frames. Darks and biases reduce electronic and sensor noise, while flats reduce vignetting.
Both DSS and Sequator have sections to add these files. It’s simple to take both types.

Dark frames are taken at the same ambient temperature, exposure and ISO as your image frames.
To get them, pop your lens cap on at the start or end of your imaging run and fire off up to 30 exposures.
Bias frames don’t require a lens on the camera, but they need the same ISO as your image frames. Keep the camera cap on a DSLR, set the exposure to the fastest exposure time and fire off the bias frames.
Flat frames need to be taken at the same ISO, aperture and focal point as the image frames – so don’t nudge the scope or lens after your imaging session.
You’ll need a white screen – such as a blank piece of A4 – that covers your scope or lens’s field of view. The exposure time for a flat file varies depending on if you’re using a DSLR, CMOS or CCD camera.
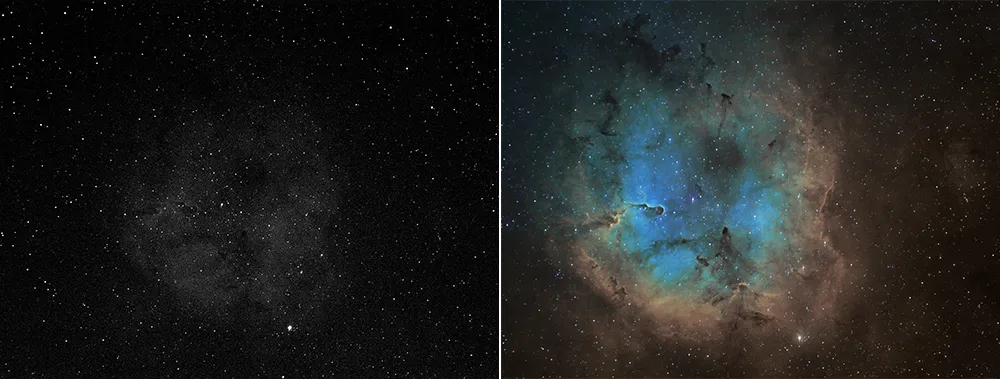
The two contrasting images of the Elephant’s Trunk Nebula above show why processing is so important. By stacking, adding calibration frames and using processing software the initial RAW camera image is transformed into a celestial marvel.
How to photograph a galaxy
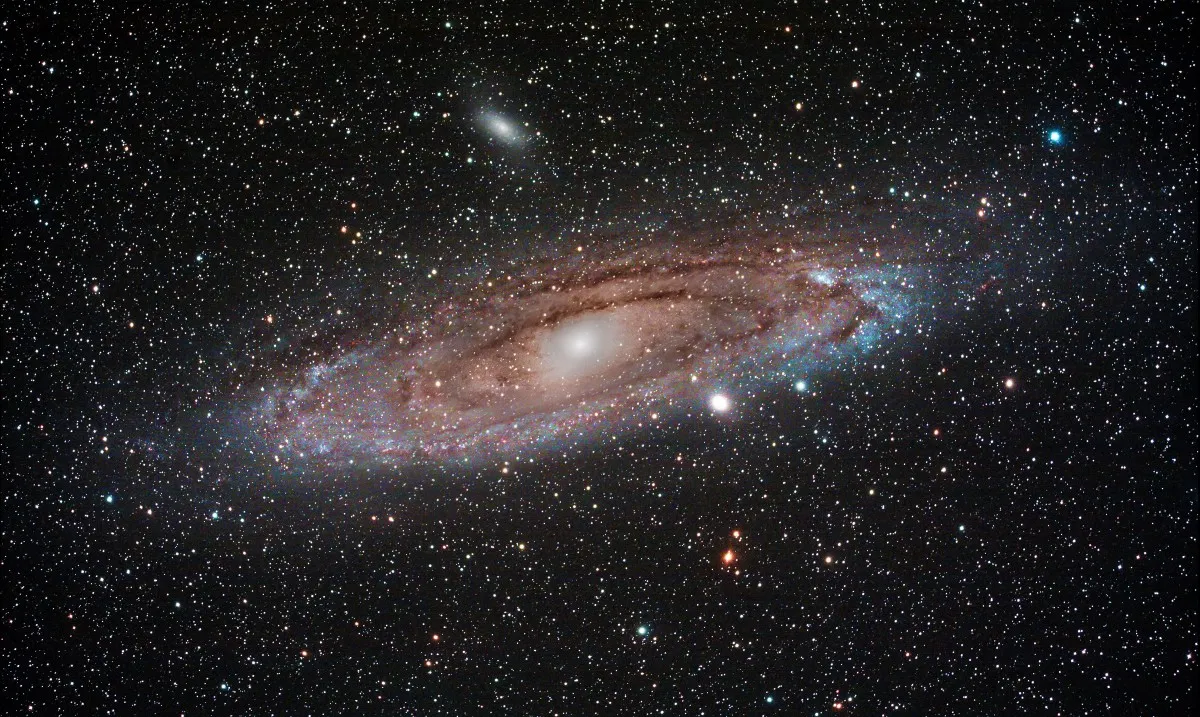
The Andromeda Galaxy, M31, is a great beginner’s deep-sky object target because it’s easy to find and can be imaged with a DSLR and lens.
The equipment needed to capture an image like this comprises a DSLR, a Go-To tracking mount and an intervalometer.
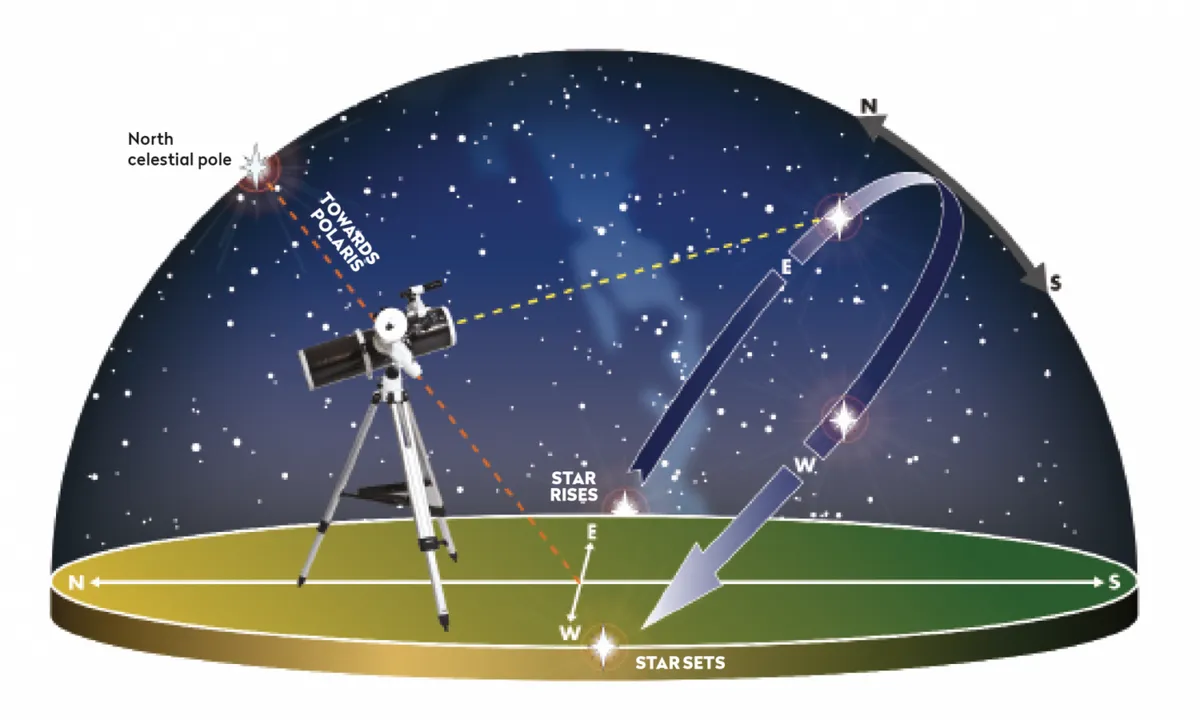
Regardless of the target, every deep-sky imaging session should start with polar aligning. By finding Polaris and positioning it in your mount’s polarscope, you calibrate the mount so that it can track the stars accurately.
For more on this, read our guide on how to find the North Star.
You should then perform a three-star alignment with the mount – this helps its Go-To function find targets reliably.
It also possible to safely polar align during the day.
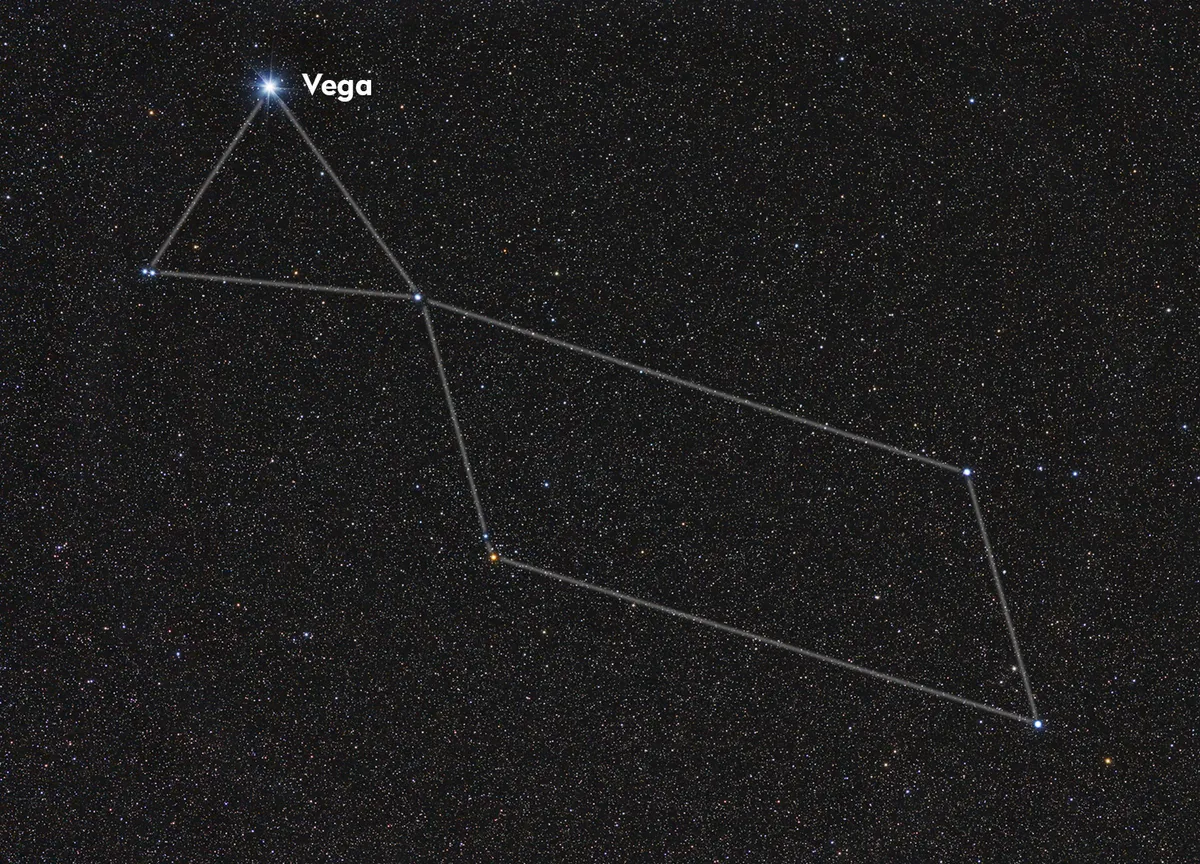
Whether imaging galaxies or nebulae, achieving sharp focus is crucial. With either target it’s the same method: focus on a bright star, such as Vega (Alpha (α) Lyrae), before finding your target.
After locating the galaxy, try out different ISO levels and exposures. As the Andromeda Galaxy has a bright galactic core, select an exposure time that doesn’t ‘blow out’ the centre of your image.
If the core is overexposed, you’ll lose detail from the inner dust lanes when it comes to processing the image. Try 90 minutes of 1-minute exposures at ISO 800.
You can combine shorter and longer exposures, however, and his can be done via the stacking process in Photoshop or DeepSkyStacker.
In DSS, you can separate different exposure lengths into ‘groups’ and stack them. In Photoshop, you stack the frames for each exposure separately to end up with a TIFF file for each.
After processing the TIFFs separately, you layer one image on top of the other and blend with the ‘Hide All’ and ‘Reveal All’ masks.
For more info, read our guide on how to photograph the Andromeda Galaxy.
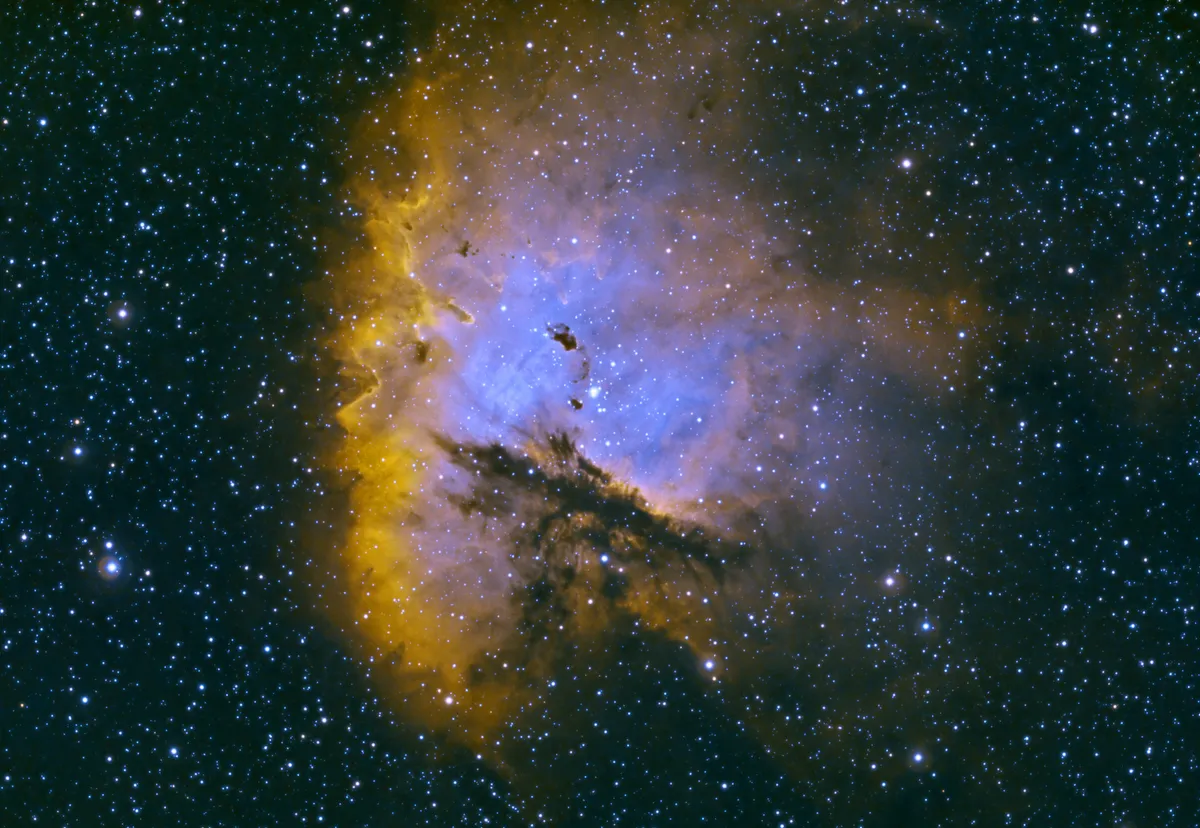
How to photograph a nebula
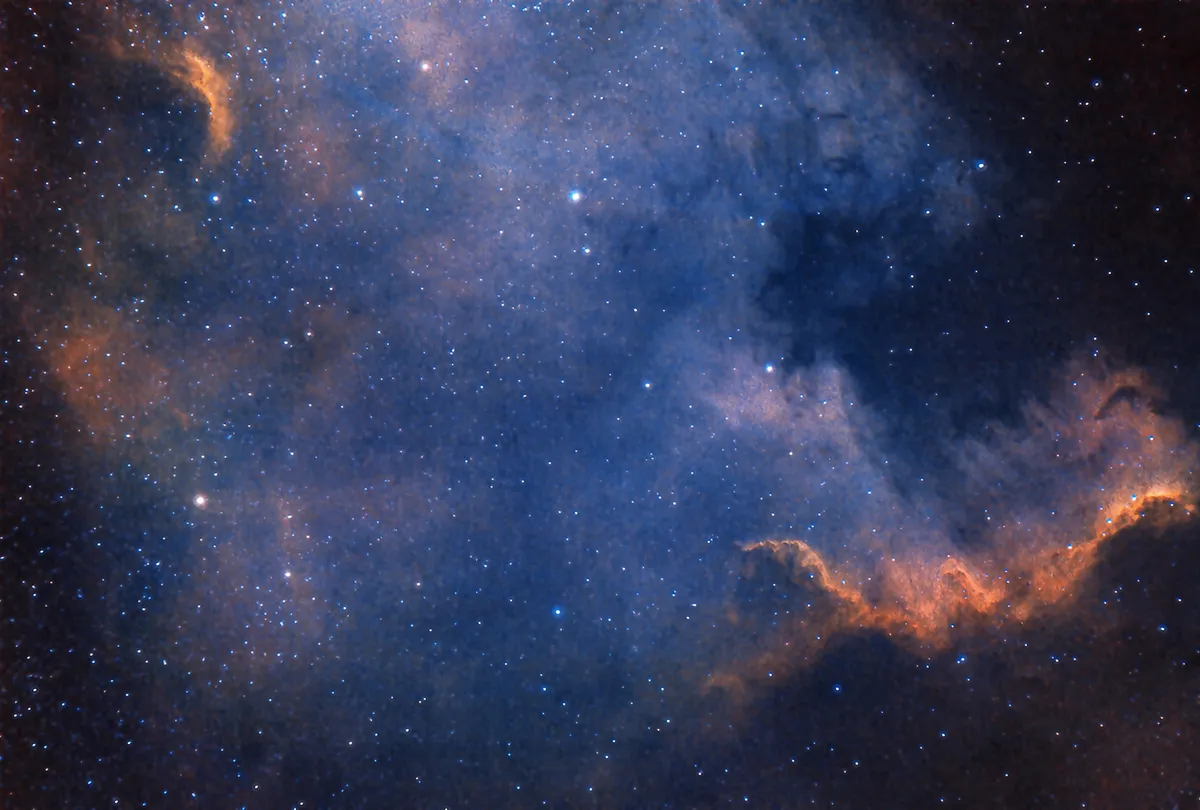
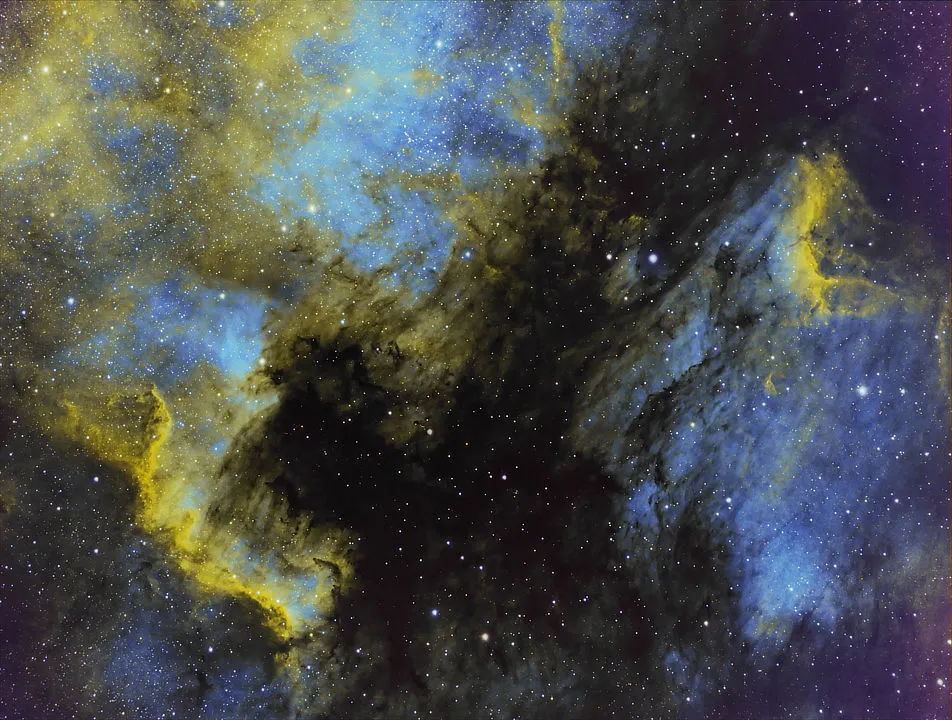
The North America Nebula is another big, bright deep-sky object that’s ideal for deep-sky astrophotography beginners.
A part of it, known as the Cygnus Wall (see above), shows up even in 10-20 second exposures with a high ISO setting, helping you know when you’ve found the target and how to position it for the rest of the imaging run.
To capture the image above, we used a modified DSLR with a clip-in Hydrogen-alpha (Ha) and Oxygen (OIII) narrowband filter added for more detail.
If you’re shooting this object with an unmodified DSLR, the final image would look mostly red, because the camera would not be sensitive to subtle OIII emissions from the nebulae.
Instead, it would just capture some of the Hydrogen. The OIII data we’ve gathered from the filter is blue in our final image above.
We also used guiding for this astrophoto, which allowed us to run four-minute exposures. Without guiding, we would have been limited to about two minutes before the mount started to drift and blur the detail.
In the end, we shot a total of two hours of Ha and two hours of OIII for the final image.
The way we processed the North America Nebula image was different to Andromeda, because of the narrowband filters.
We stacked and processed each filter separately in DSS, and set the resulting TIFF files to monochrome in Photoshop.
We then performed a histogram stretch on each to get as much detail as possible, before combining our Ha data with the Red colour channel and the OIII data with the Blue colour channel.
The Green channel was then set to 50% Ha and 50% OIII. The result is this colour image that benefits from all the extra details our narrowband filters have captured.
For another nebula challenge, read our guide on how to photograph the Orion Nebula.
Have you captured a beautiful deep-sky image? We'd love to see it. Be sure to send us your images or share them with us via Facebook, Twitter and Instagram.
Charlotte Daniels is an amateur astronomer, astrophotographer and space journalist.
This guide originally appeared in the July 2021 issue of BBC Sky at Night Magazine.


